pantry doors ideas

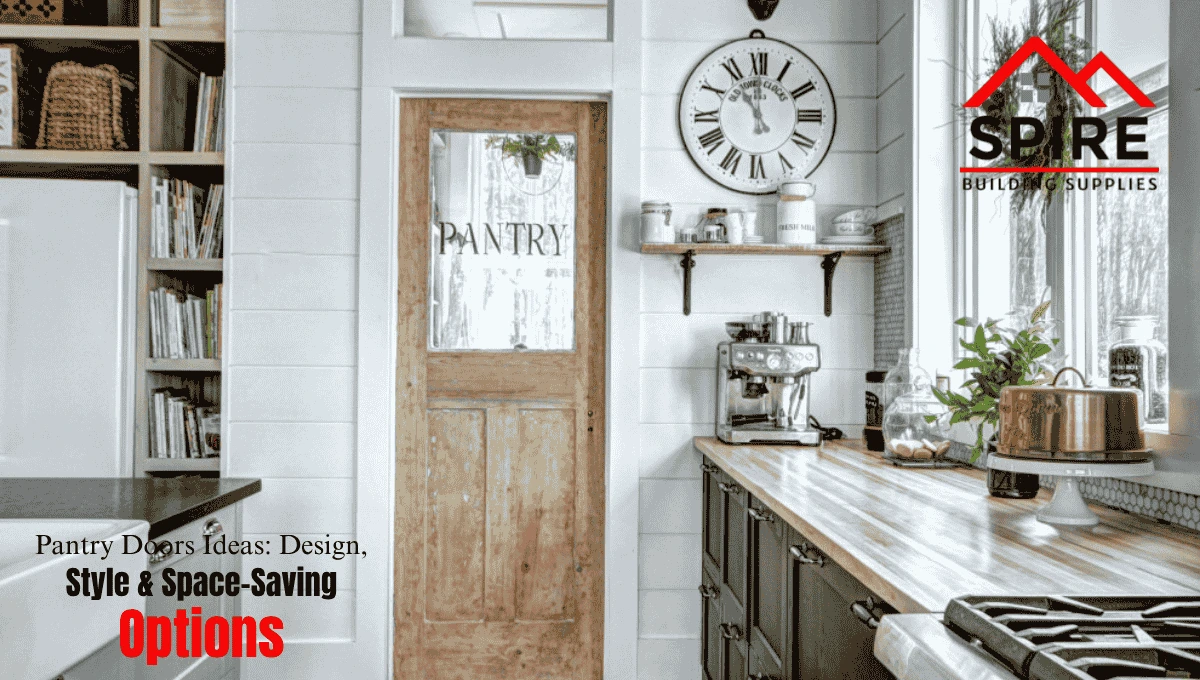
Pantry Doors Ideas: Design, Style & Space-Saving Options

Choosing the right pantry door often gets overlooked during kitchen planning but it can make a surprising difference in both function and style. The best pantry doors ideas don’t just look good; they improve access, save space, and complement your kitchen layout. A poorly chosen door, on the other hand, can block movement, clash with your design, or simply feel inconvenient over time.

This guide breaks down practical, real-world pantry door options, helping homeowners and builders understand what works, what doesn’t, and how to choose the right solution for different kitchen setups.

What You Need to Know About Pantry Doors

A pantry door is more than just an entry point—it affects:

  • Kitchen flow (how easily you move around)
  • Storage accessibility
  • Visual appeal of the space
  • Light and openness

Key Factors That Matter

Before exploring styles, it’s important to understand:

  • Available space (tight kitchens vs open layouts)
  • Pantry size (walk-in vs cabinet-style)
  • Usage frequency (daily vs occasional)
  • Design consistency (matching cabinets, flooring, and overall theme)

Explore options here:
Pantry doors

Popular Pantry Door Designs

Let’s look at pantry door designs that actually work in real homes—not just in catalogs.

1. Sliding Pantry Door (Space-Saving Favorite)

A sliding pantry door is one of the most practical solutions for smaller kitchens.

Why it works:

  • No swing clearance needed
  • Ideal for tight layouts
  • Easy to operate

Where it fits best:

  • Apartments
  • Compact kitchens
  • Modern minimalist homes

Real insight: Sliding doors reduce obstruction but require wall space for the track.

2. Hinged Swing Doors (Traditional Choice)

These are standard kitchen pantry doors with inward or outward opening.

Pros:

  • Simple installation
  • Works with most layouts
  • Cost-effective

Cons:

  • Requires clearance space
  • Can block movement in tight areas

3. Glass Pantry Doors

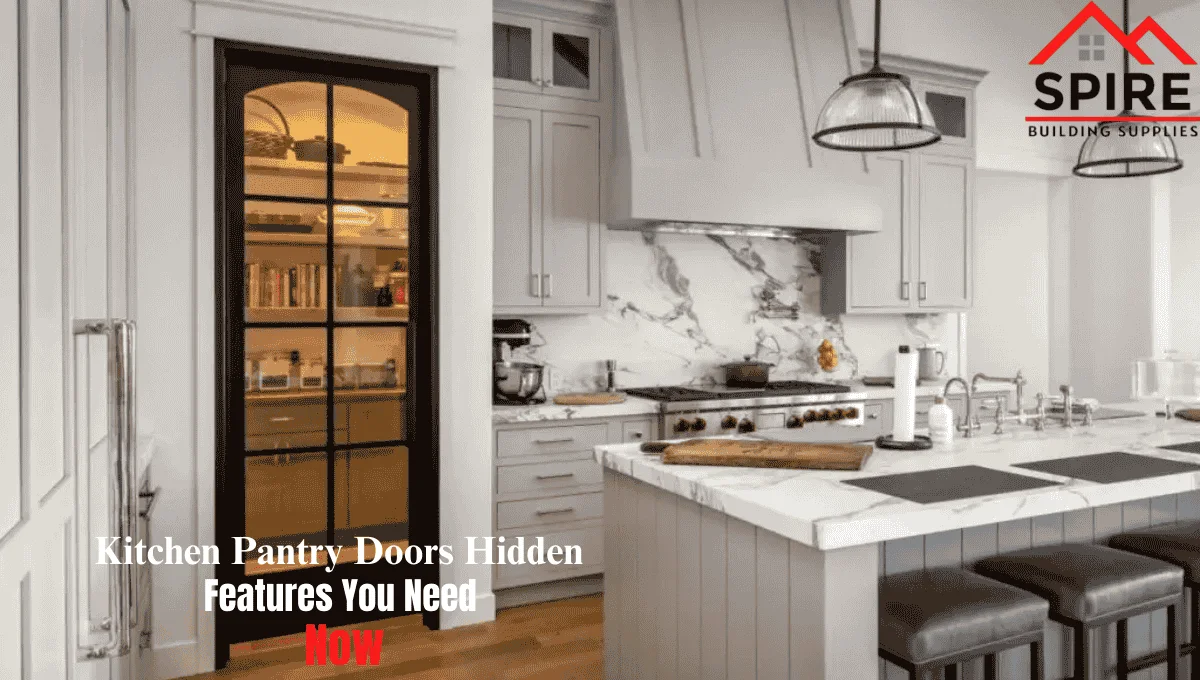
Glass panels add a decorative element while keeping the space visually open.

Benefits:

  • Makes the kitchen feel larger
  • Adds natural light
  • Stylish for modern interiors

Consideration:

  • Requires organized pantry (everything is visible)

4. Frosted Glass Doors

A practical compromise between style and privacy.

  • Light passes through
  • Hides clutter
  • Works well in contemporary kitchens

5. Barn-Style Pantry Doors

A trending option, especially in farmhouse or rustic kitchens.

  • Mounted on a sliding track
  • Adds character
  • Space-saving like sliding doors

6. Pocket Doors

These doors slide into the wall, completely disappearing when open.

Advantages:

  • Maximum space efficiency
  • Clean, seamless look

Limitation:

  • Requires wall cavity installation (best during construction)

7. Double Pantry Doors

Perfect for larger pantry openings.

  • Easier access
  • Balanced appearance
  • Ideal for walk-in pantries

Benefits of Choosing the Right Pantry Door

  1. Better Space Utilization

The right door can free up valuable kitchen space.

  1. Improved Workflow

Easy access to pantry items saves time during cooking and organizing.

  1. Enhanced Aesthetics

A well-chosen door ties the entire kitchen design together.

  1. Increased Property Appeal

Thoughtful design choices can improve resale value.

Limitations to Consider

No option is perfect. Each pantry door design comes with trade-offs:

  • Sliding doors need wall space
  • Hinged doors need clearance
  • Glass doors require maintenance
  • Pocket doors require structural planning

Understanding these limitations helps avoid costly mistakes.

How to Choose the Right Pantry Door

When comparing different kitchen pantry doors, focus on what actually matters in daily use.

  1. Measure Your Space Carefully
  • Check door swing clearance
  • Consider nearby cabinets and appliances
  1. Match Your Kitchen Style
  • Modern → glass or sliding doors
  • Traditional → paneled hinged doors
  • Rustic → barn-style doors
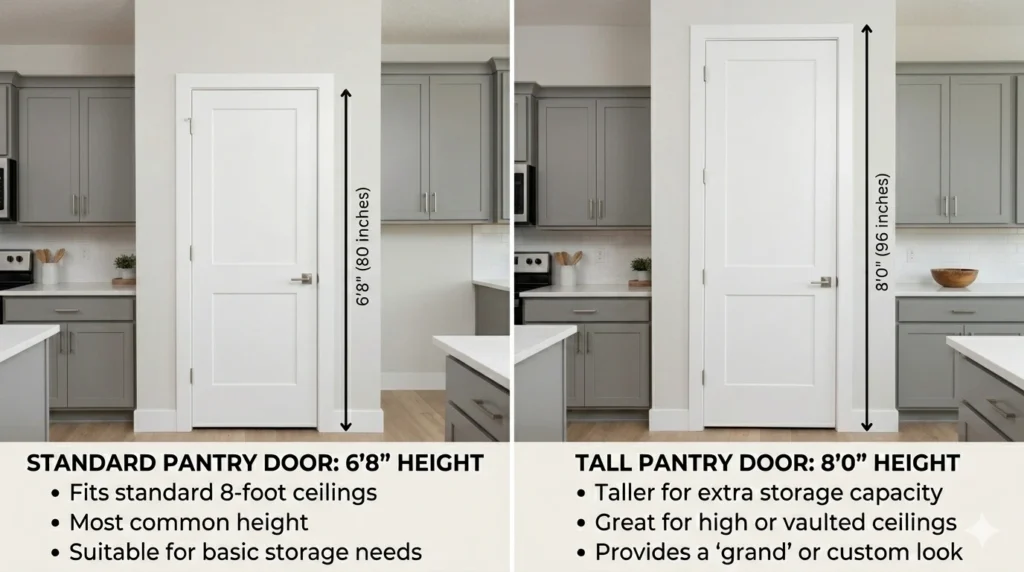
  1. Consider Door Height Options

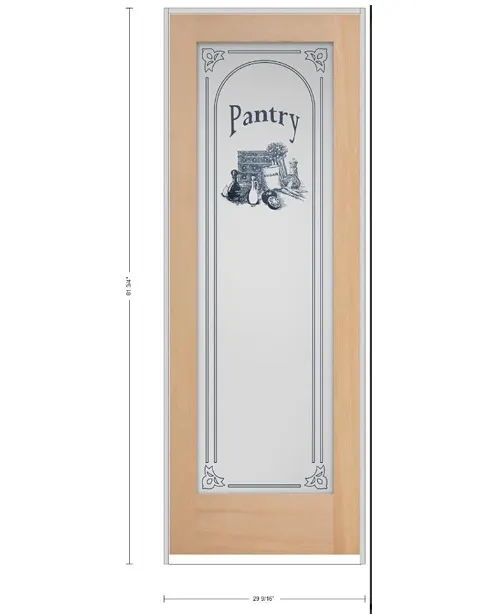
Standard heights matter for both function and aesthetics:

Taller doors create a more open, premium look.

  1. Think About Daily Usage
  • Frequent access → easy-open designs
  • Less frequent use → style-focused options
  1. Installation Complexity

Some doors (like pocket or barn doors) require more planning compared to standard hinged doors.

Common Mistakes to Avoid

  1. Ignoring Space Constraints

Choosing a swinging door in a tight kitchen can disrupt movement.

  1. Prioritizing Style Over Function

A stylish door that’s hard to use becomes frustrating quickly.

  1. Overlooking Storage Visibility

Glass doors look great—but only if your pantry stays organized.

  1. Not Planning Installation Early

Some door types need structural preparation.

  1. Choosing the Wrong Size

Incorrect height or width can affect both usability and appearance.

Expert Tips That Make a Difference

Based on real-world projects:

  • Choose sliding or pocket doors for small kitchens
  • Use frosted glass if you want light without clutter visibility
  • Match door finish with cabinets for a cohesive look
  • Test door movement before finalizing (especially in tight spaces)
  • Consider long-term use, not just initial appearance

Real-World Examples

  1. Small Kitchen Upgrade

A homeowner replaced a swinging door with a sliding pantry door—freeing up space and improving movement around the kitchen island.

  1. New Construction Project

A builder installed 8-foot pantry doors in an open kitchen, creating a more spacious and premium feel.

  1. Modern Renovation

Frosted glass doors were used to add light while hiding pantry clutter—balancing function and aesthetics.

  1. Full Kitchen Remodel

A barn-style door added character to a farmhouse kitchen while saving space.

Pantry Doors vs Other Door Installations

If you’re planning multiple door upgrades, it’s helpful to understand installation basics.

Learn more here:
patio door installation

While pantry doors are simpler, proper alignment and fitting still matter for long-term performance.

What Homeowners Say

Switching to a sliding pantry door made our small kitchen feel much bigger.

We chose frosted glass, and it’s the perfect balance between style and practicality.

Upgrading to taller pantry doors changed the whole look of our kitchen.

FAQs

  1. What is the best type of pantry door for small kitchens?

Sliding or pocket doors work best because they don’t require swing space.

  1. Are glass pantry doors practical?

Yes, but they require a well-organized pantry since contents are visible.

  1. What size pantry door should I choose?

Standard sizes are 6’8″ and 8’0″, depending on ceiling height and design preference.

  1. Do pantry doors affect kitchen design?

Absolutely. They play a big role in both aesthetics and functionality.

  1. Can I install a pantry door myself?

Basic hinged doors are DIY-friendly, but sliding or pocket doors may require professional installation.

Final Thoughts

The best pantry doors ideas come down to balancing space, style, and everyday usability. A good choice improves how your kitchen looks and works, while a poor one can create daily inconvenience.

Instead of focusing only on design trends, think about how you actually use your kitchen. The right pantry door should feel natural, easy to use, and visually consistent with your space.

About the Author

Editorial Team – Spire Building Supplies
The team at Spire Building Supplies brings practical, hands-on experience in residential construction and home improvement. Their insights are based on real-world applications, helping homeowners and builders make smart, functional design decisions that stand the test of time.

shaker style interior doors

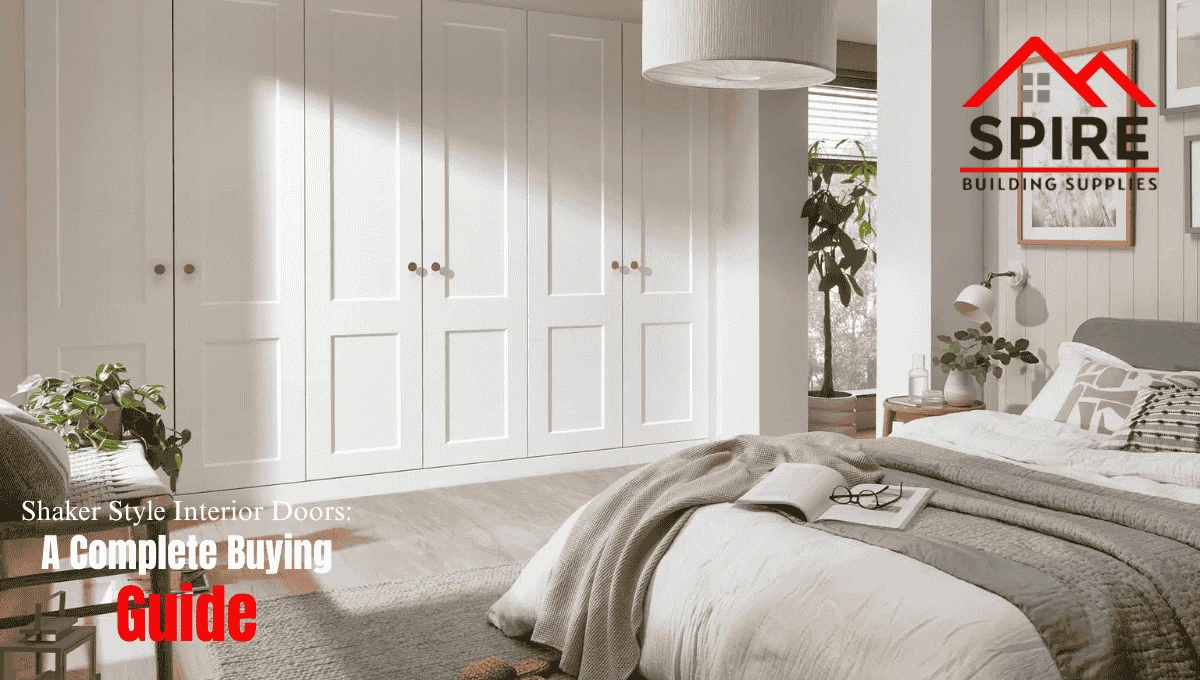
Shaker Style Interior Doors: A Complete Buying Guide

Few interior design choices hold up across as many home styles as shaker style interior doors. Whether you’re finishing a craftsman bungalow, a modern farmhouse, or a clean contemporary build, shaker doors fit without forcing the aesthetic. But that versatility also means they’re easy to get wrong the wrong profile, the wrong material, or the wrong finish can make a thoughtfully designed space feel disconnected. This guide will help you understand exactly what makes a shaker door work, where the real differences between options lie, and how to make a decision you won’t second-guess six months after installation.

What Makes a Door “Shaker Style”?

The shaker style comes from 18th-century Shaker furniture-making a tradition built on functional simplicity, clean lines, and quality craftsmanship. Applied to doors, the defining feature is a flat recessed center panel framed by clean, square-edged rails and stiles. No decorative carving.

What you get is a door with visual structure the frame-and-panel look without the fussiness of traditional raised panel designs. That restraint is exactly why shaker doors interior have remained popular across so many decades and so many design movements.

The number of panels matters too. A single large recessed panel reads more modern and open. Two stacked panels introduce a bit more visual rhythm and suit transitional or traditional spaces better. Understanding this difference before you shop saves a lot of time.

Shaker Doors vs. Other Interior Door Styles

Before committing, it’s worth knowing how shaker doors compare to what else is available.

Flat panel (slab) doors — Completely flush with no panel detail. More minimalist than shaker. Work well in ultra-modern or Scandinavian-influenced interiors but can feel stark in warmer, more layered spaces.

Raised panel doors — Traditional carved profiles with decorative detailing. The opposite of shaker’s restraint. Common in colonial and Victorian-era homes, less suited to contemporary builds.

French doors — Glass-paned doors. Different functional category, though shaker-style frames around glass inserts are available.

Shaker doors sit in the middle — they have enough detail to feel intentional without the formality of traditional raised panel designs. That’s the reason they’ve become the dominant interior door style in new construction and renovation alike.

Panel Count: One Panel vs. Two Panel

This is one of the most important and most overlooked decisions in the buying process.

Single Panel Shaker Doors

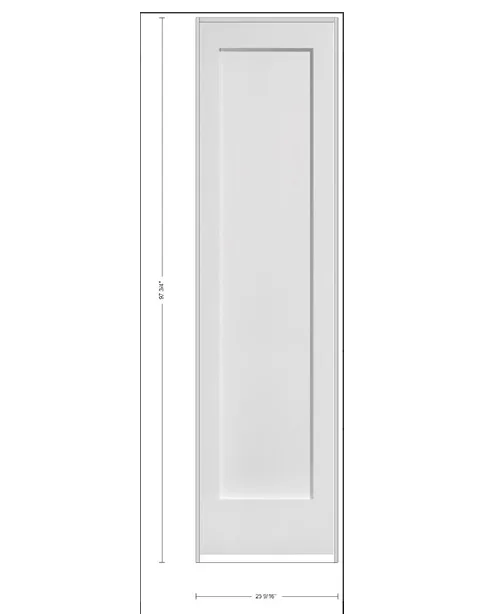
A 1 Panel Shaker 6’8″ Height Interior Door features one large recessed panel that spans most of the door face. The result is clean, open, and slightly more contemporary in feel. It works well in:

  • Modern and transitional homes
  • Spaces where you want a lighter, more open visual
  • Rooms with minimal trim profiles

1 Panel Shaker 8'0" Height

Two Panel Shaker Doors

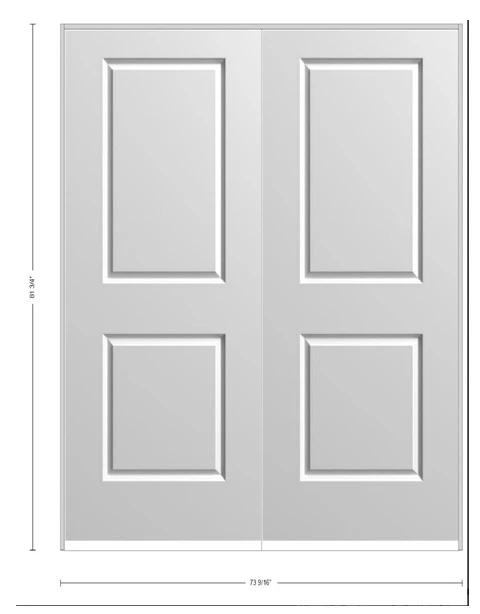
A two panel shaker door divides the face into two stacked panels, creating slightly more visual weight and structure. This suits:

  • Craftsman and farmhouse interiors
  • Spaces with more detailed trim and molding
  • Transitional homes where some traditional influence is present

The difference seems subtle in photos, but in person across a hallway of six or eight doors — the panel count shapes the entire rhythm of the space.

Two Panel Shaker Doors

Material Options and What They Mean in Practice

Hollow Core vs. Solid Core

Most shaker interior doors are available in both configurations. Hollow core doors are lighter and more affordable — the right choice for closets, laundry rooms, and secondary bedrooms where acoustic performance isn’t a priority. Solid core doors are heavier, dampen sound more effectively, and feel more substantial. They’re worth the cost in primary bedrooms, home offices, and bathrooms.

MDF vs. Wood Veneer Facing

MDF-faced shaker doors are dimensionally stable — they resist warping and paint exceptionally well. For painted finishes, MDF is often the better choice. Wood veneer doors suit stained or natural finishes and bring genuine warmth to the grain.

Primed vs. Unfinished

Many shaker doors come factory-primed and ready for paint. This saves prep time and gives you a consistent base. Unfinished doors offer more flexibility for stains and custom finishes but require more on-site work.

Shaker Doors and Cabinets: Keeping the Interior Cohesive

One of the most effective design moves in modern interiors is carrying the shaker profile from doors through to shaker cabinet doors creating visual continuity between the cabinetry and the door frames throughout a space.

In a kitchen, for example, if your cabinet doors use a flat-recessed panel shaker profile, matching that same profile on the adjacent pantry door or utility door reads as intentional design rather than coincidence. It’s a detail that interior designers use consistently and one that’s easy to apply yourself if you know what to look for.

The key is matching the rail and stile width. Standard shaker cabinet doors often use slightly narrower frames than full interior doors, but the proportions should be in harmony. When in doubt, bring a sample door panel to the cabinet showroom or bring a cabinet door sample when you’re selecting your interior shaker door.

Pre-hung vs. Slab: Which Do You Need?

This is a basic but important distinction that catches buyers off guard.

Slab doors are just the door panel — no frame, no hinges, no hardware prepped. You need an existing door frame to hang them into. If you’re replacing existing doors that already have frames in good condition, slab is fine.

Pre-hung doors come as a complete unit: door, frame, hinges, and sometimes the door stop. If you’re framing a new opening, finishing a room addition, or the existing frame is damaged, pre-hung is the right choice.

Ordering the wrong type means extra labor cost or a trip back to the supplier. Measure your existing frame (or new rough opening) carefully before deciding.

For standard 6’8″ height openings, the 1 Panel Shaker 6’8″ Height 80 Inch Interior Door is a well-suited option that fits the most common residential rough openings without custom sizing.

What to Think About Before You Buy

Door Swing Direction

Every interior door is either left-hand or right-hand swing, depending on which side the hinges are on and the direction the door opens. Stand in the doorway facing the room — if the hinges are on your left, it’s a left-hand door. Get this wrong on a pre-hung unit and you’ve got a return on your hands.

Width and Height

Standard interior doors are 80″ tall and range from 24″ to 36″ wide. Bathrooms typically use 24″–28″. Bedrooms use 28″–32″. Main passage doors and primary bedrooms benefit from 32″–36″. If you’re building to code with accessibility in mind, 32″ clear opening is the minimum for wheelchair access.

Thickness

Most residential interior doors are 1-3/8″ thick. Some solid core and exterior-grade doors run 1-3/4″. Make sure your hardware (locksets, hinges, door stops) is sized to match.

Finish Coordination

Shaker doors take paint beautifully. The most popular choices are crisp white, warm off-white, and charcoal/black for an accent door. If you’re staining, test on a sample piece first — MDF doesn’t take stain the way wood veneer does.

Coordinating your floor and door finish is a good habit. If you’re working on flooring at the same time, the best vinyl plank flooring guide covers how to think about undertones and finish coordination between floors and interior elements.

Common Mistakes to Avoid

  1. Mixing Panel Styles Across a Floor

Using a single-panel shaker in the hallway, a two-panel in the bedroom, and a flat slab on the bathroom creates visual noise. Pick one profile and use it consistently throughout a level. Small variations in profile are much more noticeable in person than in product photos.

  1. Ordering Before Measuring the Rough Opening

Don’t trust your memory or the previous door’s dimensions — especially in older homes where openings were sometimes built out of square. Measure the rough opening height and width, not the old door itself.

  1. Skipping the Primer on MDF Doors

MDF absorbs paint differently than wood. If you apply a finish coat directly to bare or lightly sanded MDF, you’ll get blotchy, uneven results. Two coats of quality primer before any finish paint is not optional — it’s the only way to get a clean, professional result.

  1. Ignoring the Frame and Casing

The door is only part of what you see. Thin, poorly installed casing makes even a great door look cheap. Make sure your casing profile complements the shaker detail — a simple flat or slightly stepped profile works best. Avoid overly ornate casing around a shaker door.

  1. Choosing Hardware That Conflicts With the Style

Ornate Victorian lever sets on a shaker door look out of place. Shaker-style doors pair best with clean, simple hardware — square or rounded lever sets, minimalist backplates, and matte finishes (black, satin nickel, or brushed brass). The hardware is the last thing a person touches on their way in and out of a room. Don’t let it undercut the door selection.

  1. Buying Pre-Hung When You Only Needed a Slab

Pre-hung units are more expensive and harder to transport. If your existing frame is square and in good shape, a slab door is the smarter buy. Check the frame with a level before you order.

Expert Tips From the Field

Paint the door before hanging it. Laying the door flat and painting it before installation gives you access to all edges and eliminates the masking and cleanup required when painting in place. It also lets you get the edges — which are often missed — properly coated.

Use three hinges on any door taller than 80″. Standard 6’8″ doors work on two hinges. Anything taller benefits from a third hinge in the middle to prevent racking and long-term sagging.

Don’t skip the undercut. Interior doors should be undercut 3/4″ to 1″ from the finished floor to allow air return through the HVAC system. This is code in many jurisdictions and practically important in any conditioned space. Ask your supplier or carpenter to confirm the right clearance for your floor type.

Order 10% extra if you’re cutting to size. Slab doors can typically be trimmed up to 3/4″ per side. If you’re fitting a non-standard opening, having a spare door gives you margin for error.

Sample the finish first. Order a primed door sample and paint or stain it exactly as you plan to finish the full set. Live with it in the space for 48 hours under different lighting conditions before committing.

Real-World Use Cases

Full Home Renovation, Transitional Style: A homeowner replacing 1990s raised panel doors throughout a two-storey home chose a two panel shaker profile in primed MDF, painted Sherwin-Williams Alabaster. The updated doors immediately modernized the interior without requiring any trim replacement. Total cost was significantly less than a custom millwork solution, and the result was cohesive across all 11 doors.

New Build, Modern Farmhouse: A builder specifying doors for a custom home used single-panel shaker doors throughout the main floor and secondary bedrooms, with the same profile in a taller format for the primary suite. The consistent profile across 14 openings gave the interior a deliberate, designed feeling that clients frequently comment on.

Rental Property Upgrade: An investor refreshing a duplex replaced original hollow-core flat slabs with primed single-panel shaker doors in standard sizing. The change required no framing work, cost less than expected, and noticeably elevated the perceived quality of the units during showings.

People Also Ask

What makes a door “shaker style”? A shaker door has a flat recessed center panel surrounded by clean, square-edged rails and stiles. No ornate molding or curves — just structured simplicity. That’s what defines the style.

Are shaker interior doors more expensive than flat slab doors? Generally, yes — slightly. The panel construction adds manufacturing complexity. But the price gap between a basic shaker door and a flat slab is modest, and the visual return is significant in most interior contexts.

Can shaker doors be used in a modern home? Yes. Single-panel shaker doors work very well in modern and minimalist interiors. The key is choosing the right panel count (one panel reads cleaner and more contemporary) and keeping hardware minimal.

What’s the best finish for shaker interior doors? Paint is the most popular choice, and MDF-faced shaker doors take paint exceptionally well with proper priming. Crisp white and warm off-white tones are the most versatile. For stained finishes, choose a wood veneer door instead of MDF.

Should interior doors match throughout a home? Generally, yes — especially on the same floor. Consistent door style, finish, and hardware throughout a level creates a cohesive interior. It’s fine to vary between floors if the design intent changes, but mixing profiles within the same visual field creates noise.

What Customers Have Said

We replaced every door in our main floor with single-panel shakers — primed, painted white. The transformation was bigger than I expected for what felt like a simple change. Everything just looks more intentional now. — M. Lindqvist, Homeowner, BC

As a contractor, I’ve been spec’ing shaker doors on most of my builds for the past four years. Clients love them, they install cleanly, and the style doesn’t date quickly. That’s what matters to me. — T. Okonkwo, Residential Contractor, Alberta

I was worried about matching my kitchen cabinets with the door profile — but once I found a shaker door with the same rail width as my uppers, it looked like it was always meant to be that way. — R. Sato, Homeowner, Ontario

Final Thoughts

Shaker style interior doors earn their popularity honestly — they’re versatile, timeless, and easy to integrate into almost any interior. But getting them right means thinking through panel count, material, swing direction, and finish before you order. The decisions aren’t complicated, but skipping them is where most buyers run into problems.

Take the time to measure carefully, sample your finish, and pick a profile you’ll use consistently. Done right, shaker doors are one of the simplest ways to give an interior a cohesive, considered look — and one of the most cost-effective upgrades available in a renovation or new build.

About The Author

Written by the Spire Building Supplies Editorial Team — building materials specialists and residential design advisors with hands-on experience across residential construction, renovation, and interior finishing. Our content is written to help you make better decisions, not to steer you toward a particular product.

Best Building Material Supplier in Texas

How to Avoid Common Mistakes When Choosing the Best Building Material Supplier

Introduction: The Costly Mistake Most Homeowners Realize Too Late

Choosing the best building material supplier can make or break your entire project — yet most homeowners don’t realize this until problems start showing. One homeowner shared, “Everything looked perfect at first… but within months, the flooring peeled, the doors warped, and the windows started leaking.”

The issue wasn’t design or installation — it was the wrong supplier.

This is exactly why experienced builders and homeowners prefer working with trusted suppliers like Spire Building Supplies, where quality, consistency, and expert guidance come first. In this guide, you’ll learn how to avoid costly mistakes and choose materials that actually last.

What Is the Best Building Material Supplier? (Quick Definition)

A best building material supplier is a reliable provider of home building & renovation supplies that offers high-quality materials like windows, doors, floorings, trims, cabinets, and quality accessories — backed by verified specifications, warranties, and expert guidance for long-term performance.

Why Your Supplier Matters More Than the Material

Here’s a reality most people ignore:

The same flooring or door can perform completely differently depending on the supplier.

A trusted supplier ensures:

  • Accurate material thickness & composition
  • Proper storage and handling
  • Consistent quality standards
  • Reliable after-sales support

Suppliers like Spire Building Supplies focus on consistency across all categories — which is why professionals avoid switching vendors mid-project.

Common Mistakes (And How to Avoid Them)

1. Choosing Based Only on Price

Cheap materials often mean:

  • Thinner floorings
  • Weak door cores
  • Poor window insulation

✔ Expert Tip: Always compare cost vs lifespan, not just upfront price.

2. Ignoring Technical Specifications

Most buyers focus on looks — not performance.

Key specs to check:

  • Flooring wear layer (12–20 mil recommended)
  • Thickness (laminate: 8–12 mm, vinyl: 4–6 mm)
  • Door core (solid vs hollow)
  • Window glazing (double-glazed preferred)

3. Buying from Multiple Suppliers

This leads to:

  • Color mismatches
  • Size inconsistencies
  • Uneven quality

✔ Real Insight: Contractors prefer one trusted supplier for full-home consistency.

4. Ignoring Durability & Environment

Not all materials suit every condition.

Examples:

  • MDF cabinets fail in moisture-prone kitchens
  • Low-grade vinyl scratches easily
  • Cheap trims crack over time

5. Skipping Warranty & Support

If something fails, you’re stuck.

Always ask:

  • Warranty coverage
  • Replacement policy
  • Installation guidance

Supplier Comparison: Local Dealer vs Professional Supplier

Feature Local Dealer Best Building Material Supplier
Product Range Limited Complete (Windows, Doors, Floorings, etc.)
Quality Inconsistent Standardized
Warranty Rare Available
Guidance Minimal Expert-level
Long-Term Value Low High

This is why many homeowners shift to trusted providers like Spire Building Supplies after bad experiences.

Material Deep Dive (What Experts Actually Check)

Flooring

  • Thickness: 8–12mm (laminate), 4–6mm (vinyl)
  • Wear Layer: 12–20 mil
  • Lifespan: 10–20 years

✔ Higher wear layer = better scratch resistance

Doors

  • Solid core: Durable + soundproof
  • Engineered wood: Balanced cost & performance
  • Iron doors: Maximum security + premium look

Windows

  • Double-glazed: Energy efficient
  • uPVC vs Aluminum:
    • uPVC = better insulation
    • Aluminum = stronger, modern design

Cabinets

  • Plywood: Best for durability & moisture resistance
  • MDF: Budget-friendly but less durable

Trims & Quality Accessories

  • High-density trims last longer
  • Stainless steel accessories resist rust and wear

Cost vs Value: What Smart Buyers Understand

Factor Cheap Materials Quality Supplier Materials
Upfront Cost Low Moderate
Maintenance High Low
Lifespan Short Long
ROI Poor Strong

Spending 15–20% more upfront can save double the cost in repairs later.

What Sets a Trusted Supplier Apart

From real project experience:

  • The biggest failures come from inconsistent quality, not installation
  • Cheap accessories (hinges, handles) fail faster than major components
  • A reliable supplier recommends based on:
    • Climate
    • Usage
    • Budget

Suppliers like Spire Building Supplies stand out because they don’t just sell — they guide customers toward long-term solutions.

Practical Checklist Before You Buy

Before choosing a supplier, ask:

  • Do they offer full-category materials (windows, doors, floorings, etc.)?
  • Are specifications clearly defined (thickness, wear layer)?
  • Do they provide warranties?
  • Can they guide based on your project needs?
  • Do they have real customer feedback?

Customer Testimonials

Daniel Harris (Contractor)
I’ve worked with multiple suppliers, but Spire Building Supplies stands out for consistency. I know exactly what quality I’m getting every time.

Rebecca Moore (Homeowner)
Spire helped me choose the right flooring and cabinets. It saved me from making a costly mistake.

People Also Ask (PAA)

1. How do I choose the best building material supplier?
Check quality, specifications, warranty, and expert guidance.

2. Why is a good supplier important?
It ensures durability, safety, and long-term cost savings.

3. What materials should a supplier offer?
Windows, doors, floorings, trims, cabinets, and quality accessories.

4. Are premium materials worth it?
Yes, they last longer and reduce maintenance costs.

5. What should I check before buying?
Thickness, wear layer, durability, and supplier reputation.

Conclusion: Build Once, Build Right

Choosing the best building material supplier isn’t just about buying materials — it’s about making a smart, long-term investment.

The right supplier ensures:
✔ Better durability
✔ Consistent quality
✔ Lower maintenance
✔ Higher home value

For homeowners and professionals looking for reliability and expert guidance, Spire Building Supplies offers trusted home building & renovation supplies designed to deliver lasting performance.

Author Bio

Spire Building Supplies Team
With years of experience in home building & renovation supplies, Spire Building Supplies provides high-quality windows, doors, floorings, trims, cabinets, and accessories. Their focus is on helping customers make informed decisions that ensure durability, style, and long-term value.

best sliding windows for home

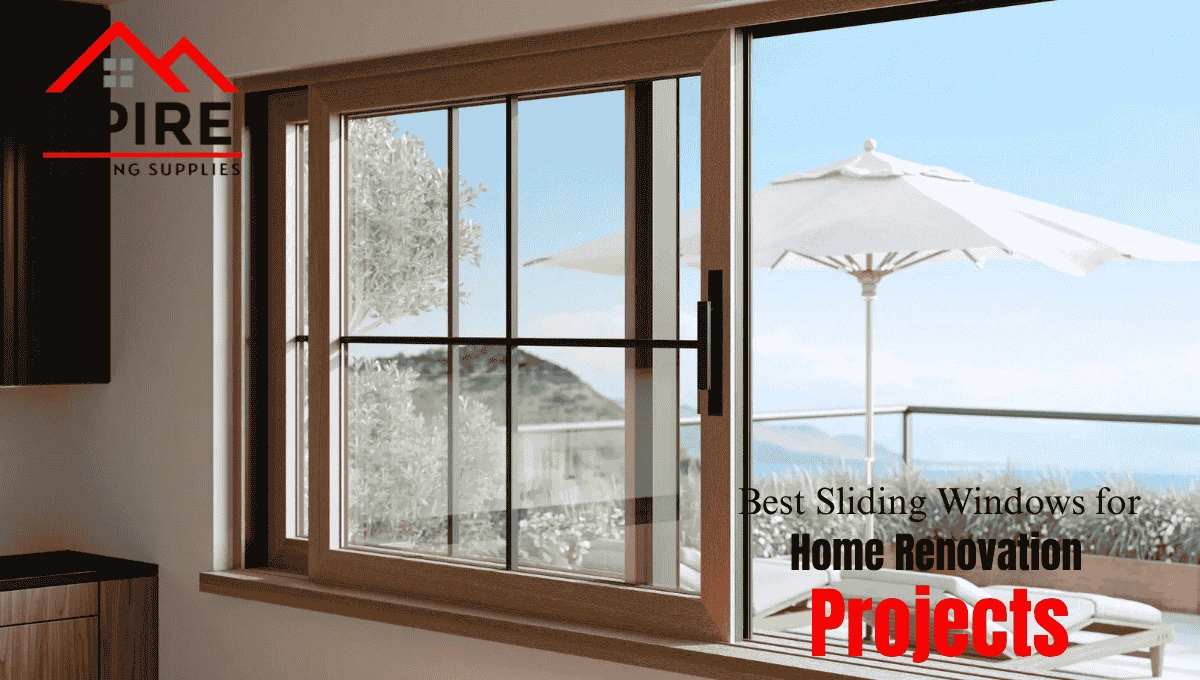
Best Sliding Windows for Home Renovation Projects

.Choosing the best sliding windows for home renovation projects is less about chasing a trend and more about getting the right mix of ventilation, durability, energy performance, and day-to-day usability. Sliding windows are popular because they’re simple, clean-looking, and practical in rooms where swinging or lifting a sash isn’t ideal. But not every slider is a good fit for every renovation. The wrong size, frame material, glass package, or installation method can lead to problems that are expensive to fix later.

This guide breaks down what homeowners and builders should know before selecting sliding windows for a remodel. You’ll learn how they work, where they perform best, what to compare before buying, common mistakes to avoid, and what tends to hold up well in real homes—not just on a showroom page.

What Are Sliding Windows?

A sliding window opens horizontally along a track instead of moving up and down like a single hung window. One sash usually slides while the other remains fixed, although some models allow both sides to move.

That simple design makes them especially useful in places where:

  • You want easy ventilation
  • The opening is wider than it is tall
  • You need a window that’s easy to use over sinks, counters, or furniture
  • You want a clean, modern profile with lots of glass

If you’re still comparing styles, browsing actual Sliding windows can help you see the difference in size, frame style, and layout before you make a renovation decision.

Why Sliding Windows Work Well in Renovation Projects

Renovation projects come with constraints: existing wall openings, trim conditions, sightlines, furniture placement, and budget. Sliding windows tend to fit well into those realities.

Main reasons people choose sliding windows

  • Easy operation
    They glide side to side and are usually simple to open.
  • Great for wide openings
    They often make more sense than forcing a tall window style into a broad space.
  • Good natural light
    Their design often allows for large glass areas.
  • Ventilation where you need it
    Bedrooms, kitchens, and living areas often benefit most.
  • No outward swing
    Useful near patios, walkways, decks, and landscaping.
  • Low maintenance in the right material
    Especially true with vinyl options.

For many renovation projects, that combination of practicality and visual simplicity is exactly what makes sliders attractive.

What Makes a Sliding Window “Good” for a Renovation?

The best option isn’t always the most expensive one. It’s the one that fits the opening, the room, and the way the space is actually used.

A good renovation window should be:

  • Sized correctly for the opening
  • Built with durable hardware
  • Easy to operate
  • Properly weather-sealed
  • Efficient enough for the room’s sun exposure and climate
  • Compatible with either replacement or new-construction installation needs

That last point matters more than many homeowners realize.

Replacement vs. New Construction: Know Which One You Need

Before you compare brands or sizes, figure out whether your project is a replacement install or a new-construction-style install.

Replacement installation

This is used when:

  • You’re swapping out an existing window
  • The rough opening stays the same
  • Exterior wall materials remain mostly intact

New construction installation

This is used when:

  • You’re opening up or reframing the wall
  • The siding or exterior cladding is being reworked
  • You need a nailing flange or fin system
  • The rough opening itself is changing

A lot of renovation issues happen because people order the right window style in the wrong installation format.

Best Sliding Window Frame Materials for Renovation Projects

The frame material affects how the window looks, performs, and holds up over time.

Vinyl: Often the Smartest Practical Choice

A sliding vinyl window is one of the most common and renovation-friendly options because it typically offers:

  • Good thermal performance
  • Low maintenance
  • Resistance to moisture and corrosion
  • A more budget-friendly price point than many premium materials
  • Consistent performance in everyday residential use

For most homeowners doing a remodel—not a custom architectural showpiece—vinyl is often the most balanced choice.

If you want to compare common residential sizes, models like INSPIRE VINYL SVS 5040 and INSPIRE VINYL SVS 6030 are helpful examples of the kind of dimensions often used in kitchens, bedrooms, and living spaces.

What to Compare Before Buying Sliding Windows

This is the part that saves people from buying the wrong window for the right room.

1) Frame durability

Look for solid frame construction, clean welds (if vinyl), and hardware that doesn’t feel flimsy.

2) Roller and track quality

This matters more than people think. A slider that drags after six months is frustrating every single day.

3) Glass package

Compare:

  • Double-pane vs. triple-pane
  • Low-E coatings
  • Insulating gas fills
  • U-factor and SHGC ratings

These affect comfort, efficiency, and how the room feels throughout the year.

4) Venting area

Not all sliding windows open the same amount. Make sure the operable area fits the room’s airflow needs.

5) Locking and security hardware

A good slider should feel secure and close cleanly.

6) Interior and exterior finish compatibility

Think beyond the window itself. How will it look with your trim, siding, drywall returns, or renovation style?

Benefits and Limitations of Sliding Windows

A trustworthy buying guide should cover both sides.

Benefits

  • Easy to use
  • Good for wide openings
  • Great natural light
  • Often cost-effective
  • Good for modern and transitional homes
  • Usually easy to maintain

Limitations

  • Tracks need periodic cleaning
  • Many models only open halfway
  • Some lower-end units don’t seal as tightly as better compression-style windows
  • Large sliders can feel heavy if the hardware isn’t strong
  • Water management matters a lot during installation

A slider is a great choice in the right location. It’s just not automatically the best choice in every room.

Best Rooms for Sliding Windows in a Remodel

Some window styles work best when matched to room function.

Sliding windows often work especially well in:

  • Kitchens – especially over sinks
  • Bedrooms – where easy ventilation matters
  • Living rooms – for wider wall sections
  • Home offices – for light without bulky framing
  • Basements – depending on code and egress needs
  • Additions – where horizontal proportions fit the design

For taller, narrower openings, another style may make more sense. If you’re comparing options, this guide on single hung windows for sale can help you understand when a vertical-operating window may be the better fit.

Can Sliding Windows Be Installed Vertically?

This is a common question, especially during remodel planning.

Short answer:

Generally, no—not unless the manufacturer specifically allows it.

If you’ve ever wondered, can sliding windows be installed vertically, the important thing to know is that most horizontal sliders are engineered for one orientation only.

They’re designed around:

  • Track direction
  • Roller placement
  • Drainage and weep systems
  • Lock alignment
  • Structural loading

Turning a horizontal slider vertically can compromise both function and performance. If you need a vertical-opening window, it’s better to choose a style designed for that use.

How to Install a Sliding Window: What Homeowners Should Know

A lot of people search how to install a sliding window, but the real answer depends on the opening, wall condition, and installation type.

You don’t need to be a contractor to understand the basics, though.

Typical sliding window installation steps

  1. Remove the old unit (if replacing)
  2. Inspect the rough opening
  3. Check for rot, damage, or moisture
  4. Confirm measurements
  5. Prep the sill and flashing
  6. Dry-fit the new window
  7. Level, plumb, and shim properly
  8. Fasten according to manufacturer instructions
  9. Insulate perimeter gaps correctly
  10. Seal and trim the opening
  11. Test operation, lock function, and drainage

That’s the broad version of sliding window window installation, but here’s the part that matters most:

The install is often more important than the window brand.

A high-quality window can still underperform if:

  • it’s installed out of square
  • flashing is skipped or done poorly
  • foam bows the frame
  • the sill isn’t supported correctly
  • drainage paths are blocked

That’s why renovation success usually comes down to fit, prep, and installation quality—not just what looked best online.

Common Mistakes to Avoid

This section matters because window regrets are usually expensive.

1) Measuring only once

Even small measurement errors can cause operation or sealing problems.

2) Buying based only on appearance

A clean profile means nothing if the window is hard to use or poorly suited to the room.

3) Ignoring hardware quality

Rollers and locks matter more in sliders than people expect.

4) Choosing the wrong style for the opening

A wide opening may suit a slider. A tall narrow one may not.

5) Overlooking glass performance

Sun exposure, orientation, and room use should affect your glass choice.

6) Assuming any installer can “make it work”

Window installs are detail-sensitive. Experience matters.

7) Forgetting maintenance access

Tracks need occasional cleaning, and some rooms make that easier than others.

Expert Tips That Actually Help

These are the practical details that tend to make the difference in real projects.

  1. Best practices before ordering
  • Measure width and height in multiple places
  • Check whether the opening is square
  • Look at how the room is actually used
  • Think about furniture, cabinets, and reach
  • Prioritize hardware quality over small cosmetic upgrades
  • Match the glass package to sun exposure and climate

2. Best practices during installation

  • Confirm the sill is solid and level
  • Use proper flashing, not shortcuts
  • Shim carefully to avoid frame distortion
  • Test sash movement before finishing trim
  • Make sure the lock engages smoothly

3. Best practices after installation

  • Clean the track regularly
  • Inspect sealant seasonally
  • Keep drainage paths clear
  • Address sticking or drag early before it worsens

A good sliding window should feel smooth and easy—not something you have to fight every time you want fresh air.

Real-World Renovation Examples

Example 1: Kitchen update

A homeowner replacing an older, hard-to-reach crank window above the sink may find a slider easier to operate and easier to clean.

Example 2: Bedroom remodel

In a guest room or primary bedroom, a horizontal slider can bring in good airflow while maintaining a simple, low-profile look.

Example 3: Living room refresh

For a wide wall opening, a slider often provides better glass area and easier proportions than trying to split the opening into multiple narrower units.

These are the kinds of practical renovation decisions that often matter more than trends.

Quick Checklist: How to Choose the Best Sliding Windows for Home Renovation

Before you buy, ask yourself:

  • Is this a replacement or reframing project?
  • Does the opening suit a horizontal slider?
  • Will the window be opened often?
  • Is vinyl the best frame choice here?
  • What glass performance does this room need?
  • Is the hardware durable?
  • Is the installer experienced with water management?
  • Will the window be easy to maintain in this location?

If you can answer those confidently, you’re already ahead of most renovation mistakes.

FAQ:

What are the best sliding windows for home renovation?

The best ones are the windows that fit your opening correctly, operate smoothly, match your room needs, and offer the right balance of efficiency, durability, and maintenance.

Are sliding vinyl windows a good choice for remodeling?

Yes, in many cases. They’re popular because they’re low maintenance, energy-efficient, and often more budget-friendly than other materials.

How do I know if a sliding window is right for my room?

Sliding windows usually work best in wider openings and in spaces where easy side-to-side operation is more practical than lifting or cranking.

Can sliding windows be installed vertically?

Usually no. Most are engineered specifically for horizontal use and should not be rotated unless the manufacturer clearly allows it.

Are sliding windows good for ventilation?

Yes, especially in rooms like kitchens, bedrooms, and living spaces where easy airflow is a priority.

What Homeowners Commonly Say After a Good Upgrade

We didn’t realize how much easier the room would feel to ventilate until the old window was gone.

The slider ended up being a better fit for our kitchen layout than the style we originally planned.

Getting the right size and glass package made more difference than we expected.

Final Thoughts

The best sliding windows for a renovation project aren’t just the ones with the nicest frame profile or the lowest price. They’re the ones that suit the room, fit the opening properly, operate well, and hold up over time.

If you’re renovating, focus on performance first: fit, glass, hardware, and installation quality. Those are the details that turn a good-looking window into a smart long-term upgrade.

About the Author

Spire Building Supplies Editorial Team creates practical, reader-first content for homeowners, renovators, and building professionals. Our goal is to make product choices and installation planning easier to understand by focusing on real-world performance, practical comparisons, and the details that matter once a renovation moves from planning to execution.

picture window ideas

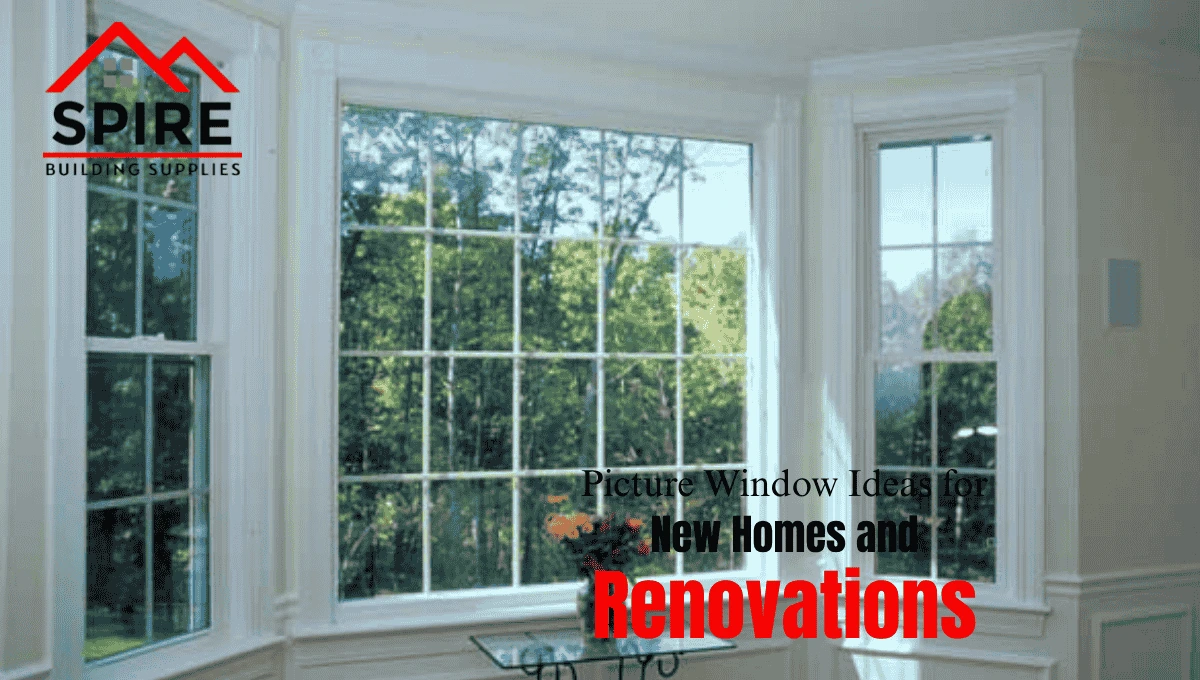
Picture Window Ideas for New Homes and Renovations

Choosing the right picture window ideas can completely change how a home looks and feels, but it is also one of those decisions that is easy to get wrong if you focus only on style. A picture window can brighten a dark room, frame a backyard view, and make a new build feel more custom. It can also create glare, privacy problems, awkward furniture layouts, or expensive framing changes if it is not planned carefully.

This guide is built for homeowners, renovators, and builders who want practical direction—not just inspiration photos. You’ll learn how picture windows work, where they make the most sense, what design choices matter most, and how to avoid common mistakes during planning, selection, and installation.

What Is a Picture Window?

A picture window is a large fixed window designed to bring in daylight and showcase a view. Unlike operable windows, picture windows do not open. Their value comes from visibility, natural light, and clean visual impact.

In simple terms:

A picture window is meant to “frame” the outdoors the way artwork frames a scene.

That makes it a strong choice for:

  • Living rooms
  • Dining rooms
  • Front elevations
  • Great rooms
  • Stair landings
  • Home offices
  • Rear-facing gathering spaces

Because picture windows are fixed, they often offer:

  • Wider uninterrupted glass areas
  • Clean modern or traditional lines
  • Fewer moving parts
  • Strong energy performance when specified well

That said, they are not automatically the right answer for every wall or every room.

What Is a Picture Window

Why Picture Windows Matter in New Builds and Renovations

The same window can have very different results depending on whether you’re designing a new home or updating an existing one.

In new homes

You usually have more flexibility to decide:

  • Wall placement
  • Room orientation
  • Window proportions
  • Exterior symmetry
  • Interior sightlines

In renovations

You often have to work around:

  • Existing framing
  • Rooflines
  • furniture layout
  • privacy challenges
  • structural limitations

That difference matters. In new construction, you can build around the window. In remodeling, you usually need the window to work within what already exists.

Either way, a picture window influences more than just appearance. It affects:

  • Room brightness
  • Energy performance
  • Daily comfort
  • Exterior design
  • Interior layout
  • Resale appeal

That’s why the best ideas are the ones that balance beauty, comfort, and practicality.

Key Concepts: What You Need to Know Before Choosing

Before comparing styles and layouts, it helps to understand a few fundamentals.

1) Picture windows are fixed, not venting

This is the first thing people often forget.

A picture window gives you:

  • Light
  • Views
  • Design impact

But it does not give you:

  • Fresh air
  • Ventilation
  • Emergency egress

If airflow matters in that room, you may want to pair the window with side units that open.

2) The “best” window depends on the room

A front-facing picture window may need:

  • More privacy
  • Better street-facing proportions
  • Balanced curb appeal

A backyard-facing picture window may be more about:

  • View quality
  • Natural light
  • Connection to outdoor living

The right idea always depends on where the window is going and how the room is used.

3) Bigger glass is not always better

A large picture window can be beautiful, but oversizing it without thinking about sunlight, wall space, and room function often creates more problems than benefits.

The goal is not to install the biggest unit possible.

The goal is to choose a window that makes the room work better.

Best Picture Window Ideas by Room

One of the easiest ways to narrow down your options is to think by room rather than by product size first.

Living Room Picture Window Ideas

A living room is one of the best places for a picture window because it benefits from:

  • Natural light
  • Better seated views
  • Strong visual impact

What works well:

  • Wide centered windows
  • Balanced trim around the opening
  • Moderate sill heights for seated comfort
  • Rear-facing views or controlled front-facing light

Best for:

  • New family rooms
  • Front formal spaces
  • Renovated older homes needing more daylight

Dining Room Picture Window Ideas

A dining room picture window can make the space feel more open and less boxed in.

Good design choices:

  • Mid-height to large fixed windows
  • Backyard or side-yard views
  • Soft morning or north-facing light

Practical note:

This is one of the easiest rooms to improve with a picture window because you usually need less wall storage than in kitchens or media rooms.

Kitchen Picture Window Ideas

A kitchen picture window can work extremely well, especially over a sink or breakfast nook, but placement matters.

What to consider:

  • Glare during prep hours
  • Nearby cabinetry
  • Counter and backsplash layout
  • Ventilation elsewhere

Best use:

  • Over sink areas
  • Breakfast corners
  • Rear walls overlooking the yard

A moderate-size window often performs better here than an oversized one.

Stairwell and Landing Picture Window Ideas

This is one of the most underused opportunities in both new homes and renovations.

Why it works:

  • Brightens dark vertical spaces
  • Adds architectural character
  • Improves visual flow between levels

What usually works best:

  • Tall rectangular forms
  • Clean vertical placement
  • Minimal trim for a modern look

This is a particularly effective strategy in new construction where the opening can be planned early.

Home Office Picture Window Ideas

A picture window in a home office can improve focus and comfort if it is placed carefully.

Best practices:

  • Avoid direct west-facing glare
  • Keep the monitor wall in mind
  • Use the window to bring in daylight without constant distraction

A moderate-size fixed window is often more useful here than a dramatic oversized one.

How to Choose the Right Picture Window Style

Once you know where the window is going, the next step is choosing a style that fits the architecture and daily use of the room.

  1. Match the window to the home’s design language

A picture window should feel intentional—not like an afterthought.

Modern and contemporary homes often suit:
  • Slim frame profiles
  • Large clean glass spans
  • Minimal trim
  • Geometric proportions
Traditional homes often suit:
  • More balanced divided layouts nearby
  • Heavier trim details
  • More symmetrical placement
Transitional homes usually work well with:
  • Clean rectangular windows
  • Moderate trim depth
  • Flexible frame color choices

A good window idea should support the house, not compete with it.

  1. Think carefully about orientation and sunlight

This is one of the most important practical decisions.

How direction affects performance

South-facing windows

Usually bring:

  • Strong daylight
  • Winter warmth
  • Potential summer heat gain

West-facing windows

Usually bring:

  • Warm afternoon light
  • Higher glare risk
  • More overheating potential

East-facing windows

Usually bring:

  • Pleasant morning light
  • Softer heat load

North-facing windows

Usually bring:

  • Even daylight
  • Less direct solar intensity

Practical insight:

A beautiful inspiration photo does not show what a room feels like at 4:30 p.m. in July. That is why orientation matters just as much as aesthetics.

  1. Compare frame materials realistically

Frame material affects more than looks. It changes maintenance, durability, energy efficiency, and budget.

Common frame options

Vinyl

A vinyl picture window is one of the most practical choices for many homes because it tends to be:

  • Low maintenance
  • Energy efficient
  • Cost-conscious
  • Easy to integrate into many home styles

This is often a strong option for both new homes and picture window replacements.

Wood

Wood can add warmth and character, but it usually requires more upkeep.

Composite or aluminum

These may appeal to homeowners or builders pursuing slimmer, more contemporary profiles.

Real-world advice:

If you want a window that is easy to live with over time, vinyl often gives the best balance of maintenance, value, and performance.

If you’re exploring options more closely, browsing picture windows for sale can help you compare practical styles and common dimensions.

  1. Decide Between Standard and Custom Sizing

This is where budget and design goals often meet.

Standard-size windows

Usually make sense when:

  • You’re replacing an existing unit
  • You want easier product sourcing
  • You’re trying to simplify installation

Custom picture windows

Can be worthwhile when:

  • You’re framing a very specific view
  • The wall proportions are unusual
  • You want a feature window in a new build
  • You’re trying to align with custom elevations

Practical tip:

Custom picture windows are worth considering when they solve a real design challenge. But if a standard size works visually, it can often save time and cost without sacrificing appearance.

For example, products like:

…can help you visualize how standard-size fixed windows might fit common wall conditions.

Benefits of Picture Windows

When chosen thoughtfully, picture windows can improve both function and aesthetics.

Main benefits

More natural light

This is often the biggest reason people choose them. Rooms feel brighter, larger, and more open.

Better views

A picture window can turn a backyard, tree line, patio, or landscape into part of the room itself.

Cleaner visual design

Because there are no moving sashes, the glass area feels more uninterrupted and intentional.

Strong energy performance

Fixed windows often perform well because they have fewer potential air-leak points than operable units.

Better design value

A well-placed picture window can improve both curb appeal and the quality of interior spaces.

Limitations and Trade-Offs

A realistic decision means understanding where picture windows are less ideal.

Common limitations

No ventilation

This is the biggest one. If the room needs fresh air, you will need another venting strategy.

Glare and solar heat gain

This can become a real issue with west- or south-facing glass if not planned correctly.

Privacy concerns

A front-facing picture window can make a room feel exposed if sightlines are not considered.

Less usable wall space

Larger windows reduce room for:

  • Built-ins
  • Artwork
  • Cabinets
  • TVs
  • Shelving

The right answer is often not “more glass,” but the right glass in the right location.

Practical Planning and Buying Considerations

If you’re moving beyond inspiration and into decision-making, these are the details that matter most.

What to compare before choosing

1) Glass package and energy performance

Ask about:

  • Low-E coatings
  • Double or triple glazing
  • U-factor
  • Solar heat gain performance

2) Frame profile

The frame shape and thickness can make a huge visual difference, especially in modern or minimalist homes.

3) Installation complexity

A simple picture window installation can become more involved if the project requires:

  • Structural framing changes
  • Header adjustments
  • Exterior finish modifications
  • Interior drywall or trim rework

4) Interior and exterior trim

The trim surrounding the window often determines whether it looks “builder-basic” or thoughtfully finished.

If your project includes wider finish upgrades, working with the right supplier matters. This is where resources like a Building accessories supplier in Texas can support a more coordinated outcome.

5) Replacement vs. new opening

Picture window replacements are usually simpler when you’re keeping the existing rough opening.

A new opening gives you more flexibility but usually involves more planning and cost.

Common Mistakes to Avoid

This is where many homeowners and even capable builders lose time, money, or design quality.

1) Choosing only from inspiration images

Online photos are useful, but they rarely show:

  • Afternoon glare
  • Privacy issues
  • Furniture conflicts
  • exterior proportion problems

2) Oversizing the window without a plan

A bigger window is not always better if it causes:

  • Heat gain
  • Layout problems
  • Reduced wall function

3) Ignoring what the room actually needs

A family room, office, and stairwell do not need the same window strategy.

4) Forgetting ventilation

A fixed window can be perfect in the wrong place—and frustrating in the wrong room.

5) Overlooking trim and finish details

Even a quality window can feel unfinished if the casing, drywall returns, or exterior detailing are poorly handled.

6) Searching by product before defining the goal

People often start with terms like picture windows near me or compare only by dimensions. That can be useful later, but it is not the best starting point.

Start with:

  • What room is this for?
  • What do I want this window to improve?
  • What tradeoffs am I willing to accept?

That usually leads to better choices.

Expert Tips and Best Practices

These are the details that consistently lead to better outcomes in real homes.

Frame the best view, not just the biggest opening

If only one side of the yard or lot is worth looking at, design around that.

Think from both inside and outside

A good picture window should improve the room and look proportionate on the elevation.

Keep furniture in mind early

This avoids common problems like placing a beautiful window where the sofa, TV, or built-ins need to go.

Use standard sizes where practical

If a standard-size unit works visually, it often simplifies procurement and installation.

Pair fixed glass with airflow elsewhere

This is especially important in kitchens, living rooms, and bedrooms.

Prioritize glazing in sunny exposures

Good glass specifications can matter more than just increasing or reducing size.

Real-World Use Cases

Use Case 1: New build family room

Goal:

  • Create a bright rear-facing gathering space

What worked:
A centered picture window overlooking the backyard added daylight and made the room feel larger without needing oversized glass walls.

Use Case 2: Older home renovation

Goal:

  • Replace a dated front window and improve curb appeal

What worked:
A clean vinyl picture window update modernized the room while preserving wall function and improving efficiency.

Use Case 3: Stair landing in a two-story home

Goal:

  • Brighten a dark transitional zone

What worked:
A taller fixed window added natural light and visual height without compromising privacy.

Use Case 4: Home office remodel

Goal:

  • Add daylight without screen glare

What worked:
A moderate-size side-facing picture window improved comfort and brightness without overexposing the workspace.

Quick Checklist Before You Decide

Use this before finalizing your design.

Choose a picture window idea that answers these questions:

  • What is the main purpose of the window?
  • Which room is it for?
  • What direction does the wall face?
  • Do I need ventilation nearby?
  • Is standard sizing enough?
  • Will it affect furniture or cabinetry?
  • Does it look balanced from the exterior?
  • Have I considered trim and finish details?

If you can answer those clearly, you are much more likely to end up with a window you still like years from now.

Customer Testimonials

We originally planned for a much bigger window, but scaling it back actually made the room work better. We kept the light and view without losing the whole wall.
Andrea M., Homeowner

The biggest help was thinking about sun direction before choosing the wall. That saved us from a lot of afternoon glare.
Tyler G., Renovation Client

Our stair landing was always dark. Adding a fixed picture window there made the entire upper hallway feel brighter and more finished.
Luis P., Builder

FAQ:

Are picture windows a good idea for new homes?

Yes, especially when they are planned early around room layout, natural light, and exterior design.

Can picture windows open for ventilation?

No. Picture windows are fixed, so if airflow matters, you’ll want another window nearby that opens.

Are vinyl picture windows worth it?

For many homeowners, yes. They are low maintenance, practical, and often a strong value.

Should I choose custom picture windows?

Only if the wall, view, or design really calls for it. Standard sizes often work well and keep the project simpler.

Are picture window replacements difficult?

Not always. Replacements are often more straightforward if you are keeping the same opening size and shape.

Final Thoughts

The best picture window ideas are not always the most dramatic ones. They are the ideas that improve the room in a meaningful, lasting way—bringing in light, framing a useful view, and fitting naturally with how the home is actually lived in.

Whether you’re planning a new home or updating an older one, the smartest window decisions usually come from balancing design with comfort, proportion, and practical everyday use.

If you get those pieces right, a picture window can become one of the most valuable and visually rewarding upgrades in the entire home.

Author / Editorial Team Bio

Spire Building Supplies Editorial Team creates practical, experience-informed content for homeowners, remodelers, and builders looking to make better material and design decisions. The team focuses on useful product knowledge, realistic project planning, and straightforward guidance that helps readers choose with more clarity and confidence.

Glass pantry door

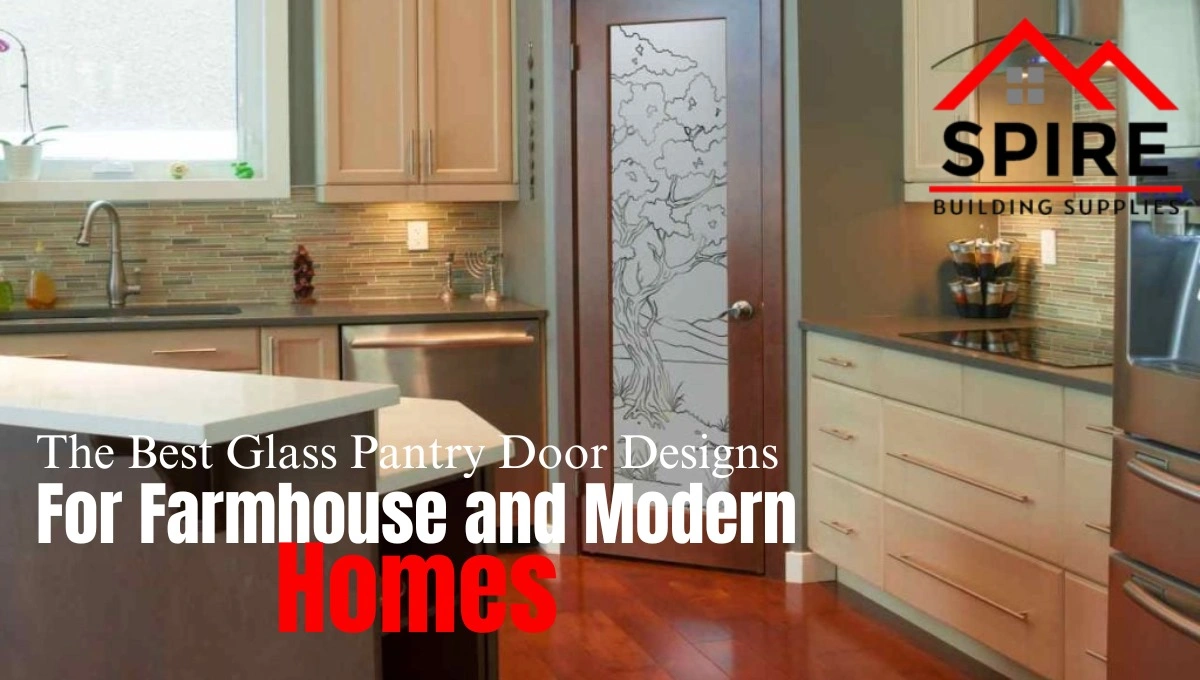
The Best Glass Pantry Door Designs for Farmhouse and Modern Homes

The heart of every home lies in the kitchen—and what better way to elevate your kitchen’s look and functionality than with a glass pantry door that seamlessly blends aesthetics with everyday utility? Whether you’re building new, renovating, or just upgrading your interiors, the right pantry door can be a game-changer in your home’s design.

At Spire Building Supplies, we take pride in offering expertly crafted glass pantry doors tailored to meet the unique needs of both farmhouse and modern home designs. With a range of styles, materials, and sizes—including the popular Pantry door 6’8″ Height and Pantry door 8’0″ Height—our collection ensures every homeowner finds the perfect fit.

Why a Glass Pantry Door Is More Than Just a Door

Choosing a pantry door isn’t only about accessing your storage. It’s about enhancing light flow, making small spaces feel larger, and bringing a sophisticated, clean finish to your kitchen. Glass doors act as a visual break between enclosed and open spaces, giving your kitchen a more curated, designer look.

Key Advantages:

  • Natural Light: Glass allows light to pass through, brightening up dark corners and small kitchens.
  • Aesthetic Versatility: Matches a wide range of interior styles, from rustic wood to sleek metal frames.
  • Custom Design Options: Choose between clear, frosted, etched, or decorative glass.
  • Functional Beauty: Provides visibility when you want it and privacy when you don’t—especially with frosted or tinted glass.

Spire Building Supplies: Built on Expertise & Trust

At Spire Building Supplies, we’re not just another supplier. We are trusted advisors in home improvement, with years of hands-on experience in design, construction, and materials sourcing. We work closely with designers, builders, and homeowners to deliver interior doors that offer beauty, durability, and performance.

What Makes Us Different?

  • Expertise: Each glass pantry door is precision-made using durable, long-lasting materials.
  • High Customer Satisfaction: With thousands of 5-star reviews and repeat clients, we are known for service and reliability.
  • Design Expertise: Our team stays ahead of design trends and helps homeowners choose doors that not only fit but also transform their spaces.
  • Tailored Sizes: We offer the industry’s most sought-after dimensions, including Pantry door 6’8″ Height and Pantry door 8’0″ Height, with customization available on request.

Top Glass Pantry Door Styles for Every Home Type

Let’s take a deeper look at styles that are making waves in both farmhouse and modern kitchens in 2025.

 1. Frosted Glass Pantry Door

  • Best For: Privacy + light flow
  • Farmhouse Feel: Works well with shaker cabinets and neutral color palettes
  • Modern Use: Pairs beautifully with black matte frames and minimalist design

 2. Clear Glass Pantry Door

  • Best For: Showcasing organized shelves or open-style pantry designs
  • Farmhouse Feel: Ideal for rustic wood frames or barn-door sliders
  • Modern Use: Frameless or metal-framed doors with clean lines

3. Etched Glass Pantry Door

  • Best For: Decorative elements (e.g., engraved “Pantry” text or custom motifs)
  • Farmhouse Feel: Complements vintage and cottage-style kitchens
  • Modern Use: Subtle, artistic etching adds a personal touch without overpowering

 4. Sliding Barn-Style Glass Doors

  • Best For: Saving space and adding charm
  • Farmhouse Feel: Classic rustic wood frame with black metal hardware
  • Modern Use: Sleek track systems and frameless design

 5. Frameless Glass Pantry Doors

  • Best For: Ultra-modern interiors
  • Farmhouse Feel: Not typically used, but possible in eclectic designs
  • Modern Use: Minimalist, invisible hardware, clean aesthetics

Understanding Pantry Door Sizes: 6’8″ vs 8’0″ Heights

Choosing the right size pantry door is just as important as picking the style. Here’s a guide to help you decide between our two most popular heights.

Pantry Door 6’8″ Height

  • Standard height for most homes
  • Ideal for older constructions or lower ceiling heights
  • Pairs well with traditional farmhouse kitchens and compact layouts

Pantry Door 8’0″ Height

  • Perfect for modern homes with tall ceilings
  • Adds a dramatic vertical element
  • Great for open-concept kitchens and luxurious design schemes

Understanding Pantry Door Sizes 6'8 vs 8'0 Heights

Both sizes are available in all glass styles and can be customized in terms of frame color, glass type, and hardware.

Why Homeowners Love Our Doors: Real Testimonials

“I didn’t expect a door to make such a difference, but it did! Spire’s team was so helpful in choosing the perfect size and style for our space.”

“The glass pantry door completely changed our kitchen. It feels brighter and more open, even without any renovations. The 8’0″ height gave it a luxury feel!”

“We chose Spire after weeks of searching. The door quality, hardware, and finish are just outstanding. Our frosted door is not only functional—it’s gorgeous.”

FAQs About Glass Pantry Doors

Q1: Will a glass pantry door fit in my existing frame?

Yes! Our doors are available in standard sizes like 6’8″ and 8’0″. We also provide custom sizing for unique kitchen layouts.

Q2: What type of glass is used in pantry doors?

We use tempered safety glass for all our pantry doors, ensuring strength, shatter resistance, and long-term durability.

Q3: Can I install the pantry door myself?

If you have experience with home installations, DIY is possible. However, we always recommend professional installation for best alignment and performance.

Q4: What finishes and frame styles are available?

From natural wood to matte black metal frames, we offer various finishes to match your decor. Frameless options are also available for modern homes.

Q5: Are glass pantry doors safe in homes with kids?

Absolutely. Our tempered glass is highly durable and designed for safe everyday use—even in busy family kitchens.

Conclusion: A Simple Upgrade with Lasting Impact

A well-designed glass pantry door is one of the most effortless yet impactful upgrades you can make in your kitchen. It creates the illusion of space, reflects natural light, and adds a layer of sophistication that never goes out of style.

Whether you lean toward the rustic warmth of a farmhouse kitchen or the clean minimalism of a modern home, Spire Building Supplies has the right door for you. With industry-trusted materials, professional support, and customer-first service, you’ll feel confident knowing your home is in good hands.

So if you’re ready to elevate your space, start with a detail that brings beauty and function together—a glass pantry door built to last.

For an exclusive collection of interior doors, visit this page: How to Choose the Right Interior Doors for Every Room in Your Home

Modern Flooring Tiles for Kitchen

Modern Flooring Tiles for Kitchen Top Styles to Upgrade Your Space in 2026

Introduction: Why Your Kitchen Floor Matters More Than You Think

Most homeowners focus on cabinets, countertops, and appliances—but the kitchen floor quietly takes the most abuse. From spills and heavy foot traffic to heat and moisture, it handles everything. If your current flooring looks outdated, stains easily, or feels unsafe, you’re not alone. Here’s the good news: modern flooring tiles for kitchen spaces in 2026 are smarter, stronger, and more stylish than ever. With new materials, textures, and finishes, you can upgrade both functionality and design—without overspending.

In this guide, I’ll walk you through real-world insights, practical recommendations, and the best-performing options—based on what actually works in modern homes, especially in high-demand areas like Texas.

What Makes Modern Flooring Tiles for Kitchen Different in 2026?

Kitchen flooring is no longer just about looks. Today’s tiles are engineered for performance + design balance.

Key Features Homeowners Should Look For:

  • Water resistance (essential for kitchens)
  • Scratch resistance (for pets & heavy use)
  • Slip resistance (for safety)
  • Easy maintenance (low effort cleaning)
  • Heat durability (important in warmer climates like Texas)

Expert Insight: In Texas homes, where temperature fluctuations and dust are common, luxury vinyl tiles (LVT) outperform traditional ceramic in long-term durability.

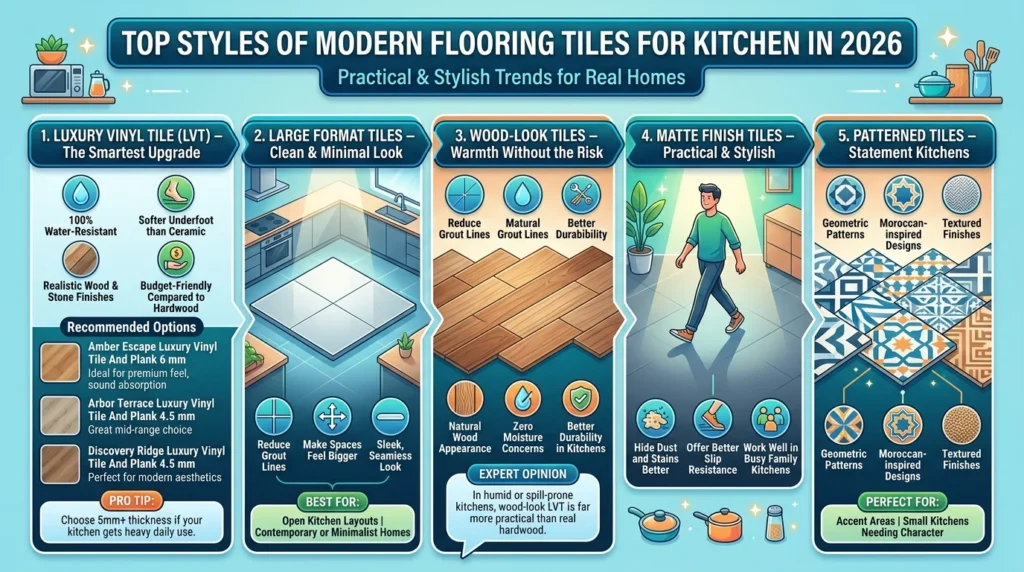
Top Styles of Modern Flooring Tiles for Kitchen in 2026

Let’s break down the styles that are dominating real homes—not just showrooms.

1. Luxury Vinyl Tile (LVT) – The Smartest Upgrade

Luxury vinyl is leading the market—and for good reason.

Why it works:

  • 100% water-resistant
  • Softer underfoot than ceramic
  • Realistic wood & stone finishes
  • Budget-friendly compared to hardwood

Recommended Options:

Pro Tip: Choose 5mm+ thickness if your kitchen gets heavy daily use.

2. Large Format Tiles – Clean & Minimal Look

Large tiles are trending in modern kitchens because they:

  • Reduce grout lines
  • Make spaces feel bigger
  • Offer a sleek, seamless look

Best for:

  • Open kitchen layouts
  • Contemporary or minimalist homes

3. Wood-Look Tiles – Warmth Without the Risk

Love hardwood but worried about water damage? Wood-look tiles give you:

  • Natural wood appearance
  • Zero moisture concerns
  • Better durability in kitchens

Expert Opinion: In humid or spill-prone kitchens, wood-look LVT is far more practical than real hardwood.

4. Matte Finish Tiles – Practical & Stylish

Glossy floors look great—but show every footprint.

Matte finishes:

  • Hide dust and stains better
  • Offer better slip resistance
  • Work well in busy family kitchens

5. Patterned Tiles – Statement Kitchens

If you want personality:

  • Geometric patterns
  • Moroccan-inspired designs
  • Textured finishes

These are perfect for:

  • Accent areas
  • Small kitchens needing character

Top Styles of Modern Flooring Tiles for Kitchen in 2026

How to Choose the Best Modern Flooring Tiles for Kitchen

Here’s a simple decision framework I use when advising homeowners:

Step-by-Step Selection Guide:

1. Consider Usage

  • Heavy cooking + kids → go for LVT (durable & forgiving)
  • Light use → ceramic or porcelain works

2. Think About Maintenance

  • Low effort needed? → Matte LVT
  • Okay with regular cleaning? → Gloss tiles

3. Match Interior Style

  • Modern → Large format or neutral LVT
  • Rustic → Wood-look tiles
  • Bold → Patterned tiles

4. Budget Smartly

  • High-end look without cost → LVT
  • Premium finish → Porcelain

Expert Insights: What Most Homeowners Get Wrong

After working with countless flooring selections, here are real mistakes people regret:

 Choosing Looks Over Function
That glossy tile may look stunning—but becomes slippery and hard to maintain.

Ignoring Thickness
Thin tiles wear out faster, especially in kitchens.

Not Considering Climate
In warmer regions like Texas:

  • Floors expand/contract
  • Heat resistance matters

Overlooking Installation Quality
Even the best tile fails with poor installation.

Pro Tip: Always prioritize material + installation, not just design.

Common Mistakes to Avoid

  • Buying cheap tiles that wear out quickly
  • Ignoring slip resistance (especially for families)
  • Choosing trendy designs that age fast
  • Not ordering extra material for repairs
  • Skipping underlayment for vinyl tiles

Real Customer Testimonials

Sarah M., Dallas, TX
I switched to luxury vinyl tiles last year, and honestly, it’s been a game changer. Easy to clean and looks like real wood.

James R., Houston, TX
We installed large-format tiles, and our kitchen feels twice as big now. Worth every dollar.

Amanda L., Austin, TX
I was worried about scratches because of pets, but LVT has held up perfectly.

People Also Ask (PAA)

1. What are the best modern flooring tiles for kitchen use?
Luxury vinyl tiles and porcelain tiles are the best due to durability, water resistance, and easy maintenance.

2. Are vinyl tiles good for kitchen flooring?
Yes, they are waterproof, scratch-resistant, and more comfortable underfoot compared to traditional tiles.

3. What tile finish is best for kitchens?
Matte finishes are ideal because they provide better grip and hide dirt effectively.

4. How long do modern kitchen tiles last?
High-quality tiles can last 10–25 years depending on material and maintenance.

5. Are large tiles better for small kitchens?
Yes, large-format tiles reduce grout lines and make small kitchens appear more spacious.

Final Thoughts: Upgrade Smart, Not Just Stylish

Choosing the right modern flooring tiles for the kitchen isn’t just about trends—it’s about long-term comfort, durability, and practicality.

If you want a solution that balances:

  • Style
  • Performance
  • Budget

Then luxury vinyl tile options are leading the way in 2026.

Upgrade with Confidence – Choose Spire Building Supplies

At Spire Building Supplies, we help homeowners across Texas find high-quality, durable, and stylish flooring solutions that actually perform in real life—not just in catalogs.

Whether you’re renovating or building from scratch, our experts can guide you to the perfect choice for your kitchen.

Upgrade your kitchen today with flooring that’s built to last.

Author Bio

Spire Building Supplies Team
The Spire Building Supplies team brings hands-on expertise in construction materials, interior design trends, and modern home solutions. With years of experience serving homeowners and builders across Texas, they specialize in helping customers choose high-quality products that combine durability, style, and long-term value.

Buy Interior Trim Online

Buy Interior Trim Online to Elevate Your Home’s Interior Style

Introduction: The Small Detail That Changes Everything

Most homeowners focus on big upgrades—floors, cabinets, doors—but overlook one of the most powerful design elements: interior trim. If you’re planning to buy interior trim online, you’re already one step ahead in transforming your space efficiently. The truth is, even the most expensive interiors can feel incomplete without the right trim.

Why Interior Trim Matters More Than You Think

Interior trim isn’t just decorative—it defines transitions, frames your space, and adds architectural depth.

What trim actually does:

  • Frames doors, windows, and walls
  • Adds contrast and visual structure
  • Covers gaps and imperfections
  • Enhances resale value

Expert Insight: In modern home design, trim is often the difference between a “basic” home and a “custom-built” look.

Why More Homeowners Prefer to Buy Interior Trim Online

Buying trim online used to feel risky. Today, it’s the smarter option—especially if you care about quality and design flexibility.

Key advantages:

  • Wider selection: Access profiles and sizes not available locally
  • Better pricing: Direct-from-supplier savings
  • Convenience: Compare products without driving store to store
  • Availability: Consistent stock for large projects

Real-world perspective (Texas homes):

In Texas, where home styles range from modern farmhouse to contemporary builds, online stores offer trim options that match these evolving aesthetics—something local inventory often struggles with.

Choosing the Right Interior Trim for Your Home

Not all trim is created equal. The wrong choice can make your space feel outdated or mismatched.

1. Match Your Home’s Style

  • Modern homes: Clean, flat profiles
  • Traditional homes: Detailed, decorative trims
  • Farmhouse style: Wider, simple boards

2. Choose the Right Size

  • Taller ceilings → wider trim
  • Smaller rooms → slimmer trim

Pro Tip: Oversized trim in Texas homes with high ceilings creates a luxury feel without major renovations.

Best Materials to Consider When You Buy Interior Trim Online

MDF (Medium-Density Fiberboard)

Perfect for painted finishes and cost-effective upgrades.

Example:

Flexible Trim Options

For curved walls or unique architectural designs:

Expert Insight: Flexible trim is often overlooked but is essential in modern custom homes where curved features are trending.

Best Materials to Consider When You Buy Interior Trim Online

How Interior Trim Instantly Elevates Your Space

When used correctly, trim can completely change how a room feels.

Transformations you’ll notice:

  • Plain walls → structured and elegant
  • Standard windows → framed focal points
  • Basic rooms → custom-designed interiors

Practical example:

Adding wider baseboards and window casings in a living room can create a high-end look for a fraction of renovation costs.

Step-by-Step: Buying Interior Trim Online the Smart Way

Measure Accurately

Always measure twice—include extra for cuts and mistakes.

Choose Consistent Styles

Stick to one trim style throughout your home for a cohesive look.

Check Material Specs

Look for:

  • Primed surfaces
  • Moisture resistance
  • Durability

Order Samples (If Available)

This avoids mismatched finishes.

Plan Installation

Decide:

  • DIY vs professional
  • Tools required
  • Timeline

Expert Insights: What Most Homeowners Get Wrong

After working with countless home improvement projects, one pattern is clear—people underestimate trim.

Here’s what experts recommend:

  • Invest in slightly wider trim than you think you need
  • Always match trim with door and window styles
  • Use consistent color (white or neutral tones work best)
  • Don’t mix too many trim profiles

Professional Tip: In Texas homes, white primed MDF trim is the most versatile and resale-friendly option.

Common Mistakes to Avoid When Buying Interior Trim Online

Choosing based on price alone
Cheap trim often chips, warps, or looks unfinished.

Ignoring proportions
Thin trim in large rooms looks out of place.

Mixing styles
Modern and traditional trim together can clash badly.

Not ordering enough material
Always add 10–15% extra for waste.

Customer Testimonials

James R., Dallas, TX
I decided to buy interior trim online and was surprised by the quality. It completely upgraded my home’s look without a full renovation.

Maria L., Houston, TX
The MDF trim I ordered was perfectly primed and easy to install. My living room now feels custom-built.

David K., Austin, TX
I used flexible trim for an arched doorway—it turned out amazing. Couldn’t find that locally anywhere.

People Also Ask (PAA)

1. Is it safe to buy interior trim online?
Yes, as long as you choose a trusted supplier with quality materials and clear specifications.

2. What is the best material for interior trim?
MDF is best for painted finishes, while solid wood is ideal for natural looks.

3. How much does interior trim cost online?
Costs vary based on material and size, but online options are often more affordable than retail stores.

4. Can I install interior trim myself?
Yes, with basic tools and measurements, most homeowners can handle DIY installation.

5. How do I choose the right trim size?
Match trim size to ceiling height and room scale for balanced proportions.

Final Thoughts: Upgrade Smart, Not Expensive

Interior trim is one of the most underrated upgrades—but also one of the most impactful. When you buy interior trim online, you unlock better designs, better pricing, and more control over your home’s final look.

If you want your home to feel complete, polished, and high-end without overspending, trim is the smartest place to start.

Ready to Transform Your Home?

At Spire Building Supplies, we offer premium-quality interior trim options designed for durability, style, and easy installation. Whether you’re upgrading a single room or an entire home, you’ll find the perfect trim solutions to match your vision.

Start your upgrade today—buy interior trim online with confidence and elevate your home instantly.

Author Bio

Spire Building Supplies is a trusted name in high-quality building materials across the USA, specializing in interior trim, doors, and home improvement solutions designed for durability and style.

Interior trim for luxury houses

How Interior Trim for Luxury Houses Enhances Every Room

When designing a high-end home, every detail counts. Interior trim for luxury houses is one of those elements that quietly elevates the aesthetic, functionality, and value of every room. From crown moldings to baseboards, the right trim adds depth, frames spaces elegantly, and provides a polished, cohesive look that distinguishes luxury interiors from standard designs.

Beyond aesthetics, interior trim also serves practical purposes: protecting walls, concealing seams, and providing smooth transitions between surfaces. Selecting the right trim materials and designs is critical, and understanding options like 1X6X10 STRAIGHT FLEXIBLE TRIM BASEBOARD, CROWN 4-1/4 X 9/16 FJ 16’PRIMED 16′ 8012FJP, and CROWN LA5COVE 17 MM X4-1/4 MDF 16 ensures both beauty and durability.

What Is Interior Trim and Why It Matters

‘Trim’ refers to the finishing elements used around windows, doors, floors, and ceilings. Common types include:

  • Baseboards: Protect walls and define floor edges.
  • Crown Molding: Frames ceilings elegantly and enhances room height perception.
  • Door and Window Casings: Highlight architectural openings and create visual interest.
  • Panel Moldings and chair rails: Add texture and style to walls.

In luxury houses, trim is not just functional; it is a design feature. Properly selected and installed trim can transform a simple room into a refined, cohesive space.

Benefits of Interior Trim for Luxury Houses

  1. Elevates Aesthetic Appeal
    • High-quality crown molding or baseboards provide a sense of refinement.
    • Consistent trim throughout rooms ties design elements together.
  2. Protects Walls and Surfaces
    • Baseboards prevent scuffs and damage from furniture or cleaning.
    • Door casings shield wall edges from everyday wear.
  3. Defines Spaces
    • Trim adds visual boundaries for walls, ceilings, and floors.
    • Makes transitions smooth and intentional.
  4. Increases Home Value
    • Homes with thoughtful trim details appear more finished and upscale.
    • Architectural details like CROWN LA5COVE 17 MM X 4-1/4 MDF 16 reflect attention to quality craftsmanship.

CROWN LA5COVE 17 MM X 4-1/4 MDF 16

Popular Trim Materials and Their Uses

  • MDF (Medium-Density Fiberboard):
    • Affordable, smooth, easy to paint
    • Perfect for crown molding and decorative trims
  • Wood (Oak, Maple, Cherry):
    • Traditional choice for baseboards, door casings, and panels
    • Durable, high-end appearance
  • Flexible Trim (1X6X10 STRAIGHT FLEXIBLE TRIM BASEBOARD):
    • Ideal for curved walls or ceilings
    • Maintains smooth finish in custom designs

1X6X10 STRAIGHT FLEXIBLE TRIM BASEBOARD

CROWN 4-1/4 X 9/16 FJ 16' PRIMED 16' 8012FJP

Practical Considerations

When choosing trim for a luxury home:

  • Scale and Proportion: Ensure trim size complements ceiling height and room dimensions.
  • Style Consistency: Match trim style with interior theme (modern, classic, transitional).
  • Durability: Consider moisture-prone areas and high-traffic spaces.
  • Installation Quality: Even the best materials look cheap if poorly installed.

Types of Interior Doors for Homes

Trim works in harmony with door designs. Common interior doors in luxury houses include:

  • Paneled Doors: Traditional, timeless look
  • Flush Doors: Sleek, modern aesthetic
  • Glass-Panel Doors: Adds light and openness
  • French Doors: Elegant, enhances transitions

Selecting trim that complements your door type enhances architectural cohesion.

Common Mistakes to Avoid

  • Installing trim too small or disproportionate to the room
  • Ignoring the style consistency between trim and doors
  • Using low-quality materials in high-traffic areas
  • Skipping professional finishing touches like caulking and sanding

Expert Tips and Best Practices

  • Use MDF crown moldings in painted rooms for cost-effectiveness
  • Combine flexible trim with straight baseboards for curved designs
  • Always measure and dry-fit before nailing
  • Consider hiring a professional for complex crown molding or large-scale installations

Real-World Use Cases

  • Living Rooms: Crown molding paired with coffered ceilings enhances height and elegance.
  • Kitchens: Trim around cabinets and windows adds polish and protects edges.
  • Bedrooms: Decorative baseboards and panel moldings make rooms feel intentional and luxurious.
  • Entryways: High-quality door casings elevate first impressions of the home.

For comprehensive building and renovation supplies, see our guide to Home Building & Renovation Supplies.

Customer Testimonials

Installing premium trim throughout our home made a huge difference—the rooms feel polished and cohesive.
— Sarah M.

We chose flexible trim for our curved staircase. It was seamless and elegant.
— David L.

The combination of MDF crown moldings and high-quality baseboards gave our living spaces a professional finish.
— Priya K.

FAQ

What is the best trim for luxury homes?
High-end luxury homes often use solid wood, MDF, or flexible trim, chosen based on interior style, ceiling height, and design detail level.

How do I choose the right crown molding?
Select crown molding based on ceiling height and room size. Larger rooms and higher ceilings suit wider, more detailed moldings for balanced proportions.

Can interior trim increase home value?
Yes, quality interior trim enhances visual appeal and craftsmanship, which can improve perceived home value and buyer interest.

How do I maintain interior trim?
Maintain trim by regular dusting, occasional repainting or touch-ups, and avoiding moisture exposure to prevent damage and wear.

What is the difference between baseboards and crown molding?
Baseboards protect and finish the lower wall at floor level, while crown molding decorates the ceiling line and adds a refined architectural finish.

Conclusion

Interior trim for luxury houses is more than a decorative element—it’s a practical, aesthetic, and investment-enhancing feature. Choosing the right materials, proportions, and designs ensures that every room feels cohesive, polished, and upscale. Proper installation and thoughtful design choices transform spaces and create a lasting impression of quality craftsmanship.

About the Editorial Team

This guide was written by the Spire Building Supplies editorial team, drawing on years of experience in home improvement, building materials, and interior design. Our insights focus on practical, hands-on advice to help homeowners make informed, high-value decisions for modern luxury homes.

kitchen pantry doors

Kitchen Pantry Doors: Hidden Features You Need Now

When homeowners plan a kitchen upgrade, they usually focus on cabinets, countertops, and appliances. But kitchen pantry doors are one of the most overlooked elements that directly impact functionality, storage efficiency, and overall design flow. The right pantry door doesn’t just close off shelves; it affects traffic patterns, lighting, accessibility, and even perceived home value.

At Spire Building Supplies, we regularly work with contractors and homeowners who realize too late that pantry door decisions weren’t carefully planned. The result? Clearance problems, mismatched heights, poor ventilation, or doors that simply feel out of scale.

This guide breaks down the hidden features most people miss and what actually works in real kitchens.

Why Pantry Doors Matter More Than You Think

A pantry door may seem like a minor detail, but in practice it plays a structural and visual role in your kitchen.

It influences:

  • How easily you access daily-use items
  • Whether the refrigerator and drawers open smoothly
  • How natural light moves through the space
  • The visual height and symmetry of your kitchen

Choosing among the best doors for your pantry isn’t about decoration; it’s about long-term functionality.

Understanding Pantry Door Basics

Before diving into hidden features, let’s clarify what qualifies as pantry doors and how they differ from other door types.

Interior vs. Exterior Doors

Pantry doors are interior doors designed for enclosed storage spaces. They are not engineered like exterior universal iron doors, which are built for weather resistance, insulation, and security. Pantry doors prioritize the following:

  • Space efficiency
  • Interior design continuity
  • Accessibility
  • Lightweight or moderate-weight construction

Knowing this distinction helps avoid overbuildin or underbuilding your pantry entry.

Pantry door

Hidden Features You Should Consider

From years of real-world installations and renovations, here are the features that make the biggest difference.

1. Door Height: 6’8″ vs 8’0″

One of the most overlooked decisions is door height.

Most homes use a Pantry door 6’8″ Height (80 inches). It’s standard, widely available, and budget-friendly.

But in homes with 9- or 10-foot ceilings, upgrading to a Pantry door 8’0″ Height can dramatically improve visual proportion.

When 6’8″ Height Works Best:

  • 8-foot ceilings
  • Traditional layouts
  • Budget-sensitive remodels

When 8’0″ Height Makes Sense:

  • Taller ceilings
  • Open-concept kitchens
  • Custom cabinetry that runs full height
  • Modern or transitional styles

In real projects, the difference is noticeable. An 8-foot pantry door often makes the entire kitchen feel more custom especially when aligned with tall cabinets.

2. Door Swing Direction (The #1 Installation Mistake)

This is where many homeowners run into trouble.

Common issues:

  • Door hits the kitchen island
  • Blocks refrigerator access
  • Interferes with cabinet drawers

Before finalizing your order:

  • Map the swing arc with painter’s tape
  • Confirm hinge orientation
  • Check appliance clearance

If space is tight, sliding or bi-fold Pantry doors may solve the issue entirely.

3. Solid Core vs Hollow Core

Homeowners rarely ask about door core type — but they should.

Hollow Core:

  • Lightweight
  • Lower cost
  • Minimal sound insulation
  • Can feel less substantial

Solid Core:

  • Better sound dampening
  • More durable
  • Higher-end feel
  • Better for pantries with secondary appliances

If your pantry contains a wine cooler, freezer, or coffee station, solid core is usually worth the upgrade.

4. Glass Panels: Function Beyond Aesthetics

Glass pantry doors aren’t just decorative.

They can:

  • Allow natural light into darker areas
  • Reduce daytime lighting needs
  • Make small kitchens feel more open

However, clear glass exposes clutter. Frosted or textured glass offers privacy while still letting light pass through — often the most practical solution.

5. Ventilation & Airflow

Pantries can trap heat and moisture, especially if they house small appliances.

Consider:

  • Louvered door panels
  • Vent cutouts
  • Passive airflow gaps

Poor ventilation can lead to stale odors or moisture buildup — something homeowners often discover months after installation.

6. Hardware Compatibility

Handles and hinges aren’t just decorative details.

Common mistakes include:

  • Oversized pulls that hit cabinetry
  • Inadequate hinges for solid-core weight
  • Ignoring soft-close hardware options

Durability matters. Proper hinge strength and alignment prevent long-term sagging.

Choosing the Best Doors for Different Kitchen Layouts

There is no one-size-fits-all solution.

Small Kitchens

  • Sliding barn-style doors
  • Bi-fold systems
  • Frosted glass panels

These maximize clearance and improve flow.

Large Kitchens

  • 8’0″ Height doors
  • Double pantry doors
  • Decorative panels matching cabinetry

Modern Homes

  • Flush slab doors
  • Minimal hardware
  • Full-height designs

Traditional Homes

  • Raised panel doors
  • 6’8″ Height standard sizing
  • Classic hardware finishes

Coordinating Pantry Doors with Whole-Home Design

Your pantry door shouldn’t feel disconnected from the rest of the home.

For example:

  • If the home features bold Exterior Universal Iron doors at the entry, interior doors should balance rather than compete.
  • Door trim and casing should align proportionally with the ceiling height.
  • Finish colors should complement cabinets and flooring.

A cohesive door strategy enhances overall design continuity.

If you’re planning broader upgrades, this guide on Home Building & Renovation Supplies is a helpful resource for understanding how doors fit into a larger renovation plan.

Real-World Mistakes We See Often

From hands-on experience, these are the most common pantry door errors:

1. Measuring the Slab Instead of the Rough Opening

Always measure:

  • Rough opening width
  • Rough opening height
  • Wall thickness

Incorrect measurements lead to expensive reorders.

2. Ignoring Floor Level

Even slight floor unevenness can cause latch issues or improper swing alignment.

3. Choosing Style Before Function

Many homeowners choose based on photos without considering:

  • Daily traffic flow
  • Appliance placement
  • Lighting conditions

Function should always lead design.

4. Overlooking Storage Depth

If your pantry shelves are deep, make sure the door allows full access. Narrow swing angles limit usability.

Practical Buying Checklist

Before placing your order, confirm:

  • Ceiling height
  • Rough opening dimensions
  • Swing direction
  • Core type
  • Ventilation needs
  • Hardware compatibility
  • Design coordination with adjacent doors

This prevents 90% of post-installation frustration.

Real-World Use Cases

Case Study: Compact Kitchen Upgrade

A homeowner replaced a standard swinging door with a sliding option. The result:

  • Gained nearly a foot of usable space
  • Improved appliance access
  • Eliminated collision with island seating

Case Study: Full Renovation with Tall Ceilings

Switching from 6’8″ to 8’0″ Height created better alignment with ceiling-height cabinets and trim. The kitchen immediately felt more architecturally balanced.

FAQ

What is the standard pantry door size?

Most homes use an 80-inch (6’8″) tall door. Taller homes may benefit from 96-inch (8’0″) options.

Are glass pantry doors practical?

Yes — especially in darker kitchens. Frosted glass provides light without exposing clutter.

Should pantry doors match other interior doors?

They should coordinate in style and finish, but exact matching isn’t required.

Is solid core worth it?

If noise control and durability matter, solid core is often a smart investment.

Are sliding doors better?

In tight kitchens, sliding doors improve clearance. In larger kitchens, hinged doors allow wider access.

What Homeowners Are Saying

Upgrading to an 8-foot pantry door changed the entire look of our kitchen. – Daniel T.

We didn’t think about swing direction at first. After switching to sliding, everything flows better. – Maria L.

Solid core made a noticeable difference. It feels sturdier and blocks the sound from our freezer. – Kevin R.

Final Thoughts

Kitchen upgrades aren’t only about cabinetry and appliances. The right pantry door improves daily functionality, enhances design flow, and prevents frustrating layout issues.

Well-selected kitchen pantry doors:

  • Improve access
  • Support airflow
  • Enhance lighting
  • Elevate visual proportion
  • Add perceived value

At Spire Building Supplies, we’ve seen firsthand how thoughtful door selection prevents costly corrections later. The key is planning early, measuring accurately, and prioritizing functionality alongside style.

Treat your pantry door as an architectural element not an afterthought.

About the Author

Editorial Team – Spire Building Supplies

Our team works closely with builders, remodelers, and homeowners across residential construction and renovation projects. With hands-on experience in door systems, framing requirements, and interior finishing, we focus on practical guidance rooted in job-site reality. Our goal is to help homeowners make informed decisions that perform well long after installation is complete.

Back to Top

Search For Products

Product has been added to your cart