luxury vinyl plank flooring installation

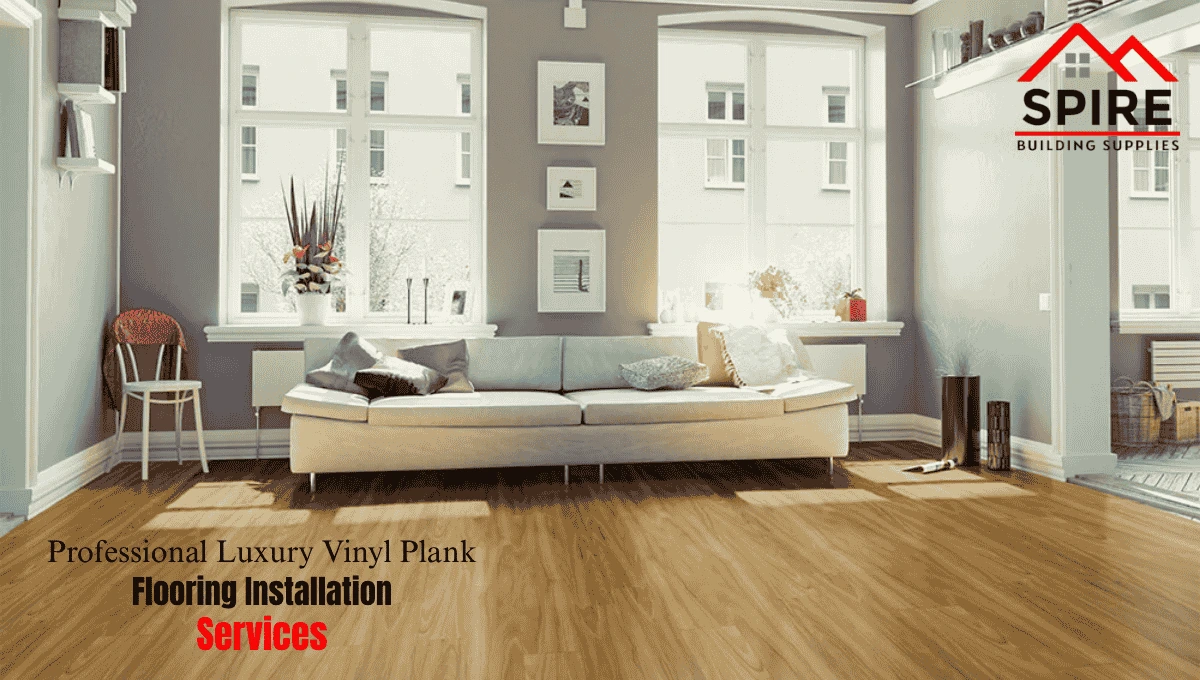
Professional Luxury Vinyl Plank Flooring Installation Services

Choosing new flooring is one of those decisions that feels simple until you’re standing in a showroom surrounded by options. If you’ve been researching luxury vinyl plank flooring installation, you’ve likely already noticed how much variation exists in materials, thickness, installation methods, and cost. Get it right and you’ll have a floor that looks sharp, holds up to daily life, and adds real value to your home. Get it wrong and you’ll be living with squeaks, gaps, and lifting edges for years.

This guide cuts through the noise. Whether you’re tackling a single room or an entire level, here’s what you actually need to know before the first plank goes down.

What Is Luxury Vinyl Plank Flooring?

Luxury vinyl plank (LVP) is a synthetic flooring material engineered to look like hardwood or stone. It’s built in layers: a rigid or semi-rigid core, a photographic film layer that replicates natural textures, and a wear layer on top that protects against scratches, scuffs, and moisture.

Unlike traditional hardwood, LVP doesn’t swell or shrink dramatically with humidity changes. Unlike laminate, most modern LVP is genuinely waterproof not just water-resistant. That distinction matters a lot in kitchens, bathrooms, and basements.

The category has expanded significantly over the past decade. You’ll now find options ranging from basic 4mm planks to thick, rigid-core formats at 8mm or more. The wear layer thickness — typically measured in mils determines how long the surface holds up under foot traffic.

Key Factors That Affect LVP Installation Quality

Installation quality determines about half of how your finished floor performs. A beautiful product installed poorly will fail early. A mid-range product installed correctly will serve you well for years.

Subfloor Condition

This is where most installations go wrong. LVP requires a flat, clean, and dry subfloor. Industry standard calls for no more than 3/16 inch variation over 10 feet. Any humps, dips, or ridges will telegraph through the planks over time — and in rigid-core formats, they’ll cause planks to crack at the locking joints.

Concrete subfloors need moisture testing before installation. Elevated moisture levels can cause adhesion failures or mold growth beneath the floor, even with “waterproof” LVP.

Acclimation

Even waterproof LVP benefits from acclimation. Letting the product sit in the installation environment for 24–48 hours allows it to stabilize to the room’s temperature and humidity. Skipping this step can lead to expansion-related issues after install.

Expansion Gaps

LVP still expands and contracts with temperature swings. Every installation requires expansion gaps at walls, door frames, and transitions — typically 1/4 inch. Without them, planks will buckle in warm weather. Installers who skip this step are the reason floors fail in summer.

Underlayment

Some LVP comes with pre-attached underlayment. If yours doesn’t, you’ll need a separate layer to reduce noise, add minor cushioning, and help the floor float more smoothly over minor subfloor imperfections. Never double up underlayment it creates too much give and can compromise the locking joints.

LVP Thickness: What the Numbers Actually Mean

Thickness is one of the most misunderstood specs in flooring. Here’s a straightforward breakdown:

  • 4mm–5mm: Suitable for rooms with light traffic and a flat subfloor. Good for bedrooms or low-traffic offices.
  • 6mm–7mm: A solid mid-range choice for living rooms and open-plan areas.
  • 8mm+: Rigid-core or stone polymer composite (SPC) formats. Better at hiding minor subfloor imperfections and more durable under heavy furniture and foot traffic.

If you’re comparing specific products, the Discovery Ridge Luxury Vinyl Tile And Plank 4.5mm is a well-suited option for moderate-traffic areas where a clean aesthetic matters. For spaces that see more wear or need added durability, the Explorer’s Cove Luxury Vinyl Tile And Plank 5mm offers a slightly thicker profile with the same reliable locking system.

Benefits of Luxury Vinyl Plank Flooring

There’s a reason LVP has displaced laminate and engineered hardwood in so many renovation projects. It delivers a combination of features that’s hard to match at the price point.

Waterproof core. Most rigid-core LVP is 100% waterproof through the entire plank, making it safe for wet areas where wood-based products can’t go.

Durability. A quality wear layer handles daily foot traffic, pet claws, and dropped items without showing the damage quickly.

Easy maintenance. Sweep regularly, damp mop as needed. No waxing, no refinishing, no special cleaners required.

Realistic visuals. Modern printing technology means the best luxury vinyl plank flooring is difficult to distinguish from real hardwood or stone at a glance — and in some cases, in photos.

Comfortable underfoot. Especially with attached underlayment, LVP is softer and warmer than tile and more forgiving on joints than hardwood over concrete.

Faster installation. Most LVP uses a click-lock floating system that an experienced installer can move through quickly. No adhesive curing time required.

Realistic Limitations to Consider

No flooring is perfect. Here’s what LVP doesn’t do well:

  • It can’t be sanded or refinished. Once the wear layer is gone, the floor needs replacing.
  • It can be damaged by prolonged exposure to direct sunlight — UV fading is real, especially in south-facing rooms.
  • In very cold environments, rigid-core products can become brittle and more susceptible to impact damage.
  • It doesn’t add the same resale value perception as real hardwood, though this gap has narrowed.
  • Heavy furniture with small legs can dent or compress LVP if left in place long term. Use furniture pads.

Common Installation Mistakes to Avoid

These are the errors that show up most often — and the ones that are most costly to fix after the fact.

Skipping the moisture test. If you’re installing over concrete, test first. Always. Moisture is the number one cause of LVP failure over concrete subfloors.

Not checking subfloor flatness. Running a straightedge across the subfloor takes 20 minutes. Skipping it and discovering the problem after installation can cost significantly more to fix.

Forgetting expansion gaps at vertical surfaces. This includes door frames, cabinets, islands, and any vertical obstacle — not just perimeter walls.

Starting in the wrong direction. Planks should generally run parallel to the longest wall or the primary light source. Running them perpendicular to natural light can exaggerate seams visually.

Rushing transitions. Where LVP meets tile, carpet, or changes elevation, transitions need the right profile type. Using the wrong one looks amateurish and can create a tripping hazard.

Mixing batches without checking dye lots. Slight color variation between production runs is normal. Mix planks from multiple boxes throughout the installation to blend any differences naturally.
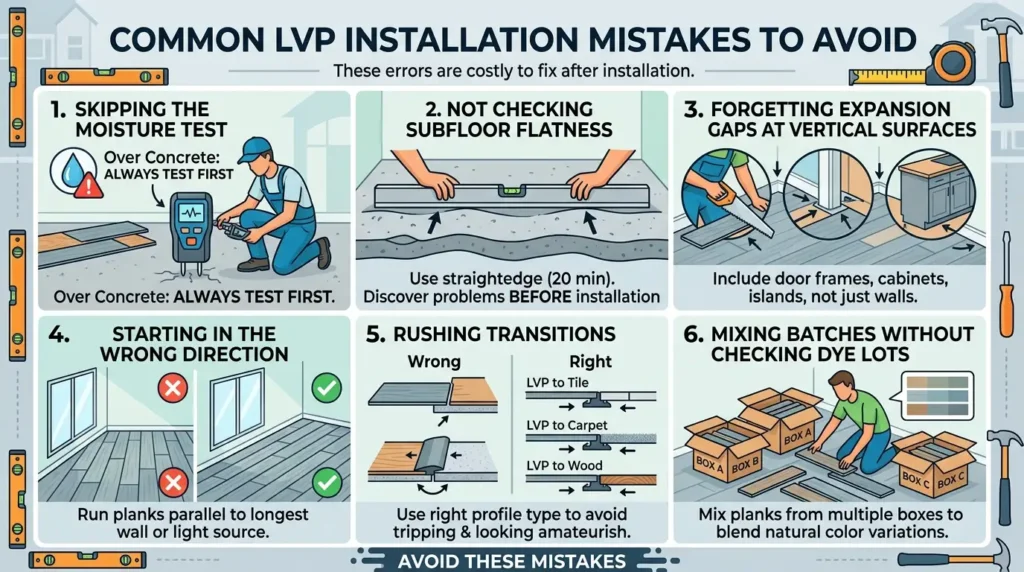
Common Installation Mistakes to Avoid

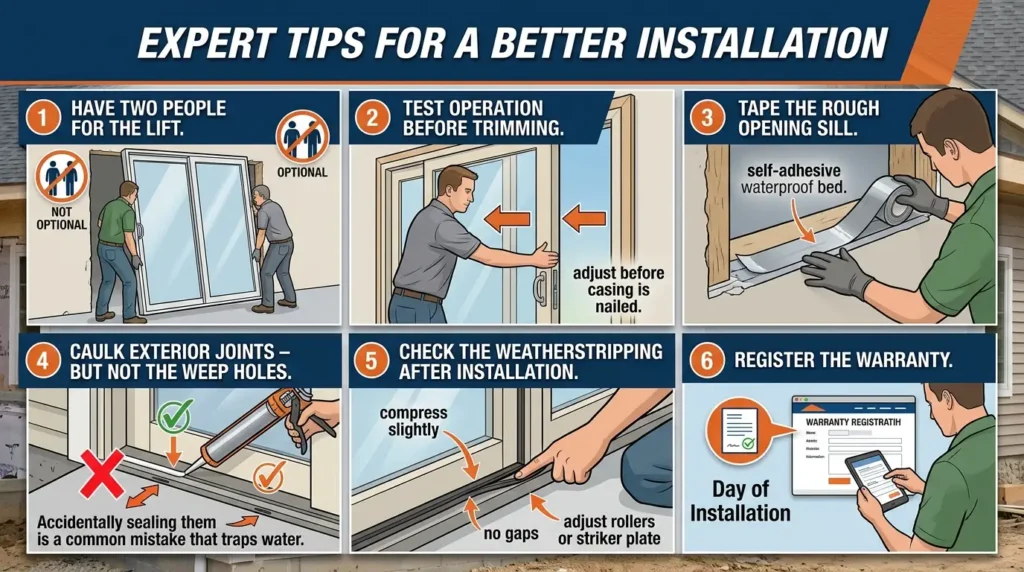
Expert Tips for a Better Installation

These aren’t just best practices from a manual — they’re the things experienced installers actually do on every job.

  • Stagger end joints by at least 6 inches between adjacent rows. Short joints close together create a “stacked” look that looks manufactured and structurally undermines the floor.
  • Work from multiple boxes at once. Pulling planks from two or three open boxes at a time randomizes the pattern and prevents visual clustering of similar-grain planks.
  • Use a pull bar and tapping block. Click-lock systems need to be seated fully. Hand pressure alone often leaves gaps that open further over time. The right tools make the connection solid.
  • Undercut door casings. Sliding LVP under the existing casing looks far more professional than cutting around it. A jamb saw or oscillating tool makes this quick.
  • Install the last row before baseboard and trim. Leave the expansion gap visible until trim covers it. This keeps the floor free and allows movement without restriction.

What to Look for in a Professional Installer

Not all flooring installers bring the same standard of work. Before hiring, ask:

  • Do they test the subfloor moisture before starting?
  • How do they handle transitions to adjacent flooring types?
  • What warranty do they offer on the labor itself?
  • Can they provide before-and-after photos of similar projects?

A quality installer will welcome these questions. One who deflects them is telling you something.

Real-World Use Cases

Open-plan kitchen and living areas: LVP running continuously through kitchen, dining, and living creates a seamless look. Because it’s waterproof, spills near the kitchen sink or dining table aren’t a concern.

Basement conversions: Below-grade concrete presents moisture challenges that rule out wood-based flooring. Rigid-core LVP, properly installed over a vapor barrier, handles this environment well.

Rental properties: The durability-to-cost ratio of LVP makes it the go-to choice for landlords. It handles tenant traffic without showing wear quickly and doesn’t require the refinishing that hardwood eventually needs.

Pet owners: LVP with a thick wear layer handles claws significantly better than hardwood. It’s also easier to clean than carpet for accidents.

People Also Ask:

How long does luxury vinyl plank flooring last?

With proper installation and regular maintenance, quality LVP typically lasts 15–25 years. Wear layer thickness is the biggest factor thicker wear layers hold up longer under heavy traffic.

Can luxury vinyl plank flooring be installed over existing tile or hardwood?

Often, yes provided the existing surface is flat, stable, and not too elevated. You need to account for height changes at transitions. Always check manufacturer guidelines for your specific product.

Is luxury vinyl plank flooring suitable for bathrooms?

Rigid-core and waterproof LVP formats are well-suited for bathrooms. The key is ensuring proper expansion gaps and using appropriate transition strips at the shower or tub edge.

What’s the difference between LVP and luxury vinyl tile (LVT)?

LVP mimics wood planks; luxury vinyl tile is cut in square or rectangular formats to replicate stone or tile. Both use the same core construction. The choice is primarily aesthetic.

How do I clean and maintain luxury vinyl plank floors? Sweep or vacuum regularly to remove grit, which causes surface scratches over time. Damp mop with a pH-neutral cleaner. Avoid steam mops — the heat can affect the adhesive and joints over time.

What Our Customers Say

We had LVP installed throughout our entire main floor kitchen, living room, hallway. The installer caught a moisture issue in the concrete before it became a disaster. The floor looks incredible and has handled two dogs and three kids without a mark. — Sandra M., homeowner

I was skeptical that vinyl could look like real hardwood. I’m not skeptical anymore. The texture and plank variation are genuinely impressive. Very happy with the result. — James R., condo renovation

We’ve used LVP in three of our rental units now. It holds up, it’s easy to clean between tenants, and it looks sharp. Makes a real difference in how quickly units rent. — Derek T., property manager

Pairing Your Floor with the Right Interior Finishes

A new floor doesn’t exist in isolation. Once you’ve selected your LVP, it’s worth thinking about how it connects to adjacent finishes. Door styles and trims, for instance, need to coordinate with your floor’s tone and texture. If you’re also updating entryways or interior spaces, it’s worth reviewing options for interior door installation alongside your flooring project to create a cohesive design outcome.

For a full range of flooring options to compare and consider, browse the flooring section at Spire Building Supplies.

About This Article

This guide was written by the editorial team at Spire Building Supplies a team with hands-on experience in residential and commercial building materials. Our goal is to give you honest, practical information that helps you make smarter decisions, whether you’re a homeowner, contractor, or designer. We don’t write to impress search engines. We write to be useful.
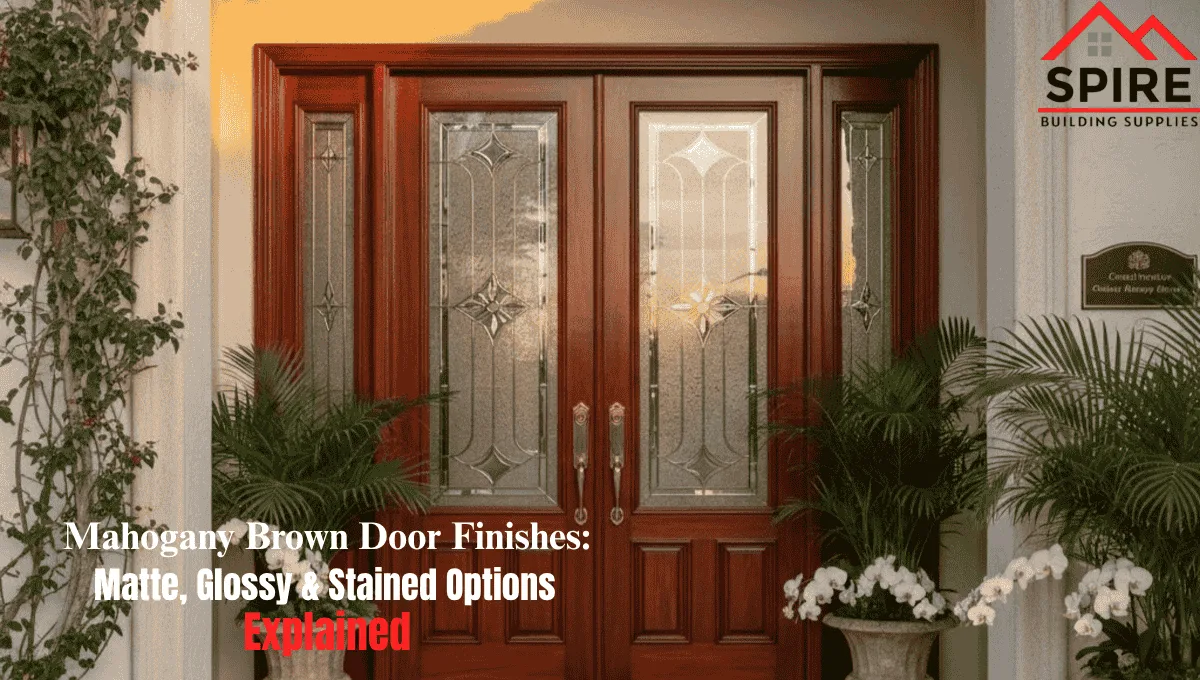
Mahogany Brown Door

Mahogany Brown Door Finishes: Matte, Glossy & Stained Options Explained

When choosing a mahogany brown door, the finish you select matters just as much as the wood itself. It defines the look, durability, maintenance level, and even how your home is perceived from the curb. Whether you’re designing a modern entryway in Texas or upgrading interior doors for a warm, timeless feel, understanding the difference between matte, glossy, and stained finishes will help you make the right decision.

At Spire Building Supplies, years of hands-on experience with premium door materials and customer-focused solutions have shown that homeowners don’t just want a door—they want a long-lasting investment that aligns with their style and climate conditions.

Why Finish Matters for a Mahogany Brown Door

Mahogany is naturally rich, durable, and visually striking. However, the finish enhances:

  • Color depth and grain visibility
  • Resistance to humidity and temperature changes (critical in Texas)
  • Longevity and ease of maintenance
  • Overall aesthetic—from modern to traditional

A poorly chosen finish can make even high-quality mahogany look dull or wear out faster. On the other hand, the right finish elevates both performance and visual appeal.

Understanding Mahogany Wood Characteristics

Before diving into finishes, it helps to understand why mahogany is so popular:

  • Dense hardwood with natural resistance to rot
  • Smooth grain structure, perfect for finishing
  • Deep reddish-brown tones that age beautifully
  • Ideal for both interior and exterior doors

This is why premium door options like Mahogany Wood 72X80 LH 5 Lite Equal Frosted IG, Mahogany 6 Lite (3/4) Over 1 Panel Clear IG Bevelled, and Mahogany Wood 72X80 RH 5 Lite Equal Frosted IG are highly preferred in residential projects—they combine durability with elegant design flexibility.

Types of Mahogany Brown Door Finishes

1. Matte Finish: Subtle, Modern & Low-Reflection

A matte finish gives your mahogany brown door a soft, non-reflective appearance. It absorbs light instead of reflecting it, creating a clean and understated look.

Best For:

  • Modern homes
  • Minimalist interiors
  • Low-maintenance households

Advantages:

  • Hides fingerprints and scratches well
  • Offers a natural wood appearance
  • Requires less frequent cleaning

Considerations:

  • Slightly less protective than glossy finishes
  • May need occasional refinishing over time

Real Experience Insight:
Many Texas homeowners prefer matte finishes for interior doors because they reduce glare in bright sunlight and maintain a consistent look throughout the day.

2. Glossy Finish: Bold, Reflective & Protective

A glossy finish enhances the richness of a mahogany brown door by adding shine and depth. It reflects light, making the wood grain stand out dramatically.

Best For:

  • Front entry doors
  • Luxury homes
  • Statement pieces

Advantages:

  • Strong protective layer against moisture and wear
  • Enhances color vibrancy
  • Easier to wipe clean

Considerations:

  • Shows fingerprints and dust more easily
  • Requires regular cleaning to maintain shine

Pro Tip:
In humid regions of Texas, a glossy finish acts as an extra barrier against moisture, making it ideal for exterior applications.

3. Stained Finish: Natural Depth & Custom Color Control

A stained finish penetrates the wood, enhancing its natural grain while allowing color customization. This is the most versatile option for a mahogany brown door.

Best For:

  • Traditional and transitional homes
  • Custom design projects
  • Homeowners wanting unique tones

Advantages:

  • Highlights natural wood grain beautifully
  • Wide range of shades (light brown to deep espresso)
  • Can be combined with matte or satin topcoats

Considerations:

  • Requires sealing for durability
  • Color may vary slightly depending on wood grain

Expert Insight from Spire Building Supplies:
Stained finishes are often recommended for customers who want a balance between natural aesthetics and personalization.

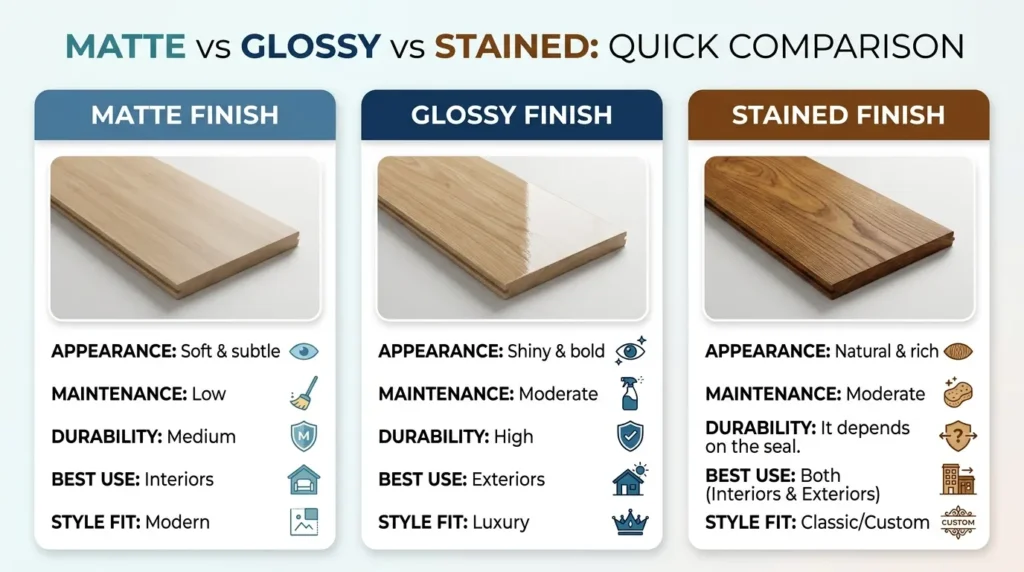
Matte vs Glossy vs Stained: Quick Comparison

Feature Matte Glossy Stained
Appearance Soft & subtle Shiny & bold Natural & rich
Maintenance Low Moderate Moderate
Durability Medium High It depends on the seal.
Best Use Interiors Exteriors Both
Style Fit Modern Luxury Classic/Custom

Matte vs Glossy vs Stained: Quick Comparison

Choosing the Right Finish for Texas Homes

Texas weather brings heat, humidity, and sun exposure, so your finish must handle these conditions.

Exterior Doors:

  • Go with glossy or sealed stained finishes
  • Provides better resistance against UV and moisture

Interior Doors:

  • Matte or satin finishes work best
  • Easier to maintain and visually balanced

High-Traffic Areas:

  • Glossy finish for durability
  • Or satin-stained combination

Design Pairing Ideas with Mahogany Brown Doors

A mahogany brown door isn’t just functional—it shapes your home’s personality.

Modern Homes:

  • Pair matte finish with neutral walls (white, gray)
  • Add black hardware for contrast

Traditional Homes:

  • Use stained finish with warm tones
  • Complement with brass or bronze hardware

Luxury Entryways:

Installation Considerations That Affect Finish Longevity

Even the best finish won’t perform well without proper installation.

Key Factors:

  • Proper sealing around edges
  • Moisture barriers for exterior doors
  • Professional alignment to prevent warping

At Spire Building Supplies, installation guidance ensures every door performs as expected—especially in demanding climates like Texas.

Maintenance Tips for Long-Lasting Finish

To keep your mahogany brown door looking new:

For Matte Finish:

  • Dust regularly
  • Avoid harsh cleaners

Glossy Finish:

  • Use microfiber cloth
  • Clean fingerprints frequently

For Stained Finish:

  • Reapply sealant every few years
  • Protect from direct sunlight

Why Homeowners Trust Spire Building Supplies

Spire Building Supplies has built a strong reputation by focusing on:

  • High-quality materials sourced for durability
  • Expert-level product knowledge
  • Customer-first approach
  • Proven experience in residential door solutions

Their range of mahogany doors is designed to meet both aesthetic and performance needs, especially for homeowners in Texas.

Real Customer Testimonials

James R., Dallas, TX
I installed a glossy mahogany brown front door from Spire Building Supplies, and it completely changed my home’s appearance. It still looks brand new after months of Texas heat.

Melissa T., Houston, TX
The matte finish on our interior doors is exactly what we wanted—simple, elegant, and easy to maintain.

Carlos M., Austin, TX
I went with a stained mahogany door for my entryway. The natural grain stands out beautifully. Highly recommend Spire Building Supplies.

People Also Ask (PAA)

What is the best finish for a mahogany brown door?
The best finish depends on usage. For exterior doors, glossy or sealed stained finishes provide durability. For interiors, matte finishes offer a clean and low-maintenance look.

Does a glossy finish last longer than matte?
Yes, glossy finishes generally last longer because they provide a stronger protective layer against moisture and wear.

Can you change the finish of a mahogany door later?
Yes, you can sand and refinish a mahogany door. This allows you to switch between matte, glossy, or stained finishes based on your preference.

Is a stained finish better than paint for mahogany doors?
Stained finishes are often better because they highlight the natural grain of mahogany, while paint hides it.

How do I maintain a mahogany brown door in Texas weather?
Use UV-protective sealants, clean regularly, and inspect for wear annually to ensure long-term durability.

Final Thoughts

Choosing the right finish for your mahogany brown door isn’t just about looks—it’s about durability, maintenance, and how your home feels every day. Matte finishes offer simplicity, glossy finishes deliver bold elegance, and stained finishes provide natural beauty with flexibility.

If you want a door that performs well in Texas conditions while maintaining timeless appeal, focusing on the right finish is essential. With expert-backed options and trusted solutions from Spire Building Supplies, you can confidently select a finish that fits your home and lifestyle.

See our exclusive collection of interior double doors; visit this page: Interior Double Doors for Dining Rooms: Elegant Space Planning

Author Bio

Spire Building Supplies
Spire Building Supplies is a trusted name in premium door solutions across the USA, especially in Texas. With years of industry experience, the team focuses on delivering high-quality materials, expert guidance, and customer-focused service to help homeowners choose doors that combine durability, style, and long-term value.

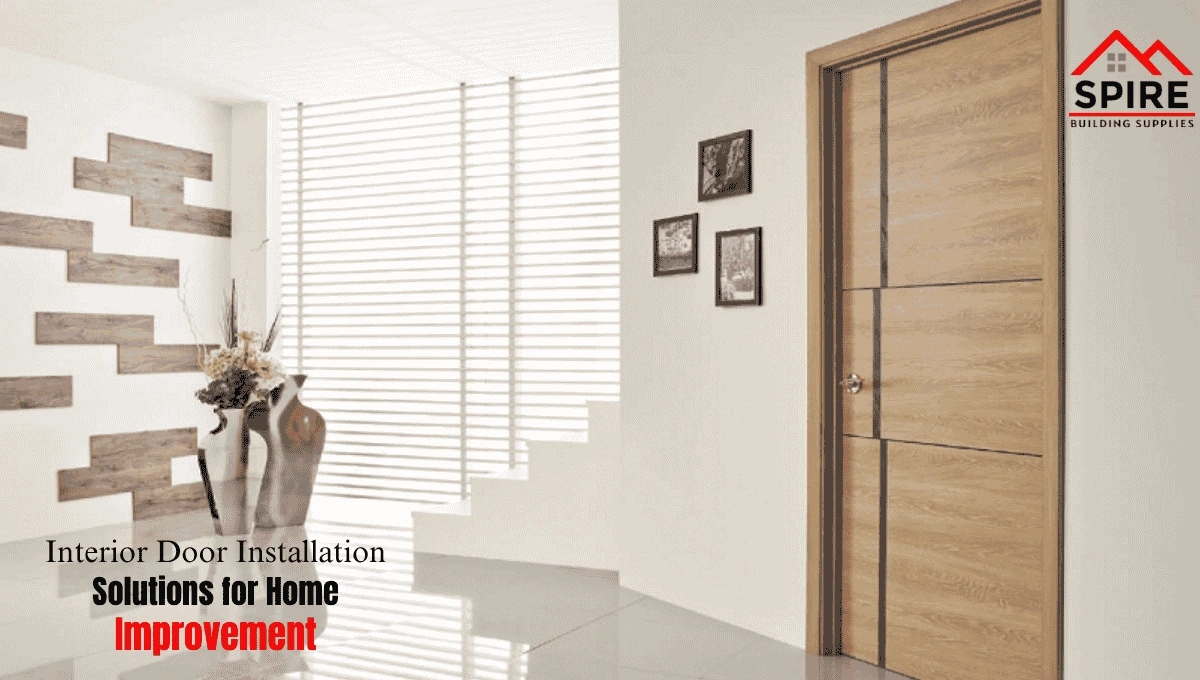
Interior door installation

Interior Door Installation Solutions for Home Improvement

A new door can completely change how a room feels but most homeowners don’t realize how much goes into getting it right. Interior door installation seems straightforward until you’re halfway through the project and discover the rough opening is off by half an inch, the door swings the wrong way, or the trim doesn’t sit flush. These are fixable problems, but they’re also avoidable ones.

Whether you’re replacing a worn-out hollow-core slab, upgrading to something more stylish, or tackling a new build, this guide walks you through everything you need to know before you buy, plan, or install. We’ll cover the different door types and styles, what to look for when choosing hardware and materials, and the mistakes that turn a weekend project into a week-long headache.

What Is Interior Door Installation? A Quick Overview

Interior door installation is the process of fitting a door along with its frame, hinges, and hardware into a wall opening inside a home. This can involve:

  • Pre-hung door installation: The door comes already attached to a frame, making it the easiest option for replacements or new openings.
  • Slab door installation: Just the door panel itself, which gets hung into an existing frame using new or existing hinges.
  • New rough opening construction: When you’re adding a doorway where one didn’t exist before, which involves framing work beyond just the door itself.

Each approach has different skill, tool, and time requirements. Knowing which situation you’re in before you purchase anything saves a lot of frustration.

Understanding Interior Door Styles: More Than Just Aesthetics

Choosing the right door isn’t just about looks the style affects how the door operates, how much space it needs, and what it costs to install.

Panel Doors

Panel doors are the most common interior door style in North American homes. They feature raised or recessed rectangular sections (panels) set within a frame of rails and stiles. A 1-panel square top MDF door gives a clean, modern look, while a 5-panel equal design is a timeless option that suits both traditional and transitional interiors.

Panel doors are widely available, easy to paint, and tend to be more rigid than hollow-core alternatives.

Flush Doors

Flush doors have a completely flat surface — no panels, no texture. They’re common in mid-century and contemporary homes and work well in minimalist spaces. Modern interior doors with flush profiles pair cleanly with integrated handles and simple frames.

French Doors

These are hinged double doors, typically with glass panels. Used between living areas, dining rooms, or as entry points to a home office. They let in light while still providing a degree of separation between spaces.

Barn Doors and Sliding Doors

Barn-style sliding doors have become popular for bathrooms, closets, and pantries where a swinging door would take up too much space. They require a wall section wide enough to slide into and a track system installed above the opening.

Bifold Doors

Bifold doors fold in on themselves and are a go-to for closets. They’re economical, widely available, and require minimal clearance but they don’t provide as much privacy or sound separation as solid-hung doors.

Key Measurements Before You Buy Anything

Getting your measurements wrong is the single most common source of problems in any door project. Here’s what you need to check:

Rough opening size: This is the framed opening in the wall. Standard interior doors are 80 inches tall (6’8″), with widths ranging from 24 to 36 inches. Your rough opening should typically be about 2 inches wider and 2.5 inches taller than the door size to allow for the frame and shimming.

Door swing direction: Stand in the doorway and determine which side the hinges will be on and which way the door will open. Measure clearance for the swing — you don’t want it hitting furniture or another door.

Floor-to-ceiling height: In older homes especially, ceilings and floors may not be perfectly level. Measure in multiple spots. If you’re installing a pre-hung unit, you need the frame to be plumb even if the surrounding structure isn’t.

Wall thickness: Standard interior walls are 4.5 inches (2×4 framing + drywall on both sides). Thicker walls — such as 2×6 framed walls or those with extra insulation — need extended jambs. Check before ordering.

Choosing the Right Door Material

The material affects cost, durability, paintability, and how the door performs over time.

Hollow-Core Doors

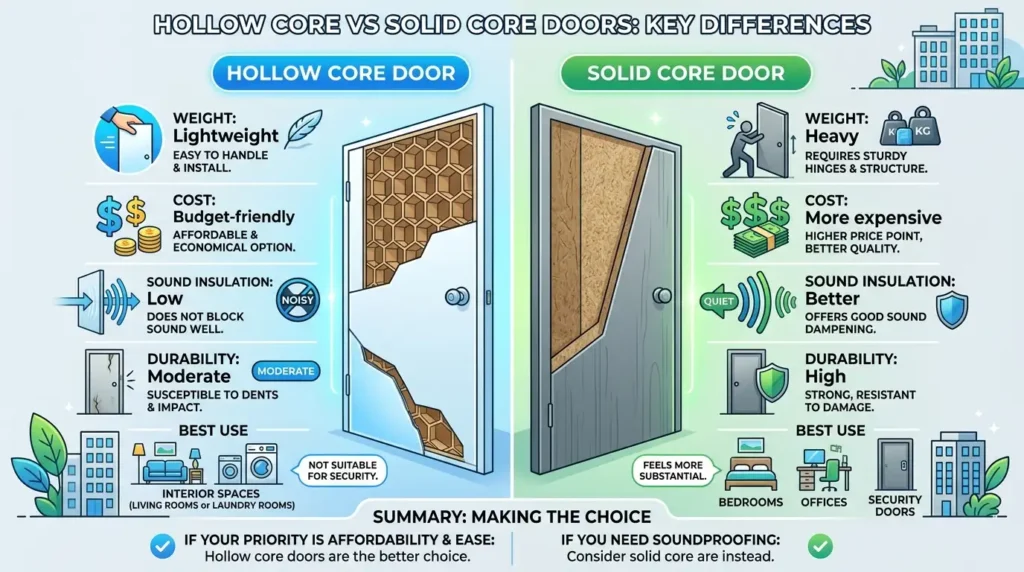
These are lightweight doors with a honeycomb cardboard core. They’re inexpensive and easy to handle solo, but they offer very little sound insulation and can be damaged easily. Good for closets or low-traffic areas where privacy and sound control aren’t priorities.

Solid Wood Doors

Real wood doors pine, oak, maple, or cherry offer excellent sound blocking, a premium feel, and can be stained or painted. The downside: they’re heavier, more expensive, and can warp or expand with seasonal humidity changes.

MDF (Medium-Density Fiberboard) Doors

MDF doors strike a balance between solid wood performance and cost. They’re denser than hollow-core, resist warping better than solid wood in humid environments, and take paint exceptionally well. For painted finishes, MDF is often the preferred choice of professional painters and contractors. MDF interior doors are especially popular for bathrooms and bedrooms where a crisp, smooth painted surface matters.

Solid Core Doors

These have an MDF or wood composite core inside an engineered wood shell. They’re heavier than hollow-core, significantly better at blocking sound, and more affordable than solid wood. A good middle-ground option for bedrooms, home offices, and media rooms.

Cheap Interior Doors: When Budget Options Make Sense (And When They Don’t)

Cheap interior doors typically hollow-core are perfectly serviceable in the right applications. A closet door doesn’t need to be solid core. A laundry room door doesn’t need sound isolation. Spending more than necessary on low-priority openings is a common mistake.

That said, low-cost doors tend to fall short in these situations:

  • Bedrooms: Thin doors let in hallway noise and light. A solid-core door makes a measurable difference in sleep quality.
  • Home offices: If you work from home and take calls, sound control matters. Hollow-core is not your friend here.
  • Bathrooms: Steam and humidity over time can degrade hollow-core doors faster than solid alternatives.
  • High-traffic areas: Kids slamming hollow-core doors will eventually show damage. Solid-core lasts longer under heavy use.

The smarter move is to spend your budget where the performance difference will actually be noticed and save on less critical openings.

Common Mistakes to Avoid

  1. Not Checking the Rough Opening Before Purchase

Ordering a door before verifying the rough opening size is a frustratingly common mistake. Measure twice. Then measure again.

  1. Forgetting About the Door Swing

Installing a door that swings into a wall switch, a toilet, or another door is a purely measurement problem — one that’s avoidable. Plan the swing direction before anything goes into the opening.

  1. Skipping the Level and Plumb Check

A door that’s even slightly out of plumb will either swing open or swing closed on its own. Always use a level when setting the frame, and shim as needed before nailing anything off.

  1. Using the Wrong Fasteners for the Wall Type

In homes with metal stud framing (common in condos and some commercial builds), you need screws appropriate for metal studs, not wood screws. Using the wrong fasteners means the hinges won’t hold properly.

  1. Rushing the Casing and Trim

Doors can look great or terrible depending on how well the casing sits against the jamb and the wall. Take your time with trim work. Gaps and uneven reveals are immediately visible and hard to ignore once you notice them.

  1. Ignoring the Floor Gap

The gap between the bottom of the door and the floor should be about 1/2 to 3/4 inch for air circulation and to clear carpet or rugs. Too tight and the door will drag. Too much and privacy and noise separation suffer.

Expert Tips for a Better Installation

Pre-drill hinge mortises accurately. Use a hinge mortise jig or a sharp chisel and take your time. A mortise that’s too deep makes the door bind; too shallow and it won’t close flush.

Set the strike plate last. Don’t cut the strike plate mortise until the door is hung and you can see exactly where the latch hits the jamb. Mark it with lipstick or chalk on the latch bolt, close the door, and the mark tells you precisely where to cut.

Paint or prime door edges before hanging. The edges of MDF and wood doors are the most vulnerable areas to moisture. Sealing all six sides — including the top and bottom edges — before installation extends the door’s life significantly.

Use 3-inch screws on at least one hinge. Standard hinge screws are short and only grip the jamb. Replacing the center screw on one hinge with a 3-inch screw that reaches the wall stud dramatically improves strength, especially on heavier solid-core or solid wood doors.

Check for square before the final nail. Once the frame is shimmed and roughly in position, measure the diagonals corner-to-corner. If they’re equal, the frame is square. If not, adjust before you commit.

Real-World Use Cases

Scenario 1 — Bedroom Upgrade in an Older Home: A homeowner in a 1970s house replaces hollow-core doors throughout with solid-core MDF panel doors. The result is noticeably quieter bedrooms and a more upscale look, at a moderate cost.

Scenario 2 — Home Office Addition: A couple converts a spare room into a shared home office. They install a solid-core door with a proper weatherstrip-style sweep and solid-core construction. Background noise from the rest of the house is significantly reduced during video calls.

Scenario 3 — New Construction Closet Build: A builder uses standard hollow-core bifold doors for all closets in a new build, reserving solid-core doors for bedrooms and bathrooms. This keeps costs manageable without compromising performance where it matters.

What to Consider If You’re Thinking About Exterior Upgrades Too

If your interior renovation has you thinking about the front entry as well, it’s worth considering what your exterior door says about the home. Exterior iron doors offer a significant visual upgrade and long-term durability and they pair well with updated interior doors to create a cohesive feel throughout the home.

What Our Customers Say

I was nervous about tackling the installation myself, but the pre-hung MDF doors from Spire were straightforward to work with. The finish is perfect for painting and everything lined up cleanly. Couldn’t be happier with how the bedroom turned out. — Michael T., homeowner

I’ve bought doors at the big-box stores before and was always disappointed by the quality. These MDF panel doors are noticeably better — heavier, cleaner edges, and the paint went on without any issues. Worth every penny. — Sandra R., interior designer

People Also Ask

Q: How long does it take to install an interior door?

A: A pre-hung door replacement typically takes 2 to 4 hours for someone with basic DIY experience. A slab door hung into an existing frame is faster around 1 to 2 hours. New rough opening construction takes longer and depends on the wall type.

Q: Can I install an interior door without removing the existing frame?

A: Yes, if the existing frame is in good condition and square. You’d be installing a slab door rather than a pre-hung unit. This is faster but requires that the existing jamb is undamaged and plumb.

Q: What is the standard interior door size?

A: The most common standard size is 80 inches tall by 32 inches wide (often written as 2’8″ x 6’8″). Bedrooms typically use 28–32 inch widths; bathrooms often use 24–28 inches. Always measure your rough opening before ordering.

Q: Are MDF doors good for bathrooms?

A: Yes, MDF doors perform well in bathrooms when all edges are properly sealed and painted. They resist warping better than solid wood in humid environments and take paint smoothly for a clean finish.

Q: What’s the difference between a pre-hung door and a slab door?

A: A pre-hung door comes with the frame, hinges, and sometimes the doorstop already assembled. A slab is just the door panel. Pre-hung is best for new openings or when the existing frame is damaged. Slab doors are simpler and cheaper when the frame is already in good shape.

Final Thoughts:

Interior doors don’t get as much attention as kitchens or bathrooms, but they’re one of those upgrades that quietly improves how a home feels every single day. The right door in the right opening properly hung, well-finished, and matched to the room’s needs is something you stop noticing because it just works.

The biggest takeaway from everything covered here: plan before you purchase. Measure the rough opening, decide on swing direction, match the material to the room’s demands, and don’t let budget decisions drive performance choices in areas where it will cost you comfort later.

Whether you’re replacing a single hollow-core door in a spare room or updating every interior door in the house, the decisions you make upfront style, material, sizing, and installation method determine how smooth the project goes and how long the result lasts.

Take your time, use the right tools, and don’t skip the level check. A well-installed door is one of those home improvements that pays off in both function and appearance for years to come.

About the Author

This article was written by the editorial team at Spire Building Supplies — a group of building professionals and home improvement specialists with hands-on experience in residential construction, door installation, and finish carpentry. Our goal is to help homeowners and trade professionals make smarter purchasing decisions by sharing practical, straightforward guidance based on real-world experience not marketing copy.

Looking for quality interior doors for your next project? Browse our full range of interior doors to find the right fit for your home.

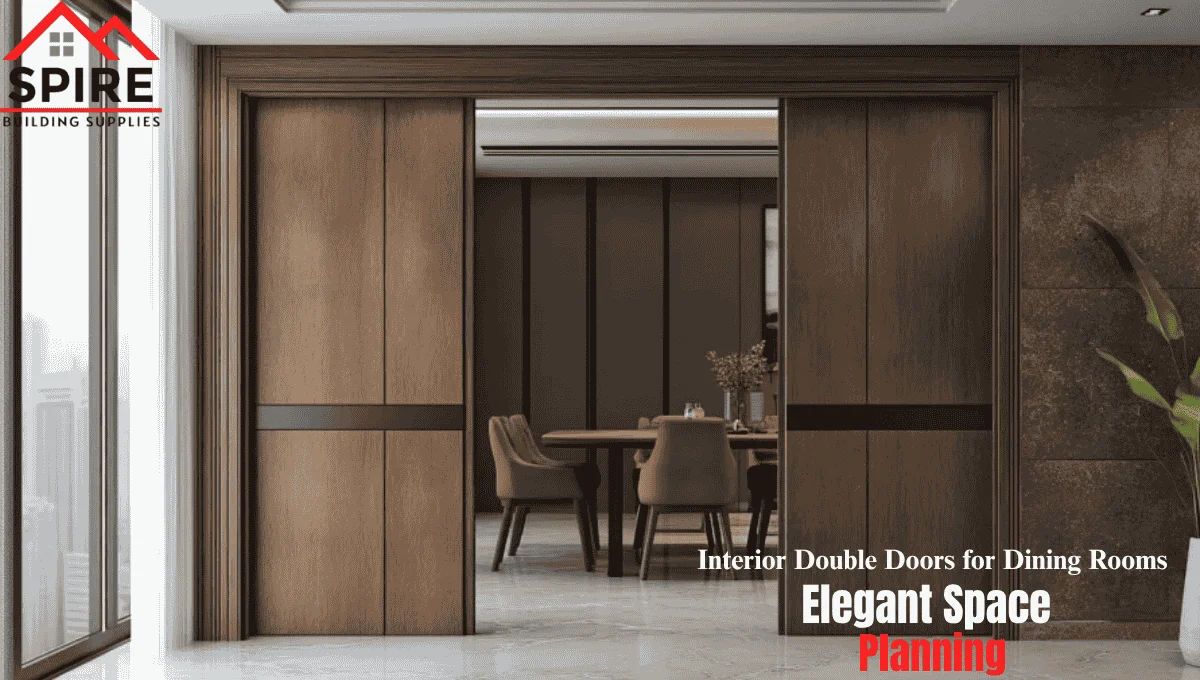
Interior Double Doors for dining room

Interior Double Doors for Dining Rooms: Elegant Space Planning

What if one simple design choice could completely change how your dining room feels the moment someone walks in? Not the table. Not the lighting. But the doors. Interior double doors have quietly become one of the most impactful upgrades in modern homes across Texas. They don’t just separate spaces—they create flow, frame your dining area like a centerpiece, and instantly add a sense of openness or privacy when you need it. Whether you’re hosting a lively dinner or enjoying a quiet family meal, the right double doors can transform the entire experience.

At Spire Building Supplies, we’ve seen firsthand how homeowners shift from basic layouts to more intentional, elegant spaces—simply by choosing the right interior double doors. And the difference isn’t subtle—it’s immediate.

Why Interior Double Doors Are Ideal for Dining Rooms

Dining rooms are unique spaces. They need openness for gatherings but also separation for privacy and noise control. An interior door solves this challenge effortlessly.

✔ Balanced Open & Closed Living

Double doors allow you to:

  • Open up your dining room for entertaining guests
  • Close it off for formal dinners or quiet family meals

This flexibility is especially valuable in modern open-concept homes across Texas.

✔ Enhanced Natural Light

If you choose glass or semi-glass options, double doors

  • Allow natural light to flow between rooms
  • Make smaller dining areas feel more spacious

✔ Elevated Visual Appeal

Compared to single doors, double doors:

  • Create symmetry
  • Add architectural depth
  • Improve perceived home value

Real Experience: What Homeowners in Texas Prefer

From real projects handled by Spire Building Supplies, homeowners in cities like Dallas, Austin, and Houston consistently choose:

  • Shaker-style interior double doors for modern homes
  • Glass panel double doors for transitional spaces
  • Solid panel doors for formal dining rooms

One clear trend: clean lines + neutral finishes dominate current preferences.

Best Styles of Interior Double Doors for Dining Rooms

Choosing the right style isn’t just about looks—it’s about how the space is used daily.

1. Shaker Style Double Doors (Most Popular)

Shaker doors remain the top choice because of their simplicity and versatility.

Common options include:

Why homeowners love them:

  • Clean, modern lines
  • Works with both contemporary and traditional interiors
  • Easy to pair with different finishes

2. Glass Interior Double Doors

Perfect for semi-formal dining areas.

Best for:

  • Open-concept homes
  • Homes needing more light flow

Pros:

  • Brightens space
  • Makes rooms feel larger

Cons:

  • Less privacy

3. Solid Panel Double Doors

If privacy and sound control matter most:

Best for:

  • Formal dining rooms
  • Homes with frequent gatherings

Benefits:

  • Better noise reduction
  • Strong visual presence

4. French Style Interior Double Doors

A timeless option that blends elegance with openness.

Key features:

  • Multiple glass panes
  • Classic appeal

Space Planning Tips for Dining Rooms

Installing interior double doors is not just about the product—it’s about how it fits into your space.

1. Measure Door Clearance Properly

Double doors need enough swing space. Always:

  • Measure wall-to-wall clearance
  • Consider furniture placement

2. Align with Dining Table Layout

Your doors should:

  • Open without blocking chairs
  • Complement table positioning

3. Think About Lighting

Doors with glass panels:

  • Enhance natural lighting during daytime
  • Reduce need for artificial light

4. Match Interior Theme

For example:

  • Farmhouse → White shaker double doors
  • Modern → Black framed glass doors
  • Traditional → Wood grain panel doors

Material Guide: What Works Best

Choosing the right material impacts durability, maintenance, and long-term value.

Solid Wood

  • Premium look
  • Long-lasting
  • Higher cost

MDF (Medium Density Fiberboard)

  • Budget-friendly
  • Smooth finish
  • Ideal for painted doors

Glass + Wood Combination

  • Stylish
  • Functional
  • Balanced light + privacy

Installation Insights (From Real Projects)

At Spire Building Supplies, one recurring issue we see is improper installation.

Common Mistakes to Avoid:

  • Incorrect frame alignment
  • Ignoring door swing direction
  • Using low-quality hardware

Pro Tip:

Always choose prehung interior double doors if you want:

  • Faster installation
  • Better alignment
  • Reduced labor costs

Cost of Interior Double Doors in Texas (2026)

Prices vary depending on style, material, and customization.

Average Cost Range:

  • Basic MDF Double Doors: $250 – $600
  • Shaker-Style Double Doors: $400 – $900
  • Solid Wood Double Doors: $800 – $2,000+
  • Glass Panel Double Doors: $700 – $1,500

Installation Cost:

  • $150 – $500 depending on complexity

Why Choose Spire Building Supplies

Choosing the right supplier matters just as much as choosing the right door.

Proven Industry Experience
Spire has worked with homeowners, contractors, and builders across Texas and the USA.

Quality You Can Trust
Each product is selected based on durability, performance, and design standards.

Customer-Focused Approach
From selection to installation guidance, Spire ensures:

  • Clear communication
  • Reliable product quality
  • Ongoing support

Testimonials from Real Customers

James R., Dallas, TX
I installed shaker interior double doors from Spire Building Supplies, and it completely changed how my dining room feels. It looks more open and high-end now.

Melissa T., Austin, TX
The 5-panel shaker doors were exactly what we needed. Great quality, easy installation, and perfect fit for our home.

Carlos M., Houston, TX
We chose glass interior double doors for our dining space, and the natural light difference is amazing. Highly recommend Spire.

People Also Ask (PAA)

Are interior double doors worth it?
Yes, they improve functionality, enhance visual appeal, and can increase perceived home value, especially in dining areas.

What size are standard interior double doors?
The most common size is:

  • Height: 80 inches (6’8)
  • Width: 60 to 72 inches total

Do interior double doors add value to a home?
Yes. Buyers often view double doors as a premium feature, particularly in dining rooms and living areas.

Which style is best for dining rooms?
Shaker-style and glass panel double doors are the most popular due to their balance of style and practicality.

Can I install interior double doors in a small space?
Yes, but consider:

  • Sliding double doors
  • Narrow-width configurations

Final Thoughts

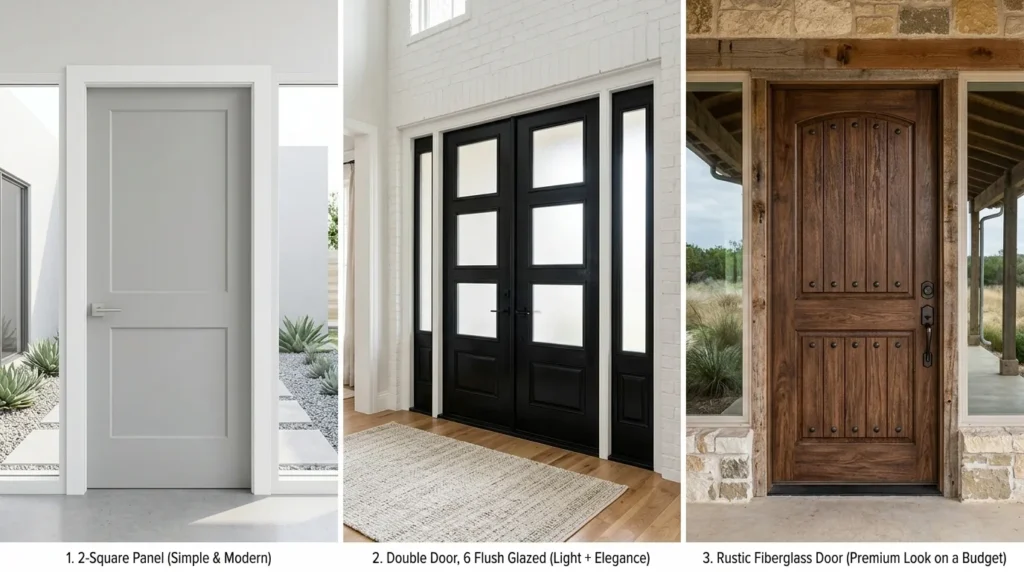
Interior double doors are more than just an upgrade—they are a strategic design decision that impacts how your dining room looks, feels, and functions every day. Whether you choose a 2-panel shaker 8’0″ height, a 5-panel shaker 6’8″ height, or a 5-panel shaker 6’8″ 80 inch, the key is aligning your choice with your space, lifestyle, and long-term goals.

If you’re planning a dining room upgrade in Texas or anywhere in the USA, investing in the right interior double doors can deliver both immediate visual impact and lasting value.

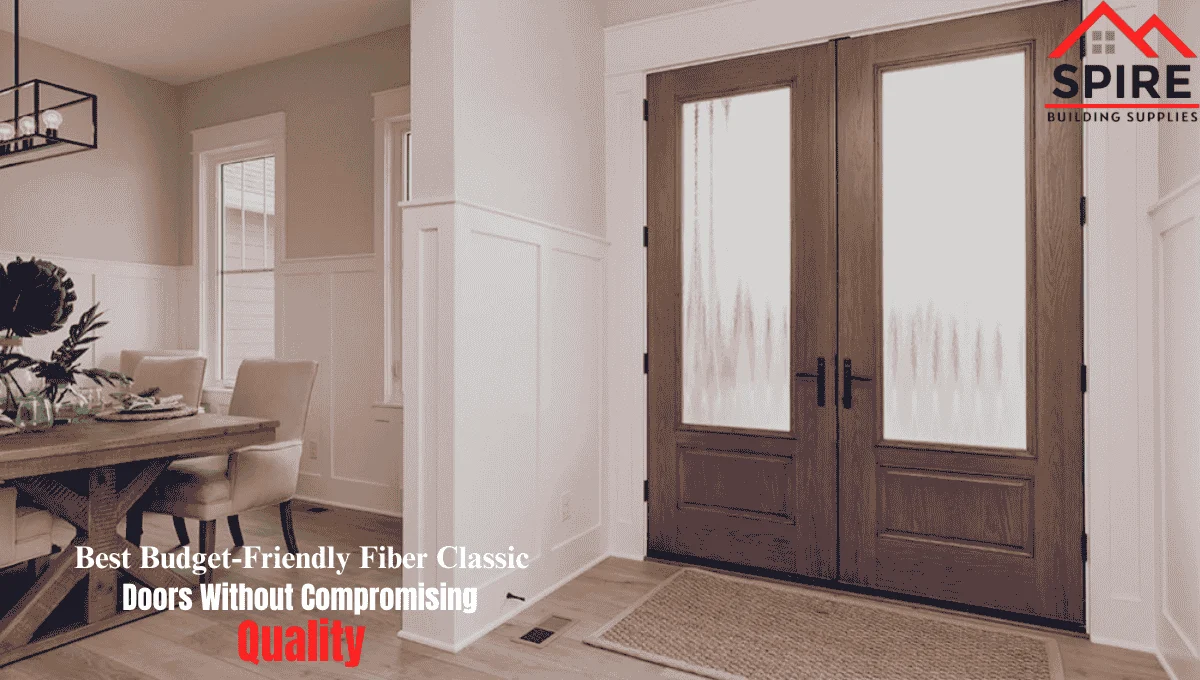
See our exclusive collection of fiber classic doors; visit this page: Best Budget-Friendly Fiber Classic Doors Without Compromising Quality

Author Bio

Spire Building Supplies:
Spire Building Supplies is a trusted USA-based supplier known for quality interior doors and practical expertise, helping homeowners and builders choose the right solutions with confidence.

Exterior iron doors

Exterior Iron Doors for Modern and Classic Home Designs

There’s something about a well-chosen front door that changes everything. It’s the first thing guests notice, the last thing you see when you leave for work, and one of the most lasting impressions your home makes on the street. Exterior iron doors have held a prominent place in residential design for centuries and if you’re considering one, you’re in good company. But choosing the right iron door requires more than picking a style you like. The material, construction, finish, glass configuration, and how well it’s matched to your home’s architecture all matter. This guide covers what you actually need to know before making that decision.

What Makes Iron Doors Different From Other Entry Doors

Iron doors particularly wrought iron front doors are in a category of their own. They’re heavier, more durable, and visually more commanding than wood, fiberglass, or steel doors. But that weight and presence come with trade-offs that buyers often don’t fully consider until after installation.

Here’s what sets them apart:

Material strength: Wrought iron is exceptionally resistant to warping, shrinking, and cracking problems that plague wood doors in climates with humidity swings or temperature extremes.

Design versatility: Iron can be forged, bent, and welded into elaborate scroll patterns, geometric grids, or clean minimalist frames. Few materials offer the same range of detail.

Longevity: A properly maintained iron entry door can outlast the house itself. That’s not a figure of speech some historic iron doors are hundreds of years old and still functional.

Glass integration: Most modern iron doors incorporate decorative or clear tempered glass panels, which allow light into the entryway without sacrificing security.

Weight: Iron doors are heavy often 200 to 400+ pounds depending on size and glass content. This means the frame, hinges, and substructure all need to be appropriately reinforced.

Styles That Work: Modern, Classic, and Everything In Between

One of the most common misconceptions is that iron doors are exclusively traditional or Mediterranean in style. That was true for a long time, but contemporary manufacturing has changed the picture significantly.

Classic and Mediterranean Designs

The original aesthetic for wrought iron front doors features ornate scrollwork, arch tops, and decorative glass — often with a warm bronze, oil-rubbed, or black patina finish. These pair beautifully with stucco exteriors, Spanish tile roofs, Tuscan-inspired masonry, and traditional Colonial or craftsman architecture.

Modern and Minimalist Designs

Clean-line iron doors have become increasingly popular in modern and transitional homes. Think flat bar grids, simple frame profiles, large glass panels, and matte black or satin finishes. These work especially well with contemporary homes featuring flat rooflines, large windows, and neutral palettes.

Transitional Designs

Transitional iron doors blend elements of both — perhaps a clean frame with subtle scrollwork accents, or a geometric pattern with a warmer finish. These tend to be the most flexible in terms of pairing with different home styles.

If you’re browsing options, take a look at the iron doors collection at Spire Building Supplies — it includes styles that span the design spectrum from traditional to contemporary.

Single vs. Double Iron Entry Doors: What to Choose

The size and configuration of your iron front door matters more than most buyers realize — both aesthetically and practically.

Single iron doors are the standard for most residential entrances. They’re more affordable, easier to install, and appropriate for standard-width doorways (typically 36 inches). A well-designed single iron door can still make a dramatic statement without overwhelming a modestly-sized facade. The Single Exterior Wrought Iron Door is a good example of how much presence a single door can carry.

Double iron doors are suited for grander entrances — wider openings, larger homes, or architectural situations where a pair of doors is proportionally appropriate. They create an undeniably dramatic effect but require more structural support and a wider rough opening.

A useful rule of thumb: if your entryway feels proportionally balanced with a single door, use a single door. Double doors on a narrow or small-scale facade can look overscaled and out of place.

Prehung vs. Slab: Understanding the Difference

If you’re shopping for exterior iron doors, you’ll quickly encounter these two terms.

Slab door: Just the door itself no frame, no hinges, no threshold. A slab iron door is installed into an existing frame. This is rarely the right choice for exterior applications unless you have a very specific reason and a very solid existing frame.

Prehung door: The door comes already mounted in a new frame, with hinges attached and the frame prepped for installation. This is the standard and recommended approach for exterior iron door replacement or new installation. The Winslow Wrought Iron Prehung Front Door is a good example of a prehung unit that’s built for clean, complete installation.

For almost all homeowners replacing an existing door, prehung is the right choice. The old frame comes out, the new prehung unit goes in, and you don’t have to worry about alignment issues that come from fitting a slab into an aged or imperfect existing frame.

Benefits of Exterior Iron Doors

Let’s look at why so many homeowners choose iron, and what the experience actually tends to look like in practice.

  • Curb appeal and resale value: Iron doors consistently rank among the highest-impact exterior upgrades for visual impression and perceived home value.
  • Security: The weight and construction of iron entry doors make forced entry significantly more difficult compared to hollow-core or standard wood doors.
  • Low warping and weather resistance: Unlike wood, iron doesn’t absorb moisture and warp. In humid climates or climates with wide temperature swings, this is a real practical advantage.
  • Customization: Many manufacturers offer custom sizing, finish options, glass configurations, and hardware — giving homeowners precise control over the final look.
  • Timelessness: Iron doesn’t follow trends the way other materials do. A well-chosen iron door looks appropriate across decades.

Realistic Limitations to Know Before You Buy

Honest buying decisions require knowing the limitations, not just the highlights.

Cost: Quality iron doors are not inexpensive. Expect to pay significantly more than you would for a fiberglass or steel door — and then add installation, which is more labor-intensive due to weight.

Energy efficiency: Iron is a conductor, which means thermal efficiency can be lower than composite or fiberglass alternatives unless the door is designed with thermal breaks or well-insulated glass panels. Look for iron doors specifically engineered for energy performance if this is a priority.

Maintenance: Iron will rust if the finish is compromised and moisture gets in. This requires periodic inspection and touch-up of the finish — especially in coastal or high-humidity environments. Some doors use weatherproof powder coatings that significantly reduce this concern, but they’re not maintenance-free.

Weight and installation complexity: Iron doors require professional installation in most cases. The weight stresses hinges, frames, and thresholds differently than a standard door — and getting the alignment right matters for long-term performance.

Condensation: In cold climates, iron doors can experience condensation on the interior surface during cold snaps if not properly sealed. This is manageable with proper weatherstripping and threshold seals.

Common Mistakes People Make When Choosing Iron Doors

These are the mistakes that tend to show up most often — worth reading carefully before you commit.

Choosing style without measuring the opening: Iron doors are heavy and often custom-sized. Measuring your rough opening accurately before shopping saves significant time and money. Measure width and height at multiple points, since older doorways are rarely perfectly square.

Ignoring the glass-to-iron ratio: More glass means more light but less privacy and potentially lower security and energy efficiency. Think about what your entryway actually needs — not just what looks best in a photo.

Underestimating installation complexity: Some homeowners assume installing an iron door is similar to installing a standard interior door. It isn’t. Hire experienced installers who have worked with iron specifically.

Forgetting about hardware compatibility: Wrought iron doors need hardware (locks, handles, hinges) that’s rated for the weight and finish. Mismatched hardware is both a functional and aesthetic problem.

Skipping weatherstripping: Iron doors without proper weatherstripping will have air leaks regardless of how well the door itself is made. Make sure the unit you buy includes quality weatherstripping, or plan to add it separately.

Not thinking about the entryway interior: The interior side of an iron door — especially one with large glass panels — becomes a significant visual element of your entryway. Consider how it coordinates with your flooring, baseboard trim styles, and wall finishes so the overall entry space feels cohesive.

Expert Tips for Getting This Right

Test the finish in your climate: If you live in a coastal or humid region, ask specifically about the corrosion resistance of the finish. Powder-coated finishes generally outperform painted iron in these conditions.

Think about your sidelights: Many iron front door installations look significantly better with matching sidelights (narrow glass panels on either side of the door). This adds light, symmetry, and visual weight appropriate for larger facades.

Consider a storm door only if necessary: In extremely harsh climates, a storm door adds protection — but visually, it can hide the iron door’s design. If you live in a mild climate, skip the storm door and let the iron speak for itself.

Plan your exterior lighting early: Iron doors, especially dark-finished ones, can disappear at night without proper lighting. Wall sconces, overhead lanterns, or recessed path lighting make a significant difference in how the door reads after dark.

Match the finish to your exterior hardware: Door handles, house numbers, light fixtures, and mail slots should all coordinate with the finish of the iron door. Mixing warm bronze with cool matte black, for example, creates a disjointed look that’s easy to avoid with a little planning.

Real-World Use Cases

Classic Colonial home in the Southeast: The homeowner replaced a painted wood door that was warping due to humidity. A single wrought iron front door with decorative scrollwork and dual glass panels solved the warping problem while significantly elevating curb appeal. The oil-rubbed bronze finish coordinated with the existing brick and brass exterior hardware.

Modern stucco home in the Southwest: A contemporary iron door with a flat grid pattern and large clear glass panels replaced a generic steel door. The matte black finish tied together the dark trim and metal roof accents. The owner noted that neighbors regularly comment on the entryway upgrade.

Mediterranean revival renovation: Double iron entry doors with an arched top and mosaic glass panels anchored a complete exterior renovation. The iron doors were the design decision that unified the roofline, stonework, and landscaping into a coherent aesthetic.

People Also Ask:

How long do exterior iron doors last?

With proper maintenance, iron doors can last 30 to 50 years or more. Wrought iron doors in well-protected historic buildings have lasted centuries. The key factors are finish quality, weatherstripping condition, and periodic touch-ups to prevent rust.

Are iron doors energy efficient?

Standard iron doors conduct heat and cold more than fiberglass or insulated steel doors. However, many modern iron doors are designed with thermal breaks and insulated glass that substantially improve energy performance. Look for this feature specifically if energy efficiency is a priority.

Do iron doors rust?

Yes, if the protective finish is compromised and bare metal is exposed to moisture. Quality iron doors come with protective coatings (often powder coat) that resist rust for years. Inspect the finish periodically and touch up any chips or scratches to prevent rust from developing.

Can I install an iron door myself?

Technically possible, but not recommended. Iron doors are very heavy and require precise alignment to function correctly and seal properly. Most homeowners benefit from hiring experienced installers — ideally ones with specific experience in iron door installation.

What finish is best for an iron door?

Powder coating is generally the most durable and low-maintenance option, providing strong protection against rust and UV fading. Oil-rubbed and hand-forged finishes offer more traditional aesthetics but may require more maintenance over time. Your choice should factor in climate, maintenance preferences, and the look you want to achieve.

What Customers Say

We replaced a wood door that had been warping for years. The iron door has been in place for three seasons now with no issues at all and the house looks completely different from the street. Worth every penny. — Homeowner, Texas

I was nervous about the weight and installation, but our contractor had done iron doors before and it went smoothly. The door operates smoothly and the quality is immediately obvious when you touch it. — Homeowner, Arizona

We went with a single iron door with sidelights instead of a double door, and it was the right call for our home’s scale. It looks proportional and elegant not overdone. — Homeowner, Florida

Final Thoughts

Exterior iron doors are one of the few home upgrades that deliver on both aesthetics and function if you choose and install them correctly. The mistakes are easy to avoid with a bit of upfront research, and the payoff in curb appeal, security, and longevity is real. Take the time to measure accurately, understand the climate-specific considerations for your region, and work with installers who know the material.

If you’re exploring options, browsing a well-curated selection of iron doors is a good place to start getting a feel for what styles, sizes, and configurations are available.

About the Editorial Team

This article was written by the content team at Spire Building Supplies a group of building products specialists and home design researchers with hands-on experience across exterior doors, millwork, and architectural hardware. Our goal is to give homeowners and contractors the kind of practical, honest guidance that helps them make better decisions not just sell products. We test what we talk about, consult with installers and contractors in the field, and update our content when specifications or industry practices change.

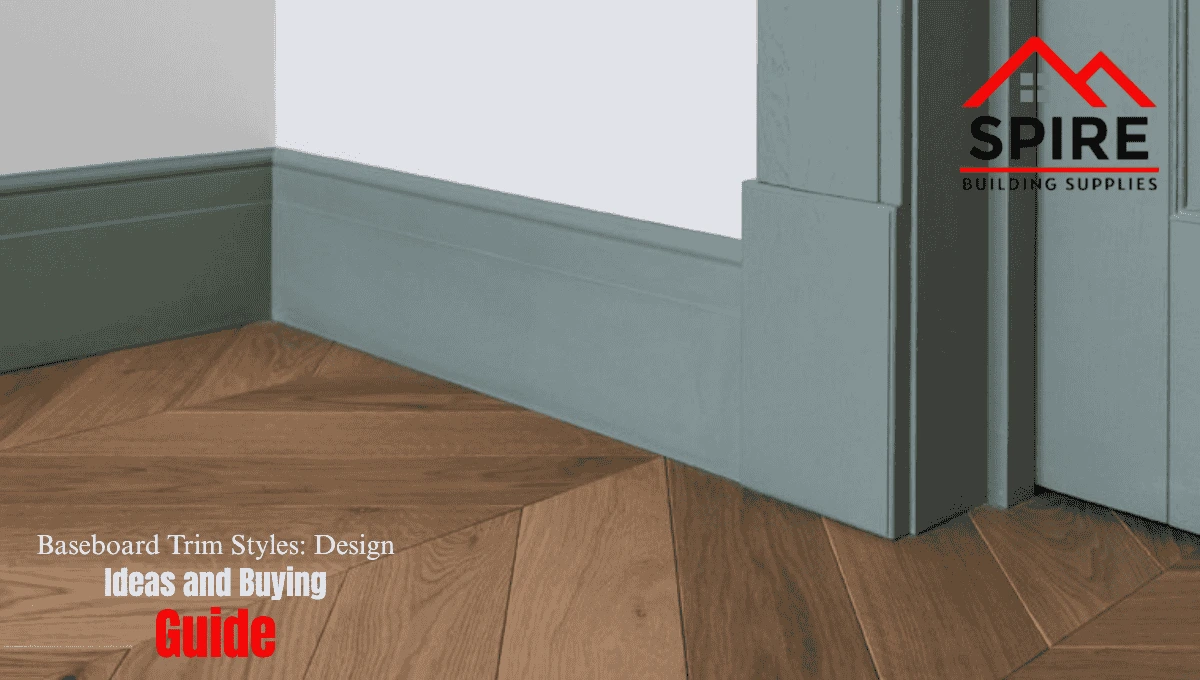
baseboard trim styles

Baseboard Trim Styles: Design Ideas and Buying Guide

Baseboards are easy to overlook but the moment you walk into a room where they’re done right, you notice. The right baseboard trim styles can ground a space, add architectural character, and make a room feel finished in a way that paint and flooring alone simply can’t. Choose the wrong style or skip the details, and even a beautifully renovated room can feel unresolved.

This guide breaks down the most popular baseboard and trim profiles, how to choose the right one for your home, what to watch out for when buying, and how to install baseboard trim without common mistakes. Whether you’re renovating a single room or outfitting an entire build, you’ll leave with a clear picture of what works and why.

What Is Baseboard Trim and Why Does It Matter?

Baseboard trim is the molding that runs along the bottom of interior walls where they meet the floor. Its practical job is to cover the gap between drywall and flooring protecting the wall from scuffs, moisture, and foot traffic. But its design role is just as important.

Well-chosen trim creates visual continuity between the floor and wall, helps define the overall style of a space, and adds a sense of quality and craftsmanship that’s hard to replicate with other finishes.

Baseboard heights typically range from 3 to 6 inches, with taller profiles generally reading as more formal or high-end.

Common Baseboard Trim Styles Explained

1. Flat (Pencil or Sanitary) Baseboard

This is the simplest profile a flat, straight board with minimal or no detailing. It works well in modern, minimalist, or Scandinavian-inspired interiors where clean lines are the goal. Flat baseboard is often used in commercial spaces and new construction where a streamlined look is preferred.

It’s budget-friendly and easy to install, but it can look stark if the rest of the space has detailed woodwork.

2. Stepped or Colonial Baseboard

One of the most common styles in North American homes, colonial baseboard features a flat middle section with a small stepped cap at the top and a curved or beveled base at the bottom. It has a classic look that suits traditional, transitional, and farmhouse-style interiors without being overly ornate.

This profile pairs well with standard door and window casings, making it easy to maintain a cohesive trim package throughout a home.

3. Ogee or S-Curve Baseboard

The ogee profile uses an S-shaped curve that adds elegance without going into full traditional territory. It’s a popular choice for craftsman-style homes and period renovations, where the trim is meant to feel deliberate and refined. Ogee profiles tend to look best when used consistently with matching casing profiles on doors and windows.

4. Cove Baseboard

Cove profiles feature a concave curve that creates a gentle, softer visual transition from wall to floor. They work particularly well in rooms with rounded architectural details or in spaces aiming for a softer aesthetic — bathrooms and bedrooms especially.

5. Craftsman (Arts & Crafts) Baseboard

Thicker, taller, and more substantial than standard colonial trim, craftsman baseboard is typically 4 to 5 inches tall with a flat face and a simple top cap. It reads as architectural and intentional — less ornate than Victorian styles but with far more presence than flat modern trim.

It suits bungalows, craftsman homes, transitional interiors, and spaces where you want trim that draws the eye without looking fussy.

6. Flexible Baseboard Trim

Not every wall is perfectly straight. In older homes, curved walls, bay windows, and uneven surfaces can make standard rigid trim nearly impossible to install cleanly. Flexible trim solves this — it bends to follow curved surfaces without cracking or gapping.

A good example is the 1X6x10 Straight Flexible Trim Baseboard, which offers the height and visual weight of a wide baseboard while accommodating walls that don’t behave.

How to Match Baseboard Style to Your Interior

Choosing baseboard trim isn’t just about picking a profile you like it needs to work with the room around it.

Consider your ceiling height. Taller ceilings support taller, more detailed trim. In a room with 8-foot ceilings, a 3.5-inch colonial baseboard feels proportional. Push the same room to 5-inch craftsman trim and it can start to look heavy.

Match your door and window casing. The baseboard and casing don’t need to be identical, but they should come from the same design family. A flat, modern baseboard paired with an ornate Victorian casing will look disconnected.

Think about what’s above the baseboard, too. If you’re planning crown molding — like the Crown 4-1/4 x 9/16 FJ Primed — choose a baseboard profile that complements it. A heavily detailed crown with a completely flat baseboard can feel imbalanced.

Factor in floor type. Thick hardwood floors require more clearance at the base of the trim. Thinner vinyl plank or tile can work with a wider range of baseboard heights without creating proportion issues.

What to Look for When Buying Baseboard Trim

Material Options

  • Solid wood — durable, paintable, and stainable, but susceptible to moisture in humid rooms. Best for living areas and bedrooms.
  • MDF (Medium-Density Fiberboard) — smooth, consistent, and takes paint extremely well. Excellent for painted trim in dry areas. Avoid in bathrooms or anywhere moisture is likely.
  • Finger-jointed (FJ) pine — budget-friendly and stable, ideal for painted applications. Uses shorter wood pieces bonded together, which makes it less prone to warping than clear pine.
  • Flexible PVC or foam — ideal for curved walls or moisture-prone environments. Doesn’t warp, rot, or swell.

Primed vs. Unprimed

Primed trim is ready to paint immediately and saves time on site. Unprimed wood is the right choice if you’re staining or applying a natural finish.

Profile Consistency

When buying trim in multiple pieces, make sure the profiles match exactly especially if sourcing from different batches. Even small deviations can be noticeable at joints.

How to Install Baseboard Trim: Key Considerations

You don’t need to be a finish carpenter to install baseboard trim, but the details matter. Here’s what to know going in.

Measure twice, cut once especially at corners. Inside corners are typically coped (one piece is cut to overlap the profile of the other), while outside corners require precise 45-degree miters. A poorly fit miter joint is one of the most common complaints in DIY trim work.

Account for the floor. Always install flooring before baseboard trim. The trim should sit on top of the finished floor surface, not the subfloor, to cover the expansion gap properly.

Nail placement matters. Nails should hit studs for a secure hold. Use a stud finder and mark locations before you start. Two nails per stud location one near the top edge, one near the bottom prevents the board from bowing outward over time.

Leave a small gap at the floor. Floating floors need room to expand. Don’t nail trim directly into floating flooring.

Caulk and fill before painting. Caulk the top edge of the baseboard where it meets the wall, and fill nail holes with wood filler. These steps make the difference between trim that looks professional and trim that looks installed by a homeowner in a hurry.

For guidance on how the trim package interacts with other millwork in a room including door surrounds our article on pantry door ideas covers complementary trim considerations worth reading.

Common Mistakes to Avoid

Going too short. Standard 2.5-inch baseboard can look like an afterthought in most rooms. A minimum of 3.5 inches reads as intentional.

Ignoring the rest of the trim package. Buying baseboard without thinking about door casing, window casing, and crown molding creates visual inconsistency. Plan the full trim package before purchasing.

Buying the wrong material for the room. MDF baseboard in a bathroom is a common and costly mistake. Use moisture-resistant materials anywhere humidity is a factor.

Skipping the primer coat on raw wood. Raw trim absorbs paint unevenly. Always prime before the finish coat, even if the trim claims to be paint-ready.

Not buying enough. Add at least 10–15% to your linear footage estimate to account for waste, cuts, and damaged pieces.

Expert Tips for a Better Result

  • Sand primed trim lightly before painting factory primer can be rough and will show through the finish coat.
  • Use painter’s tape on the floor, not the wall, to protect finished flooring during installation.
  • If you’re matching existing trim in an older home, bring a small sample piece when shopping profiles that sound identical often aren’t.
  • In rooms with high humidity (bathrooms, laundry), consider a continuous bead of construction adhesive along the back of the trim in addition to nails.
  • For wide, tall baseboards, a second piece of trim (a small cap molding) at the top can give extra depth and shadow detail without needing a single oversized piece.

FAQ:

What is the most popular baseboard trim style?

Colonial baseboard is the most widely used profile in North American homes. It has a stepped, slightly detailed shape that works with traditional, transitional, and farmhouse interiors. Craftsman-style baseboard is a close second and is gaining popularity in renovations.

How tall should baseboard trim be?

For standard 8-foot ceilings, 3 to 4 inches is a common range. For 9-foot ceilings and above, 4 to 5.5 inches reads more proportional. Taller trim in a room with low ceilings can make the space feel cramped.

Can I install baseboard trim over carpet?

Yes, but it requires care. The trim should be installed at the right height so it sits just above the carpet pile. Some installers use a carpet scrap as a spacer to get the correct gap.

What’s the difference between baseboard and base molding?

They’re often used interchangeably. “Baseboard” usually refers to the main flat board that runs along the floor. “Base molding” can refer to the full assembly, including a base cap (on top) and base shoe (at the floor), which add more detail to the profile.

Do I need to hire a professional to install baseboard trim?

Not necessarily. Many homeowners with basic carpentry skills and a miter saw can successfully install baseboard trim in straightforward rooms. Tight, complex spaces with lots of angled walls, curved surfaces, or difficult transitions are better handled by a finish carpenter.

What Our Customers Are Saying

We used flexible trim throughout our older home where the walls were far from straight. The difference versus rigid trim we tried before was immediate no gaps, no cracking. Really happy with the result. — Kevin M., homeowner renovation project

I appreciated having someone walk me through the full trim package baseboard, casing, and crown before I ordered. Made a huge difference in how cohesive everything looked once it was installed. — Sandra T., general contractor client

Final Thoughts on Choosing the Right Baseboard Trim

Baseboard trim is one of those finishing details that people rarely notice when it’s done well but always notice when it’s not. The right profile, height, and material can make a room feel complete and intentional. The wrong choice, or a rushed installation, can undermine everything else you’ve invested in a space.

The good news is that with a little planning upfront matching your trim to your interior style, choosing the right material for the room, and taking the time to install it properly baseboard trim is one of the most rewarding upgrades you can make. It’s relatively affordable, visible in every room, and delivers a level of polish that’s hard to achieve any other way.

Whether you’re starting fresh in a new build or updating the trim in a renovation, take the time to get it right. Measure carefully, plan the full trim package before you buy, and don’t cut corners on the finishing steps. The result will speak for itself.

Browse Spire Building Supplies‘ full range of trim profiles and baseboard options to find the right fit for your project.

About the Spire Building Supplies Editorial Team

The content team at Spire Building Supplies draws on years of hands-on experience in residential and commercial construction, trim carpentry, and building materials. Our goal is straightforward: give you accurate, practical information that helps you make better decisions whether you’re a first-time DIYer or a seasoned professional. We know what works in the field, and we write for people who need real answers, not marketing copy.

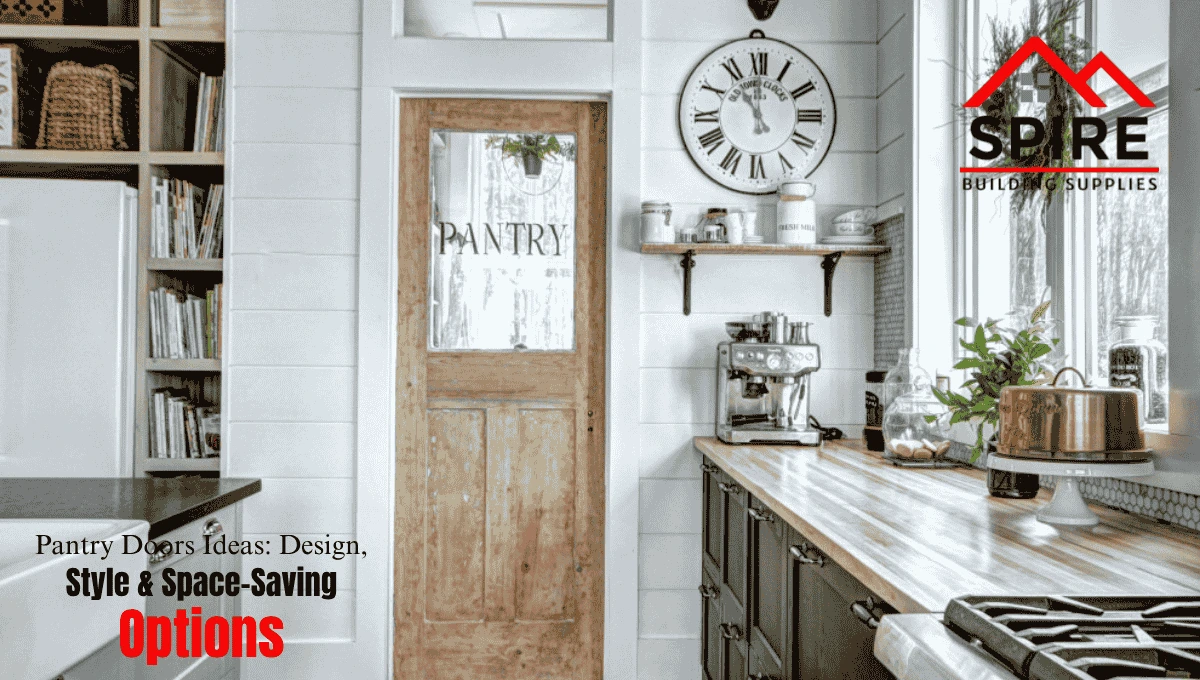
pantry doors ideas

Pantry Doors Ideas: Design, Style & Space-Saving Options

Choosing the right pantry door often gets overlooked during kitchen planning but it can make a surprising difference in both function and style. The best pantry doors ideas don’t just look good; they improve access, save space, and complement your kitchen layout. A poorly chosen door, on the other hand, can block movement, clash with your design, or simply feel inconvenient over time.

This guide breaks down practical, real-world pantry door options, helping homeowners and builders understand what works, what doesn’t, and how to choose the right solution for different kitchen setups.

What You Need to Know About Pantry Doors

A pantry door is more than just an entry point—it affects:

  • Kitchen flow (how easily you move around)
  • Storage accessibility
  • Visual appeal of the space
  • Light and openness

Key Factors That Matter

Before exploring styles, it’s important to understand:

  • Available space (tight kitchens vs open layouts)
  • Pantry size (walk-in vs cabinet-style)
  • Usage frequency (daily vs occasional)
  • Design consistency (matching cabinets, flooring, and overall theme)

Explore options here:
Pantry doors

Popular Pantry Door Designs

Let’s look at pantry door designs that actually work in real homes—not just in catalogs.

1. Sliding Pantry Door (Space-Saving Favorite)

A sliding pantry door is one of the most practical solutions for smaller kitchens.

Why it works:

  • No swing clearance needed
  • Ideal for tight layouts
  • Easy to operate

Where it fits best:

  • Apartments
  • Compact kitchens
  • Modern minimalist homes

Real insight: Sliding doors reduce obstruction but require wall space for the track.

2. Hinged Swing Doors (Traditional Choice)

These are standard kitchen pantry doors with inward or outward opening.

Pros:

  • Simple installation
  • Works with most layouts
  • Cost-effective

Cons:

  • Requires clearance space
  • Can block movement in tight areas

3. Glass Pantry Doors

Glass panels add a decorative element while keeping the space visually open.

Benefits:

  • Makes the kitchen feel larger
  • Adds natural light
  • Stylish for modern interiors

Consideration:

  • Requires organized pantry (everything is visible)

4. Frosted Glass Doors

A practical compromise between style and privacy.

  • Light passes through
  • Hides clutter
  • Works well in contemporary kitchens

5. Barn-Style Pantry Doors

A trending option, especially in farmhouse or rustic kitchens.

  • Mounted on a sliding track
  • Adds character
  • Space-saving like sliding doors

6. Pocket Doors

These doors slide into the wall, completely disappearing when open.

Advantages:

  • Maximum space efficiency
  • Clean, seamless look

Limitation:

  • Requires wall cavity installation (best during construction)

7. Double Pantry Doors

Perfect for larger pantry openings.

  • Easier access
  • Balanced appearance
  • Ideal for walk-in pantries

Benefits of Choosing the Right Pantry Door

  1. Better Space Utilization

The right door can free up valuable kitchen space.

  1. Improved Workflow

Easy access to pantry items saves time during cooking and organizing.

  1. Enhanced Aesthetics

A well-chosen door ties the entire kitchen design together.

  1. Increased Property Appeal

Thoughtful design choices can improve resale value.

Limitations to Consider

No option is perfect. Each pantry door design comes with trade-offs:

  • Sliding doors need wall space
  • Hinged doors need clearance
  • Glass doors require maintenance
  • Pocket doors require structural planning

Understanding these limitations helps avoid costly mistakes.

How to Choose the Right Pantry Door

When comparing different kitchen pantry doors, focus on what actually matters in daily use.

  1. Measure Your Space Carefully
  • Check door swing clearance
  • Consider nearby cabinets and appliances
  1. Match Your Kitchen Style
  • Modern → glass or sliding doors
  • Traditional → paneled hinged doors
  • Rustic → barn-style doors
  1. Consider Door Height Options

Standard heights matter for both function and aesthetics:

Taller doors create a more open, premium look.

  1. Think About Daily Usage
  • Frequent access → easy-open designs
  • Less frequent use → style-focused options
  1. Installation Complexity

Some doors (like pocket or barn doors) require more planning compared to standard hinged doors.

Common Mistakes to Avoid

  1. Ignoring Space Constraints

Choosing a swinging door in a tight kitchen can disrupt movement.

  1. Prioritizing Style Over Function

A stylish door that’s hard to use becomes frustrating quickly.

  1. Overlooking Storage Visibility

Glass doors look great—but only if your pantry stays organized.

  1. Not Planning Installation Early

Some door types need structural preparation.

  1. Choosing the Wrong Size

Incorrect height or width can affect both usability and appearance.

Expert Tips That Make a Difference

Based on real-world projects:

  • Choose sliding or pocket doors for small kitchens
  • Use frosted glass if you want light without clutter visibility
  • Match door finish with cabinets for a cohesive look
  • Test door movement before finalizing (especially in tight spaces)
  • Consider long-term use, not just initial appearance

Real-World Examples

  1. Small Kitchen Upgrade

A homeowner replaced a swinging door with a sliding pantry door—freeing up space and improving movement around the kitchen island.

  1. New Construction Project

A builder installed 8-foot pantry doors in an open kitchen, creating a more spacious and premium feel.

  1. Modern Renovation

Frosted glass doors were used to add light while hiding pantry clutter—balancing function and aesthetics.

  1. Full Kitchen Remodel

A barn-style door added character to a farmhouse kitchen while saving space.

Pantry Doors vs Other Door Installations

If you’re planning multiple door upgrades, it’s helpful to understand installation basics.

Learn more here:
patio door installation

While pantry doors are simpler, proper alignment and fitting still matter for long-term performance.

What Homeowners Say

Switching to a sliding pantry door made our small kitchen feel much bigger.

We chose frosted glass, and it’s the perfect balance between style and practicality.

Upgrading to taller pantry doors changed the whole look of our kitchen.

FAQs

  1. What is the best type of pantry door for small kitchens?

Sliding or pocket doors work best because they don’t require swing space.

  1. Are glass pantry doors practical?

Yes, but they require a well-organized pantry since contents are visible.

  1. What size pantry door should I choose?

Standard sizes are 6’8″ and 8’0″, depending on ceiling height and design preference.

  1. Do pantry doors affect kitchen design?

Absolutely. They play a big role in both aesthetics and functionality.

  1. Can I install a pantry door myself?

Basic hinged doors are DIY-friendly, but sliding or pocket doors may require professional installation.

Final Thoughts

The best pantry doors ideas come down to balancing space, style, and everyday usability. A good choice improves how your kitchen looks and works, while a poor one can create daily inconvenience.

Instead of focusing only on design trends, think about how you actually use your kitchen. The right pantry door should feel natural, easy to use, and visually consistent with your space.

About the Author

Editorial Team – Spire Building Supplies
The team at Spire Building Supplies brings practical, hands-on experience in residential construction and home improvement. Their insights are based on real-world applications, helping homeowners and builders make smart, functional design decisions that stand the test of time.

Fiber Classic Doors

Best Budget-Friendly Fiber Classic Doors Without Compromising Quality

When homeowners start searching for Fiber Classic Doors, one concern shows up almost every time: “Can I get durability, style, and performance without overspending?” The short answer is yes—but only if you know what to look for.

At Spire Building Supplies, we’ve worked with contractors, builders, and homeowners across the USA—especially in Texas—who want long-lasting entry doors that don’t inflate their renovation budget. This guide is built from real-world experience, not just theory, so you can confidently choose a door that balances price and performance.

Why Fiber Classic Doors Are a Smart Budget Choice

Fiber Classic (fiberglass) doors have quietly become one of the most practical investments in home building & renovation supplies. Unlike traditional wood, they don’t warp in heat, crack in cold weather, or demand constant maintenance.

Key Advantages You Actually Notice:

  • Durability in Texas weather (heat, humidity, storms)
  • Low maintenance compared to wood doors
  • Energy efficiency that helps reduce utility bills
  • Real wood-like texture without the cost
  • Long lifespan (15–25+ years with proper care)

For homeowners working within a budget, this combination is hard to beat.

What Makes a Fiber Classic Door “Budget-Friendly” (Without Being Cheap)

Not all affordable doors are equal. A low price can sometimes mean compromised quality—but not always.

Here’s how to tell the difference:

1. Material Core Quality

A good Fiber Classic door uses a high-density polyurethane foam core, which improves insulation and structural strength.

2. Fiberglass Skin Thickness

Thicker fiberglass panels resist dents and scratches better—especially important for busy households.

3. Frame Construction

Look for composite or reinforced frames instead of basic wood frames that may warp over time.

4. Finish & Texture

Premium budget doors still offer realistic wood grain textures—something you’ll notice every day.

Popular Budget-Friendly Fiber Classic Door Styles

Choosing the right style is just as important as choosing the right material. Let’s break down some of the most in-demand options.

1. 2-Square Panel Fiber Door (Simple & Modern)

A 2-square-panel Fiber door is ideal if you want a clean, minimal look without extra cost.

Best for:

  • Contemporary homes
  • Rental properties
  • Interior-to-exterior transitions

Why it works:

  • Fewer design elements = lower cost
  • Easy to paint or customize
  • Timeless appearance

2. Double Door with 6 Flush Glazed (Light + Elegance)

A double door With 6 flush-glazed panels, it brings in natural light while maintaining privacy.

Best for:

  • Main entrances
  • Larger homes in Texas suburbs
  • Homes needing brighter entryways

Benefits:

  • Enhances curb appeal
  • Makes spaces feel larger
  • Adds resale value

3. Rustic Fiberglass Door (Premium Look on a Budget)

A rustic fiberglass door gives you that high-end wooden look without the maintenance headaches.

Best for:

  • Farmhouse-style homes
  • Ranch-style properties in Texas
  • Homes with earthy or natural aesthetics

Why homeowners love it:

  • Authentic wood-grain finish
  • Weather resistance
  • No termite issues

Popular Budget-Friendly Fiber Classic Door Styles

How to Choose the Right Budget Fiber Classic Door

Choosing the right door isn’t just about price—it’s about value over time.

Step-by-Step Decision Guide:

✔ Step 1: Define Your Entry Needs

  • Main entry or secondary door?
  • High traffic or occasional use?

✔ Step 2: Consider Climate (Important for Texas)

Texas weather can be extreme. Choose doors with:

  • UV-resistant finishes
  • Insulated cores
  • Weather-sealed edges

✔ Step 3: Focus on Energy Efficiency

Look for:

  • ENERGY STAR-rated doors
  • Tight sealing systems
  • Insulated glass (if applicable)

✔ Step 4: Pick the Right Style

Match your home’s architecture:

  • Modern → 2 panel styles
  • Traditional → panel + glass
  • Rustic → wood-grain fiberglass

What Homeowners Often Get Wrong

From years of industry experience, here are common mistakes:

Choosing the cheapest option blindly
Leads to early replacement costs

Ignoring insulation quality
Results in higher energy bills

Overlooking installation
Even the best door fails if poorly installed

Not considering sunlight exposure
Can cause fading or expansion issues

Fiber Classic Doors vs Other Materials (Quick Comparison)

Feature Fiber Classic Doors Wood Doors Steel Doors
Price Affordable Expensive Moderate
Maintenance Low High Low
Durability High Medium High
Energy Efficiency Excellent Moderate Good
Weather Resistance Excellent Poor Good

For budget-conscious homeowners in Texas, fiberglass consistently offers the best balance.

Energy Efficiency: Save More Than Just Upfront Cost

One overlooked benefit of Fiber Classic Doors is long-term savings.

How They Help:

  • Reduce heat transfer in summer
  • Keep interiors warm in winter
  • Lower HVAC usage

Over time, this can offset your initial purchase cost.

Why Homeowners Trust Spire Building Supplies

When choosing doors, trust matters just as much as price.

What Sets Spire Apart:

You’re not just buying a door—you’re investing in long-term performance.

Installation Tips to Maximize Value

Even the best Fiber Classic Doors won’t perform well if installed incorrectly.

Pro Tips:

  • Always ensure proper sealing
  • Use professional installers for exterior doors
  • Check frame alignment
  • Install weather stripping properly

Maintenance Guide (Keep It Looking New)

Good news: maintenance is minimal.

Simple Routine:

  • Clean with mild soap every few months
  • Inspect seals annually
  • Repaint or refinish every few years (if needed)

Customer Testimonials

Real Feedback from Spire Building Supplies Customers

James R. (Houston, TX)
I wanted something affordable but strong for my front entry. The Fiber Classic door I got has held up perfectly through heat and storms.

Maria L. (Dallas, TX)
The double door with glass panels completely changed how my entry looks. It feels brighter and more premium.

Daniel K. (Austin, TX)
I was considering wood, but the maintenance scared me. Fiberglass gave me the same look without the stress.

People Also Ask (PAA)

Are Fiber Classic Doors better than wood doors?
Yes. Fiber Classic doors resist warping, require less maintenance, and last longer—especially in extreme climates like Texas.

How long do Fiberglass Classic Doors last?
With proper installation and care, they can last 20–25 years or more.

Are budget fiberglass doors durable?
Yes, if they use high-quality cores and fiberglass skins. Budget doesn’t mean low quality—it depends on construction.

Can Fiber Classic Doors be painted or stained?
Absolutely. Many models are designed to mimic wood and can be stained or painted easily.

Do Fiber Classic Doors increase home value?
Yes. They improve curb appeal, energy efficiency, and buyer perception.

Final Thoughts: Affordable Without Compromise

Choosing Fiber Classic Doors doesn’t mean sacrificing quality. In fact, for many homeowners in Texas, it’s the smartest way to balance cost, durability, and style.

Whether you go with a 2-square-panel Fiber door, a double door With 6 flush glazed or rustic fiberglass door, the key is focusing on construction quality and long-term value—not just the price tag.

If you make the right choice now, you won’t have to think about replacing your door for decades.

Author Bio

Written By Building Materials Expert
With hands-on experience in the USA construction market, especially Texas, the author specializes in creating practical, experience-driven content for homeowners and contractors. Their work focuses on real-world performance, material durability, and helping readers make confident buying decisions in the home building & renovation supplies industry.

What Is a Hollow Core Door

What Is a Hollow Core Door? Complete Buyer’s Guide (2026)

When homeowners ask what is a hollow core door, they’re usually trying to balance cost, durability, and style for interior spaces. A hollow core door is a lightweight interior door made with a thin outer shell (usually MDF or plywood) and a honeycomb or grid-like interior structure. It looks like a solid door from the outside but is engineered to be more affordable and easier to install.

At Spire Building Supplies, we’ve helped thousands of homeowners, contractors, and renovators across the USA—especially in Texas—choose the right interior doors for their projects. Based on real-world installations and customer feedback, hollow core doors remain one of the most practical solutions in modern home building & renovation supplies.

What Is a Hollow Core Door?

This door is not completely hollow core. Instead, it contains:

  • A lightweight honeycomb core (cardboard or composite)
  • A solid frame perimeter for structure
  • A smooth or molded outer surface

This design makes the door

  • Easier to carry and install
  • More budget-friendly than solid wood doors
  • Suitable for interior use (bedrooms, closets, offices)

Why Hollow Core Doors Are So Popular in 2026

Homeowners today want affordability + clean design + easy installation. Hollow core doors check all three boxes.

Key Benefits

1. Cost-Effective Solution
Compared to solid wood doors, hollow core options cost significantly less, making them ideal for large projects.

2. Lightweight & Easy Installation
Contractors in Texas often prefer them because they reduce labor time.

3. Modern Design Options
From classic panels to contemporary styles, options like:

  1. Molded Panel 1’6″ x 6’8″ 2-Panel Square
  2. Molded Panel 1’6″ x 6’8″ Riverside
  3. Molded Panel 1’6″ x 8’0″ Riverside

offer clean, versatile aesthetics for any interior.

4. Smooth Paint-Ready Surface
Perfect for homeowners who want to match interior themes.

Types of Hollow Core Doors You Should Know

Choosing the right type depends on your home style and room usage.

1. Molded Panel Doors

These are the most common and come in various designs like 2-panel, 3-panel, or 6-panel.

✔ Best for: Bedrooms, living areas
✔ Style: Traditional + modern blend

2. Flush Hollow Core Doors

Flat, smooth surfaces with a minimalist look.

✔ Best for: Modern interiors
✔ Style: Clean, simple

3. Textured or Woodgrain Finish Doors

Designed to mimic real wood without the high cost.

✔ Best for: Rustic or classic interiors

Hollow Core vs Solid Core Doors: Key Differences

Feature Hollow Core Door Solid Core Door
Weight Lightweight Heavy
Cost Budget-friendly More expensive
Sound Insulation Low Better
Durability Moderate High
Best Use Interior spaces Bedrooms, offices
  • If your priority is affordability and ease, hollow core doors are the better choice.
  • If you need soundproofing, consider solid core instead.

Hollow Core vs Solid Core Doors

Are Hollow Core Doors Durable?

Yes—but with realistic expectations.

From our experience at Spire Building Supplies:

  • They handle daily use well in low-traffic areas
  • They are not ideal for heavy impact zones
  • With proper care, they can last 10–15 years or more

Pro Tip: Use them for closets, bedrooms, and pantries, not main entryways.

Where Should You Use Hollow Core Doors?

Ideal Locations

  • Bedrooms
  • Closets
  • Home offices
  • Laundry rooms

Avoid Using Them In

  • Main entrances
  • High-moisture areas (unless sealed properly)
  • High-impact zones

How to Choose the Right Hollow Core Door

Choosing the perfect door isn’t just about price—it’s about fit, function, and finish.

1. Pick the Right Size

Standard sizes include:

  • 1’6″ x 6’8″
  • 1’6″ x 8’0″

Make sure to measure your opening accurately.

2. Select the Design Style

  • Minimalist → Flush doors
  • Traditional → Panel designs
  • Modern → Riverside-style doors

3. Consider Finish Options

  • Primed (ready to paint)
  • Pre-finished
  • Woodgrain texture

4. Check Frame Compatibility

Ensure your door fits standard frames or plan adjustments.

Cost of Hollow Core Doors in Texas (2026)

Pricing varies based on size, design, and finish.

Average Price Range:

  • Basic models: $50–$100
  • Mid-range designs: $100–$200
  • Premium molded styles: $200+

Bulk purchases from Spire Building Supplies often reduce overall costs for contractors.

Installation Tips (From Real Projects)

Based on field experience:

  • Always check door alignment before fixing hinges
  • Use quality hinges to prevent sagging
  • Seal edges if installing in slightly humid areas
  • Avoid excessive trimming—it weakens structure

Common Mistakes to Avoid

  • Using hollow core doors for exterior use
  • Ignoring size measurements
  • Skipping proper hardware
  • Over-trimming the door

Do Hollow Core Doors Increase Home Value?

Indirectly, yes.

While they don’t add premium value like solid wood doors, they:

  • Improve interior aesthetics
  • Keep renovation costs low
  • Help maintain budget-friendly upgrades

For rental properties and budget remodels, they’re a smart investment.

Why Choose Spire Building Supplies?

At Spire Building Supplies, we focus on:

  • Reliable quality materials
  • Consistent sizing and finishes
  • Trusted by contractors across Texas
  • Wide range of interior door designs

Our experience in home building & renovation supplies ensures you get products that perform well in real-world conditions—not just in theory.

Real Customer Testimonials

James R. – Dallas, Texas
I used hollow core doors from Spire Building Supplies for a full home renovation. Installation was quick, and the finish looks clean and modern.

Angela M. – Houston, Texas
The Riverside design gave my interiors a fresh look without overspending. Great value for the price.

Carlos T. – Austin, Texas
As a contractor, I prefer these doors for budget projects. Lightweight, easy to handle, and consistent quality.

People Also Ask (PAA)

What is the difference between hollow-core and solid-core doors?
The main difference is that hollow core doors are lightweight and budget-friendly, while solid core doors are heavier, more durable, and provide better sound insulation.

Are hollow-core doors good for bedrooms?
Yes, they work well for bedrooms where sound insulation is not a top priority.

How long do hollow-core doors last?
Hollow core doors typically last 10–15 years with normal interior use and proper care.

Are hollow core doors cheaper than solid doors?
Yes, they are significantly more affordable, making them ideal for budget projects.

Do hollow core doors block sound?
They provide minimal sound insulation compared to solid-core doors.

Final Thoughts

So, what is a hollow-core door? It’s a smart, cost-effective interior solution that balances style, practicality, and affordability. While it may not match the strength of solid doors, it excels in everyday residential use where budget and efficiency matter most.

If you’re planning a renovation in Texas or anywhere in the USA, hollow core doors remain one of the most practical choices for modern interiors.

See our best collection of double sliding windows; visit this page. How Double Sliding Windows Improve Ventilation & Natural Light

Author Bio

Spire Building Supplies Team
The Spire Building Supplies team brings hands-on experience in construction materials, interior doors, and renovation solutions across the USA. With a strong focus on quality and customer trust, the team shares practical insights to help homeowners and contractors make informed decisions.

patio door installation

The Complete Patio Door Installation Guide: What You Need to Know

A new patio door can transform how a room feels more light, better flow, and a direct connection to your outdoor space. But patio door installation is one of those projects where the details matter more than most homeowners realize. Get the rough opening wrong, skip the flashing, or choose the wrong door type for your climate, and you’re looking at drafts, water damage, or a door that won’t seal properly for years.

This guide covers the full picture: door types, how installation actually works, what to look for before buying, the mistakes that cause the most problems, and the practical details that most guides skip over. Whether you’re doing it yourself or managing a contractor, this is what you actually need to know.

Understanding Your Patio Door Options

Before installation begins, you need to know what type of door you’re working with. The configuration affects the rough opening size, the installation process, the hardware, and ultimately how the door performs over time.

Sliding Patio Doors

The most common choice for residential use. Sliding patio doors operate on a track system one panel is fixed, the other slides. They’re space-efficient (no swing clearance needed), handle large glass panels well, and are generally easier to install than hinged alternatives. The main maintenance consideration is keeping the track clean and the rollers in good condition.

A popular option is the Full Lite Gliding Patio Door a clean, full-glass sliding design that maximizes natural light and suits both contemporary and transitional home styles. It’s a strong choice where the view and light transfer matter most.

Hinged (French) Patio Doors

French doors use one or two hinged panels that swing open. They create a wider clear opening when both panels are open, which is useful for moving furniture or for a more dramatic entry feel. They require swing clearance on one or both sides, which affects furniture placement near the door.

Vinyl vs. Wood vs. Fibreglass

The frame material affects energy performance, maintenance requirements, and cost. Here’s a practical breakdown:

  • Vinyl: Low maintenance, good thermal performance, cost-effective. The most common choice for Canadian climates. Doesn’t require painting or staining.
  • Wood: Best aesthetic warmth and natural feel. Requires periodic sealing or painting. More susceptible to moisture damage if not maintained.
  • Fibreglass: Highest performance for energy efficiency and durability. More expensive but holds up exceptionally well in extreme temperature swings.

For a well-priced vinyl option that performs reliably in most residential applications, the Inspire Series Vinyl Patio Door 6068 is worth considering. The 6068 sizing (6 feet wide, 6’8″ tall) suits standard rough openings and delivers solid thermal performance without the premium price of fibreglass.

Before Installation: What to Check First

Most installation problems start before the first screw goes in. These are the things worth getting right upfront.

Measure the Rough Opening Accurately

The rough opening is the framed hole in the wall where the door unit sits. For patio doors, rough opening width is typically the door width plus 1″ (for shimming and adjustment), and height is door height plus 0.5″ to 1″.

Check the Subfloor and Sill Condition

If you’re replacing an existing patio door, inspect the sill and surrounding subfloor before ordering your replacement. Water infiltration from a poorly sealed old door is common and often causes rot that isn’t visible until the old unit is removed. Replacing rotted framing adds time and cost — better to know before the new door arrives.

Understand Your Wall Construction

Standard 2×4 framing with exterior sheathing and interior drywall gives a wall thickness of approximately 4.5″ to 5″. Patio door frames (jamb depth) are sized accordingly. If your walls are thicker — common in older homes or in cases where extra insulation was added — you’ll need extension jambs or a custom-depth unit.

Confirm the Swing and Panel Configuration

For sliding doors: confirm which panel is the active (sliding) one, and whether it operates from the left or right. For hinged doors: determine inswing vs. outswing and left-hand vs. right-hand hinge. Getting this wrong at the order stage is one of the most common and frustrating mistakes in door replacement projects.

How Patio Door Installation Works: Step by Step

This section covers the standard process for a sliding patio door replacement in a wood-framed exterior wall. New construction or different door types will have variations, but the core sequence is the same.

  1. Remove the existing door unit. Take out the old door, frame, and any trim. Inspect the rough opening for rot, damage, or moisture intrusion before proceeding.
  2. Prepare the rough opening. Check for square, level, and plumb. Correct any issues in the framing. Install a sill pan or sloped sill to direct any water that gets past the door away from the structure.
  3. Apply flashing tape. Flash the sill first, then the sides, overlapping properly so water runs down and out, never into the wall cavity. This is the single most important waterproofing step.
  4. Set the door unit. With help, lift the door into the rough opening. Set it on the sill, check for level, and adjust with shims as needed. Do not fasten permanently until the unit is square and plumb.
  5. Fasten through the frame. Secure the unit through the pre-drilled holes in the jamb, working from the hinge side first (for hinged doors) or the fixed panel side (for sliders). Check operation after each fastener.
  6. Insulate the gaps. Fill the space between the door frame and rough opening with low-expansion foam or fibreglass batt insulation. Avoid high-expansion foam — it can bow the frame and affect operation.
  7. Flash the exterior and install trim. Apply head flashing above the door, integrate with the house wrap, and install exterior casing. Caulk all exterior joints with a quality exterior-grade sealant.
  8. Install interior trim and hardware. Set interior casing, install the lock hardware, adjust the rollers or hinges for smooth operation, and do a final check of the seal and weatherstripping.

How Patio Door Installation Works: Step by Step

Common Patio Door Installation Mistakes to Avoid

  • Skipping the sill pan. A flat sill with no slope or drainage is a water infiltration problem waiting to happen. Even a small amount of water sitting against the door frame will eventually cause damage.
  • Using high-expansion foam around the frame. It’s tempting to fill fast. But high-expansion foam exerts pressure that can bow the jamb inward, causing the door to stick or not seal properly. Use low-expansion or batt insulation instead.
  • Not checking for plumb and square before fastening. Once you’ve driven screws, it’s much harder to correct alignment. Check level and plumb at every stage before shimming, after shimming, and after fastening.
  • Ignoring the head flashing. Side and sill flashing get attention, but the head (top) flashing is equally critical. Water running down the wall above the door needs to be directed outward over the door frame, not behind it.
  • Ordering the wrong hand or swing configuration. This is a very common and very avoidable mistake. Confirm the operating panel location and swing direction with your supplier before ordering, not after the unit arrives on site.
  • Forgetting to account for flooring height. If new flooring hasn’t been installed yet, the finished floor height will affect the door’s bottom clearance and operation. Factor this in before setting the door.

Expert Tips for a Better Installation

Have two people on site for the lift. Patio door units — especially full-lite glass panels — are heavy and awkward. A two-person installation is not optional; it’s how you avoid dropped glass, misaligned frames, and injuries.

Test operation before trimming. Install the door, check the slide or swing, confirm the lock aligns and engages cleanly, then install the trim. It’s much easier to adjust before casing is nailed.

Tape the rough opening sill before the door goes in. Self-adhesive flashing tape on the sill is fast and creates a proper waterproof bed for the door frame to sit on. Don’t skip it.

Caulk exterior joints — but not the weep holes. Weep holes at the bottom of sliding door frames are there to let water out. Accidentally sealing them is a common mistake that traps water inside the frame.

Check the weatherstripping after installation. Compress it slightly when the door closes. If there’s a gap anywhere, adjust the rollers or striker plate before calling the job done.

Register the warranty. Most quality door manufacturers require registration within a set window after purchase. Do it the day of installation while the details are fresh.

Expert Tips for a Better Installation

Real-World Scenarios: Where Installation Details Make the Difference

Replacing an Old Slider in a 1980s Home

Older homes often have non-standard rough openings — slightly out of square, with different wall thicknesses than modern builds. In these cases, plan for extra shimming time and inspect the sill and surrounding framing carefully before ordering. Many replacement projects in older homes reveal minor rot or moisture damage that needs to be addressed before the new door goes in.

New Construction with a Vinyl Slider

In new construction, the rough opening is set during framing. Confirm the door dimensions and rough opening requirements with your supplier before the framers finish — it’s far easier to adjust framing at that stage than after drywall. For standard new builds, a vinyl sliding door in a 6068 or 9068 configuration handles most residential openings well.

Upgrading to a Larger Opening

If you’re expanding an existing opening to accommodate a wider door, you’re into structural work — the header above the opening needs to be engineered for the new span. This is not a DIY situation. A structural engineer or experienced contractor needs to specify the header before any framing is cut.

If you’re still deciding on door style alongside this project, the guide to shaker style interior doors covers how to match interior and exterior door choices for a consistent aesthetic throughout the home.

What Our Customers Say

We replaced a 30-year-old sliding door ourselves using this guide as a reference. The flashing steps were the most useful our old door had significant rot at the sill that we would have buried again without knowing what to look for.

— Kevin M., Homeowner, Kelowna

We’ve installed Spire’s vinyl patio doors on four townhouse projects now. Consistent quality, good weatherstripping from the factory, and the sizing works with standard rough openings without modification.

— Sandra L., Residential Builder, Surrey

The Inspire Series door was a great fit for our budget and the installation was straightforward. The instructions were clear and the rollers adjusted easily to get a tight seal.

— Tom R., Homeowner, Calgary

Frequently Asked Questions

Can I install a patio door myself?

Yes, if you have intermediate carpentry skills and the right tools. A standard sliding door replacement in an existing opening is manageable for a capable DIYer. New construction installs and projects involving structural changes to the opening are better left to professionals.

How long does patio door installation take?

A straightforward replacement of an existing sliding door typically takes 4–8 hours for an experienced installer, or a full day for a DIYer doing it carefully for the first time. Projects with framing repairs, rot remediation, or structural changes take longer.

What size rough opening do I need for a patio door?

For most sliding patio doors, the rough opening should be the door width plus 1″ and the door height plus 0.5″ to 1″. Always confirm the required rough opening with your specific door’s installation instructions, as it can vary by manufacturer and frame design.

What is the best material for a patio door in a cold climate?

Vinyl and fibreglass both perform well in cold climates. Vinyl is the more common and cost-effective choice and handles temperature swings without significant expansion or contraction. Fibreglass offers the best overall energy performance but at a higher cost. Wood requires more maintenance in cold, wet climates.

How do I know if my patio door is properly sealed?

Close the door and check the weatherstripping contact around the entire perimeter it should compress slightly and leave no gaps. On a windy day, hold a candle or lighter near the edges; flickering indicates air infiltration. Proper roller adjustment and aligned lock hardware are also key to maintaining a good seal over time.

Final Thoughts

Patio door installation done right is a project that pays off for years in comfort, energy performance, and the daily experience of your space. Done wrong, it’s a source of ongoing problems that are expensive to fix after the fact.

The fundamentals aren’t complicated: measure accurately, flash properly, don’t rush the levelling, and use the right materials at every step. Most installation failures come down to shortcuts in those basics.

Whether you’re sourcing a single replacement door or specifying for a full build, the patio doors range at Spire Building Supplies covers standard residential sizes and configurations with the product knowledge to help you get the right unit for your specific opening.

About the Spire Building Supplies Editorial Team

The Spire Building Supplies content team draws on hands-on experience with residential and commercial building products. Our guides are written by people who understand how materials perform in the field not just on paper. We focus on giving homeowners and builders the practical information they need to make good decisions, avoid costly mistakes, and get results that hold up over time. No filler, no sales pitch just useful, honest guidance from people who know the product.

Back to Top

Search For Products

Product has been added to your cart